


Learn To Make A Acrylic
Photo Box / Light Box
with IGMA Artist
Stephanie Brown
Materials Needed:
- Eye Protection Glasses
- Four 75 Watt Bulbs
- Clamp Lights
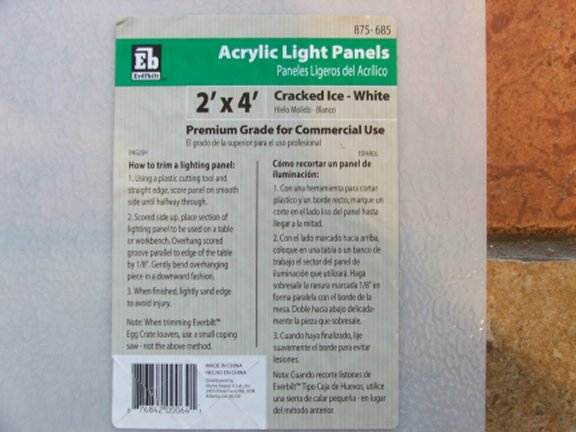
- Recommend the small size - One Cracked Ice "white" Acrylic Light Panel - 2'x4' sheet
- Styrene by Plaskolite is the brand I use. Do not use the clear panels. - Glue - Any type of strong clear glue
- Utility Knife
- A strong board or several cardboard sheets for scoring
- Tape
- Scotch brand storage tape recommended (Not shipping tape) - Framing Square Ruler
- Supply of Newspaper
- Pencil
 Close-up images of materials needed
Enlarge picture of basic supply requirements
 Close-up images of materials needed
Enlarge picture of additional supply requirements
PATTERN
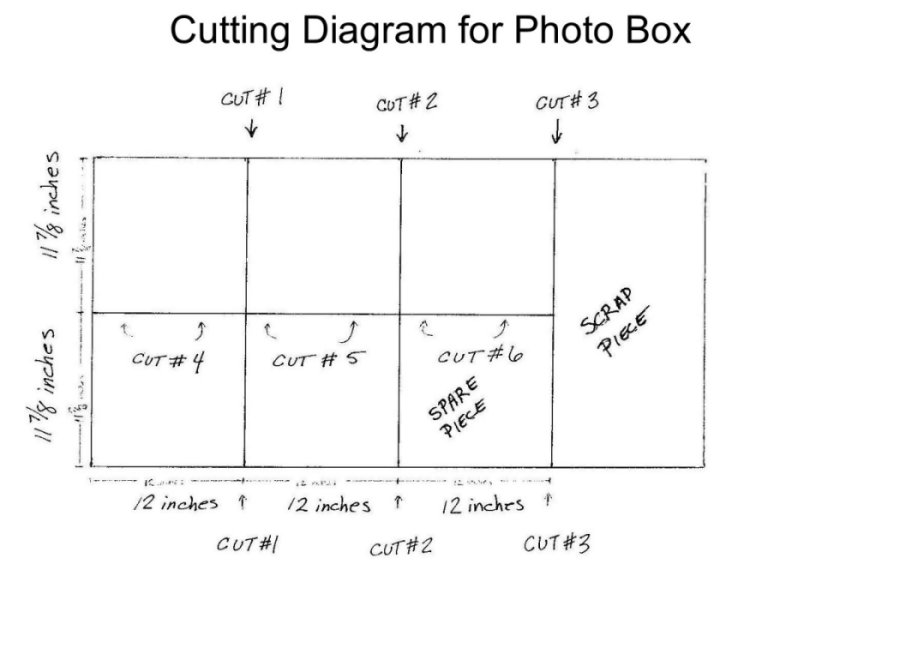
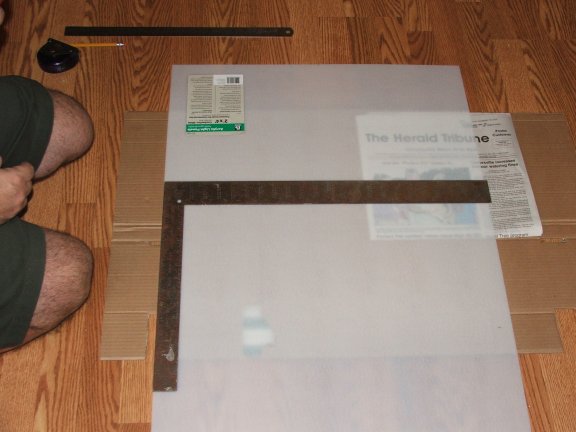
Please look at the diagram for how to measure and mark the panel for cutting.
 Close-up images of pattern
Enlarge picture of pattern
Please look at the diagram for how to measure and mark the panel for cutting.
Close-up images of patternEnlarge picture of pattern
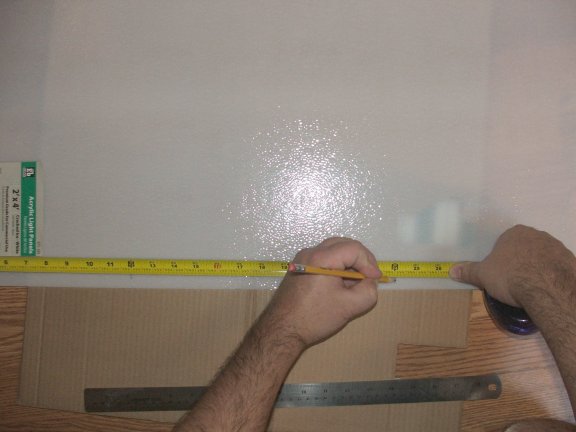
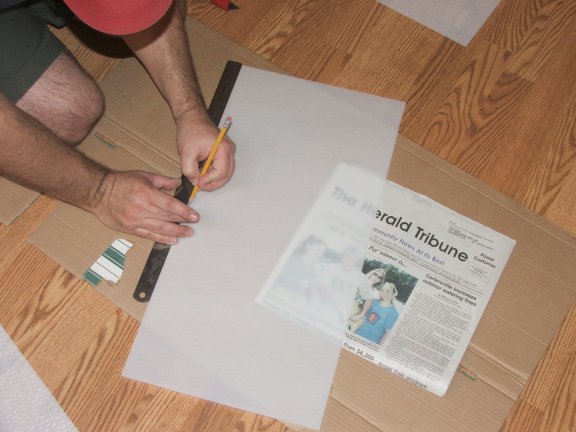
 1. Before you begin, measure out the sheet at 12 inches, 24 inches and 36 inches. When measuring make sure you always start from the same edge.
Enlarge picture showing how to measure acrylic panel
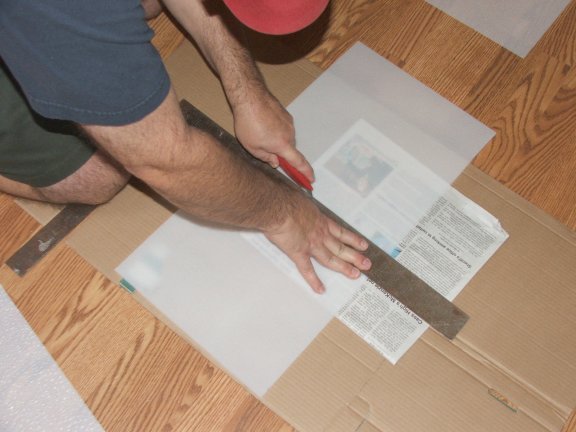
 2. Now you will need to get ready to score the first line. Only score on the smooth side of the panel. Use even pressure, you are not trying to cut through with the first score. You will have to make 4 scores. Repeat scoring depends on how much pressure you apply.
Enlarge picture showing where to score the first line
IMPORTANT
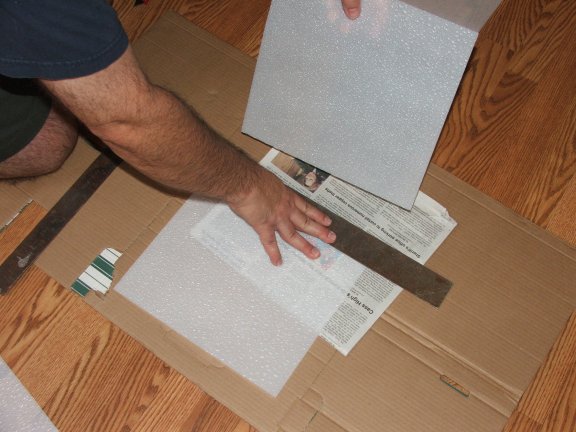
You must place thick layers of cardboard and newspaper under your panel, so not to cut your floor. Even with protection, be careful while you are cutting, you do not want to cut all the way through. Make sure to keep fingers and hands back, be careful while cutting.
You must place thick layers of cardboard and newspaper under your panel, so not to cut your floor. Even with protection, be careful while you are cutting, you do not want to cut all the way through. Make sure to keep fingers and hands back, be careful while cutting.
 3. Making the first cut. You will make 4 passes (depending on how much pressure you apply) and on the fourth cut you will hear that the sheet sounds �crunchy� and it will be harder to score on this pass.
Enlarge picture showing first cut
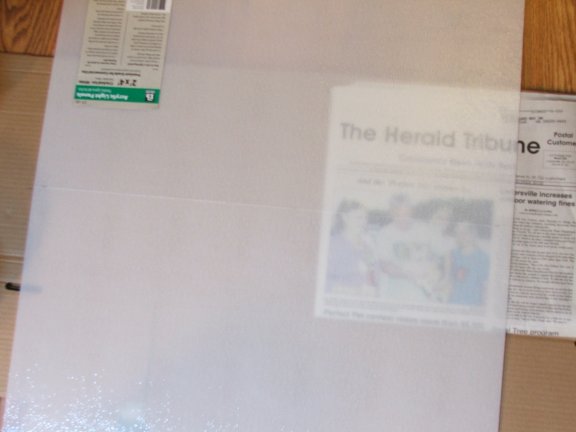
 4. You can see in the picture the score line. This score did not cut all the way through.
Enlarge picture to showing first score line
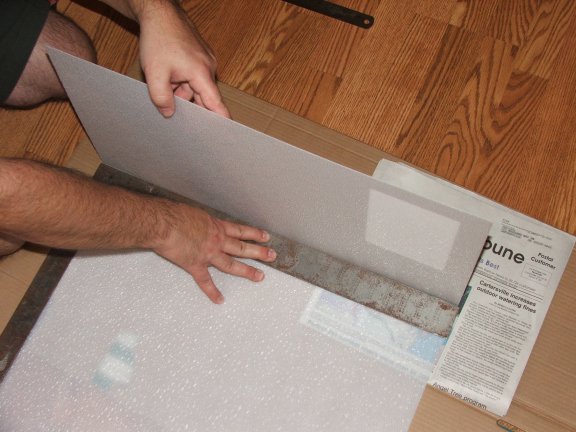
 5. You will need a straight edge ruler to hold the score line as you prepare to bend the score line. This is where the framing square came in handy but any metal ruler that is large should work. If you don�t have anything like that you can use any strong item that is straight. Just make sure it is wide enough to keep your fingers out of the way. To bend you must turn the panel over and bend with rough side up. This should not take much pressure. If it is hard to bend, turn back over to the smooth side and score again.
Enlarge picture showing how to bend along the score line
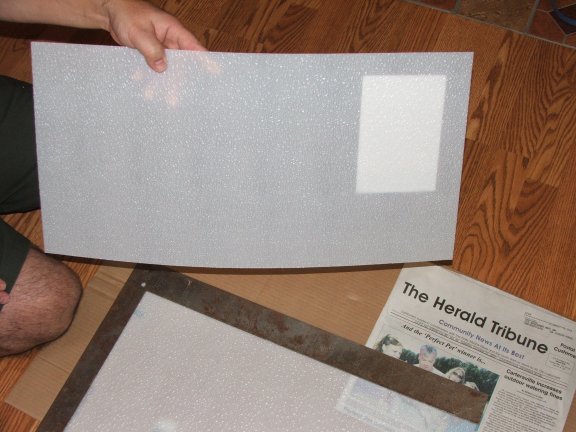
 6. This image will show you the panel bent all the way.
Enlarge picture showing bent panel
 7. Shows the panel now cut.
Enlarge picture showing first cut on panel
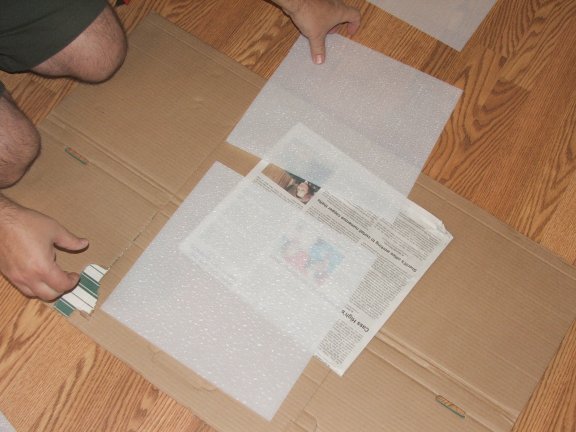
 8. To prepare for the next cut, make sure to turn the panel over to the smooth side. Repeat this process till you have all the sheets in the next set of pictures.
Enlarge picture showing second cut on panel
TIP
The acrylic sheet will break perfectly as long as you got the crunch all the way down your cut. Also, remember to turn the panel over to the rough side to break the section off
The acrylic sheet will break perfectly as long as you got the crunch all the way down your cut. Also, remember to turn the panel over to the rough side to break the section off
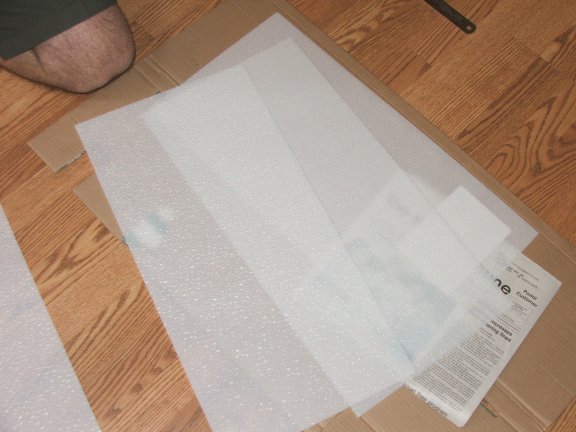
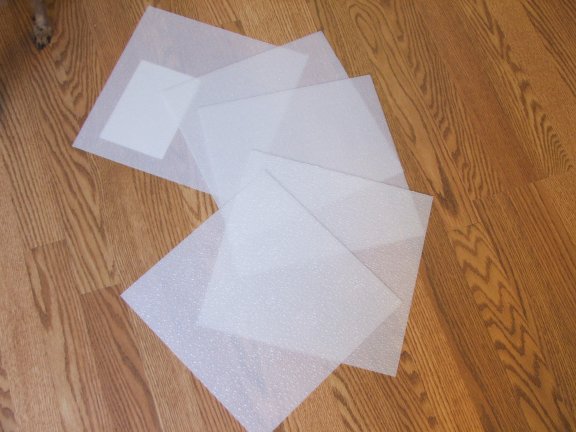
 9. Now you should have 3 (three) panels that are the correct size for the next steps.
Enlarge picture showing three acrylic panels of same size
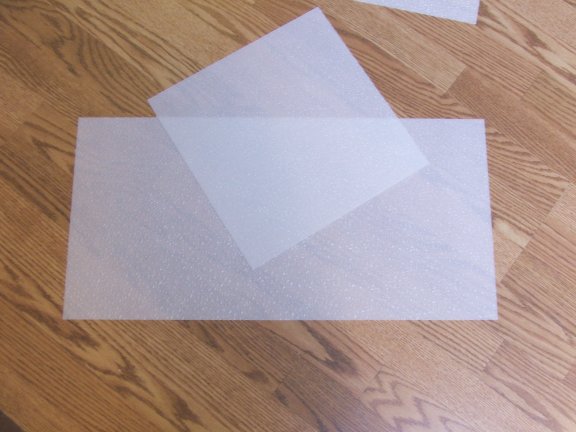
 10. You will notice that you have one panel left. Make sure to remove this one from your pile as this sheet is going to be the wrong size and should not be used. The 2 x4 sheet was not actually 2 X 4 and that is why this last sheet should not be used.
Enlarge picture showing one remaining panel
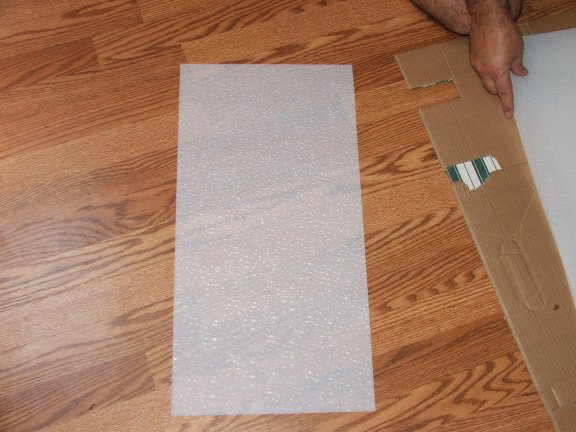
 11. Now it's time to measure the three smaller panels for cutting. Look at diagram for how to measure and mark for scoring.
Enlarge picture to showing where to begin measuring
 12. Measuring each panel in half. Look at the diagram again if you want to make sure of the measurement. 11 7/8 inches is half.
Enlarge picture showing measurements
 13. Scoring begins. Only score on the smooth side of the panel. Again, score 4 times, depending on the pressure you apply and on the forth time the panel will start to sound �crunchy� on that fourth cut. It will also be harder to make a pass on the fourth cut.
Enlarge picture showing where to begin scoring
TIP
You will need a straight edge to hold the score line as you prepare to and bend the score line. This is where the framing square came in handy but any metal ruler that is big should work. If you don�t have anything like that you can use any strong item that is straight. Just make sure it is wide enough to keep you fingers out of the way. I�m going to put this in all caps because it is important.
You will need a straight edge to hold the score line as you prepare to and bend the score line. This is where the framing square came in handy but any metal ruler that is big should work. If you don�t have anything like that you can use any strong item that is straight. Just make sure it is wide enough to keep you fingers out of the way. I�m going to put this in all caps because it is important.
 14. To bend you must turn the panel over and bend with rough side up. This should not take much pressure. If it is hard to bend, turn back over to the smooth side and score again. Shows the panel breaking in half.
Enlarge picture showing how to prepare to bend the panel
 15. Panel broken in half.
Enlarge picture showing panel in half
 16. Again, you will have extra pieces left over after these cuts. You will not need them for the light box, so it's a good idea to keep these in case you break your box and need to replace a section.
Enlarge picture to showing the extra panel pieces after cutting
 17. Shows your completed panels.
Enlarge picture showing completed panels
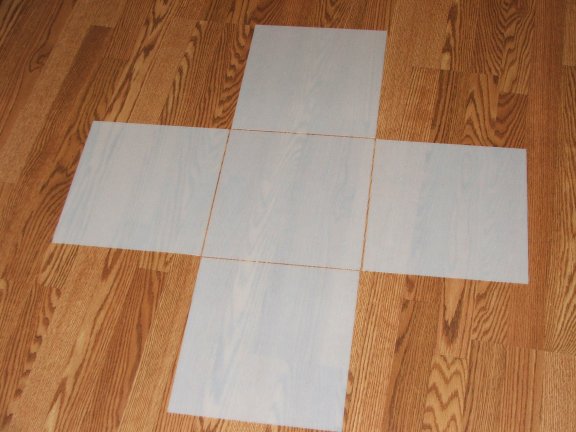
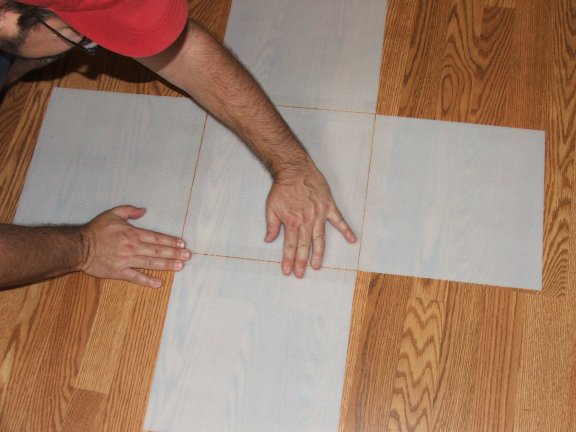
 18. Layout your panels as shown in the image. Make sure at this point, that you have the smooth side of the panels facing up (these will be the inside of your box) also take a few moments to look at the inside edges of your squares, where all the points touch the center square and make sure you line them up perfectly. They should all touch each other without some being larger on the corners than others. All the points should touch.
Enlarge picture showing how to lay out panels
TIP
Due to the fact that most people wanted their boxes to come apart we taped this one together. If you don�t want your box to come apart, you will need another person to help you to hold the panels together while you glue your panels. Make sure your glue is clear, strong and bonds fast. This box is not the strongest thing in the world so if you have a brainstorm and find a way that works better for you, definitely do it. Leave no gaps between your squares.
Due to the fact that most people wanted their boxes to come apart we taped this one together. If you don�t want your box to come apart, you will need another person to help you to hold the panels together while you glue your panels. Make sure your glue is clear, strong and bonds fast. This box is not the strongest thing in the world so if you have a brainstorm and find a way that works better for you, definitely do it. Leave no gaps between your squares.
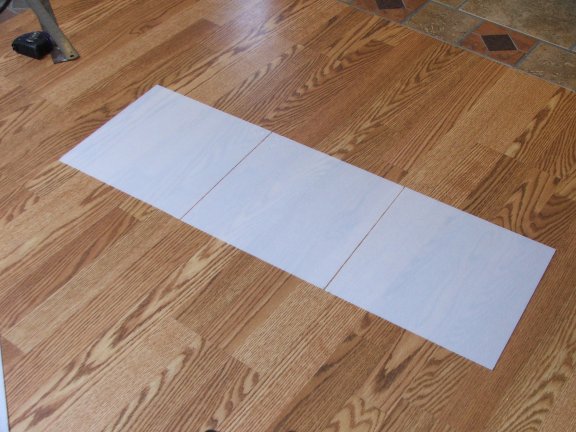
 19. This step shows how you will need to begin taping. Use three (3) panels first and tape the smooth side only. Tape will not stick to the rough side of the panels. Repeat this process till your first three (3) panels are taped. After they are taped, line up the next two, making sure of your edges and that you have the smooth side up. Tape them in place just like you did with the others. After you have taped your three (3) panels go ahead and tape the last two (2) to make your cross.
Enlarge picture showing how to begin taping
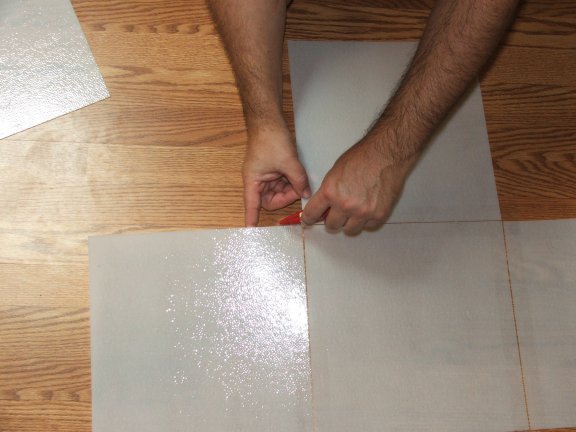
 20. You will have excess tape trim on the corners of the panels after you've applied the tape and will need to remove the excess.
Enlarge picture showing where the excess tape will need to be trimmed
TIP
Please note the gaps in the pictures are only for this demonstration and your box should not have any gaps.
Please note the gaps in the pictures are only for this demonstration and your box should not have any gaps.
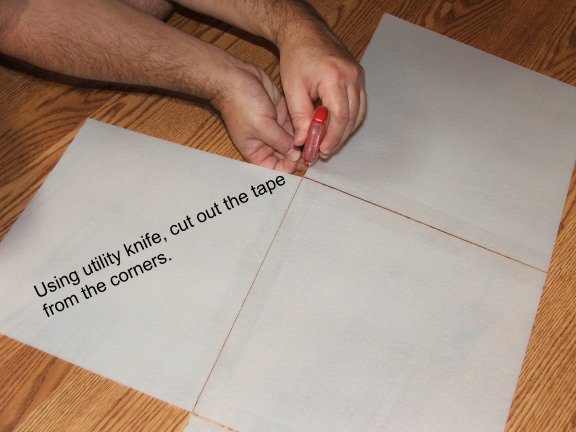
 21. Use your utility knife to trim the extra tape out of the corners, to allow the panel to fold up.
Enlarge picture showing where to use the utility knife to cut off tape excess
 22. Press down your tape to make sure you have good contact.
Enlarge picture showing where to secure your tape
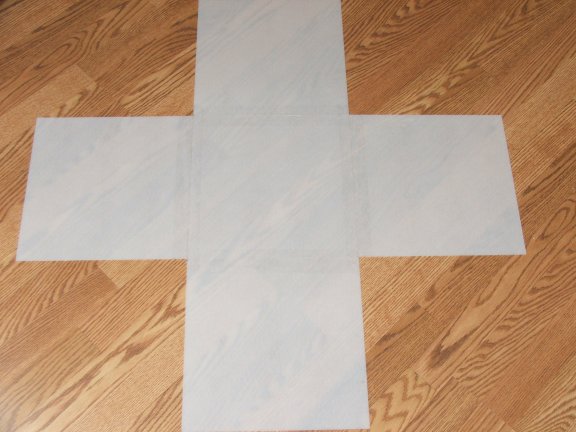
 23. Now you should have a finished cross with no gaps between squares.
Enlarge picture showing panels in shape of cross fully taped
TIP
At this stage, your panels should only be taped on the inside of the box.
At this stage, your panels should only be taped on the inside of the box.
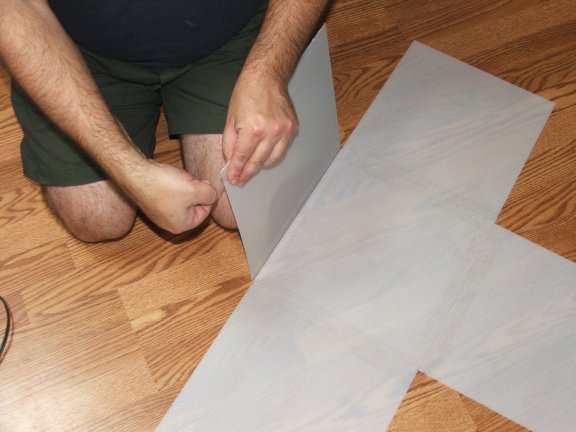
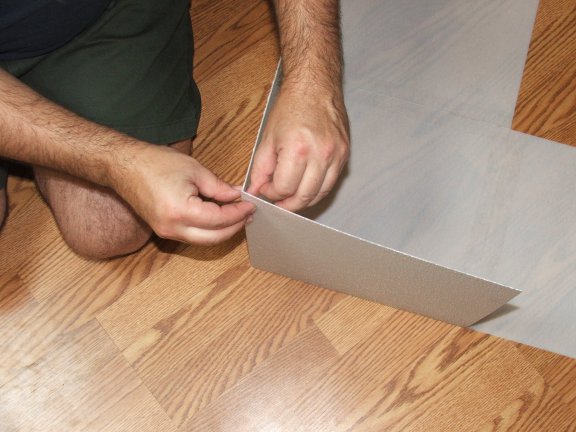
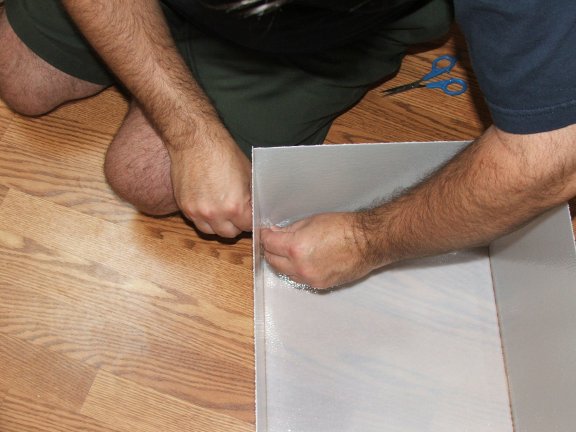
 24. Now your box is almost done. Start by taking one square and fold up, as shown in the picture. Apply a small strip of tape to the corner edge.
Enlarge picture showing how to fold the panels
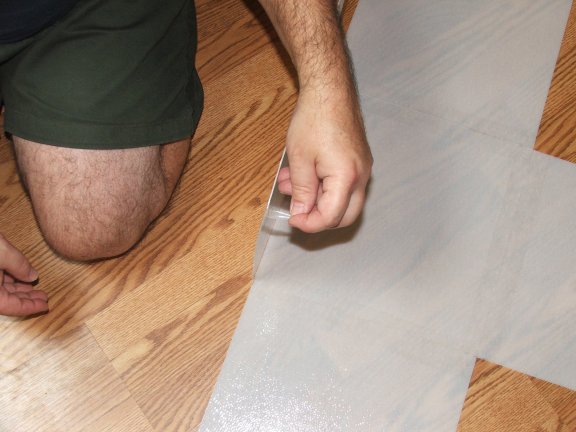
 25. Where to apply the tape on the corner of the first panel.
Enlarge picture showing tape on the corner
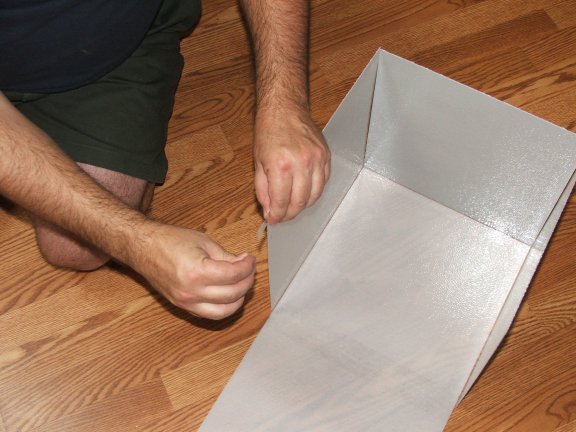
 26. After folding up the second square, join the corners.
Enlarge picture showing where to tape the two corners
 27. Taping the third corner.
Enlarge picture showing the joining of the third panel
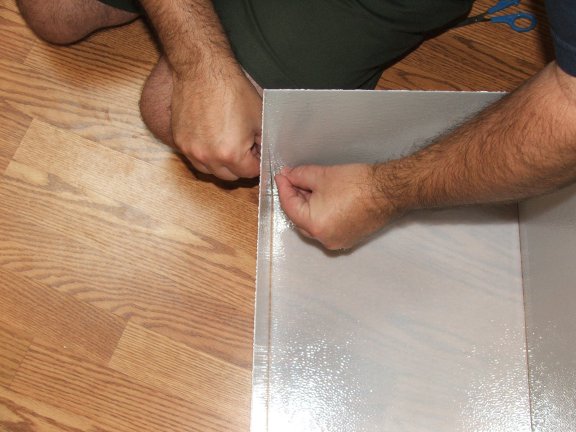
 28. Taping the fourth or final corner.
Enlarge picture showing the joining of the fourth panel
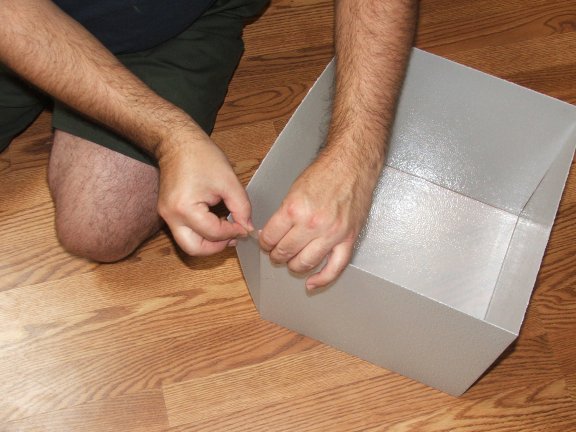
 29. Now we are going to use the next 4 strips of tape to close the gap in the middle of the panel walls. You will need to pinch the outside of the cube with one hand, while applying the tape on the inside of the cube with the other hand.
Enlarge picture showing where to close the gaps
 30. Continuing to tape each side.
Enlarge picture showing the next panel taping
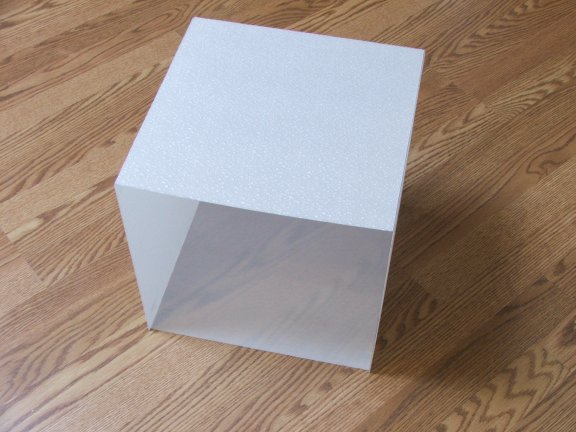
 31. Now you have a completed Photo Box. Now it's time to have fun and make great pictures of your miniatures.
Enlarge picture showing completed box
TIP
You can fold the box up, but occasionally the tape pops off; just replace the tape as needed.
You can fold the box up, but occasionally the tape pops off; just replace the tape as needed.
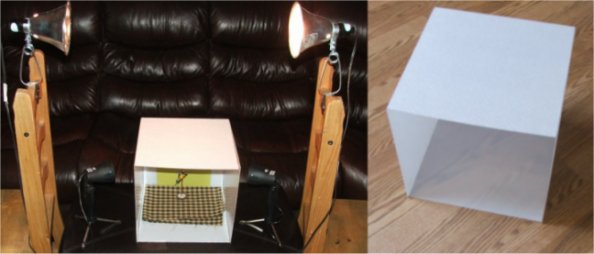
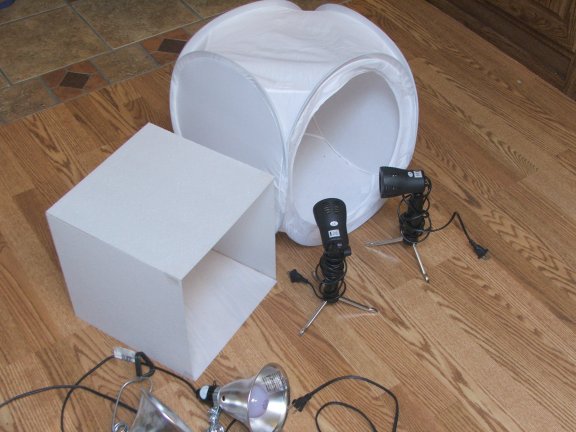
 32. Here is an example of the homemade photo light box vs. the $60.00 light box that I purchased. The store bought box came with different backgrounds that did not work well. The tungsten lights do not work well when photographing miniatures
The lights that I have recommended in the homemade box diffuses light better then the white fabric of the store bought box.
Enlarge picture showing this tutorial box vs store bought box
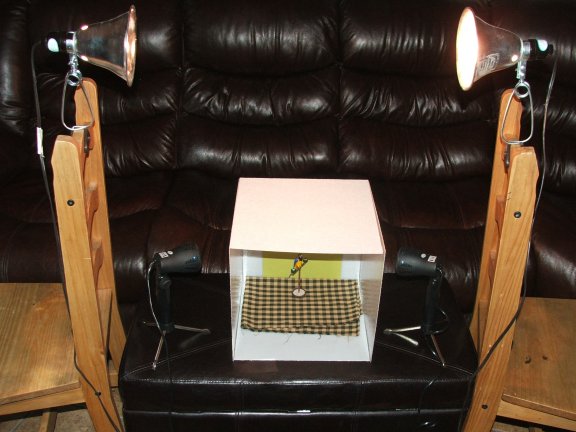
 33. Here is my set up, you will need to set up your box & lights and and find out what works for you. Notice the lights! They are not pointing directly at the box. Doing so will wash out your miniatures and make a bad picture. Turn off all other lights in your room when taking pictures.
Enlarge picture showing Instructor's set-up
TIP
Backgrounds are critical when taking pictures of miniatures. Earth tones are generally better than colors such as black, white, red, or blue. These colors will confuse the brain of cameras and have a hard time getting a focused picture, as well as a true color of your miniature.
Some great backgrounds I recommend would be Memory book paper, felt and some fabrics. Work with your camera, find out what works best for you.
ABOUT THE ARTIST
 Stephanie Brown was awarded IGMA Artist status this year in the Animal, Taxidermy category in 2008; a new category for IGMA. She enjoys sculpting wildlife, pets, and plants along with whimsical as well as fantasy creations.
Stephanie is a valued member of the CDHM Forum. Visit the Galleries today.
Stephanie Brown was awarded IGMA Artist status this year in the Animal, Taxidermy category in 2008; a new category for IGMA. She enjoys sculpting wildlife, pets, and plants along with whimsical as well as fantasy creations.
Stephanie is a valued member of the CDHM Forum. Visit the Galleries today.
© 2008-2012 Stephanie Brown
Reproduced with permission from Stephanie Brown. All photographs and text appearing in this tutorial are the exclusive property of Stephanie Brown. Permission is explicitly denied for any republication of text or photographs in this article without the prior express written consent of the author.