


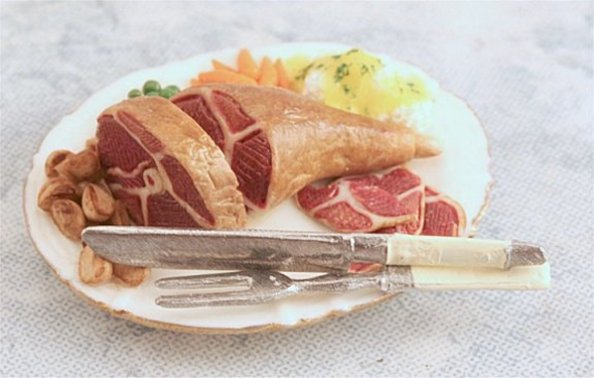
Learn To Make A
1:12 Carved Lamb on Platter
with Linda Cummings
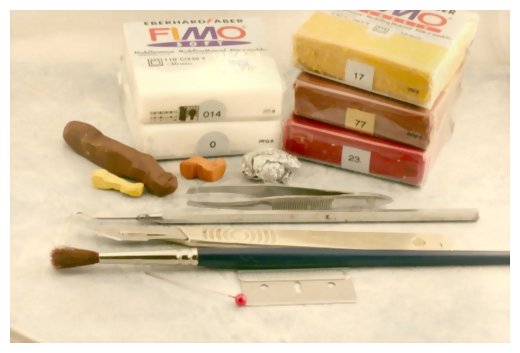
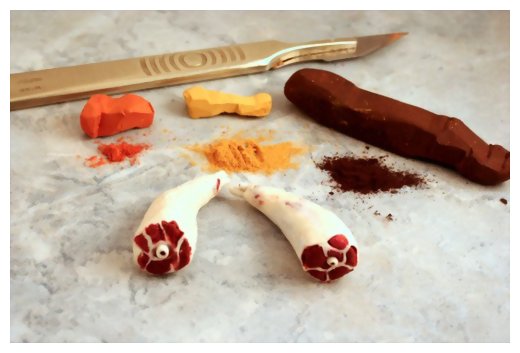
Tools and Materials Needed:
- Polymer Clay - Fimo Brand
- #23 Bordeaux
- #77 Chocolate
- #17 Ochre
- #14 translucent
- #00 White - Artist Pastel Chalks
- Brown
- Ochre
- Terracotta - Foil
- Glue: PVA
- Paintbrush - Soft
- Pin: Straight Type
- Plate or Platter for Lamb
- Varnish: Gloss
- Tile To Work On
- Baking Tray Covered In Foil
- Tools
- Pointed Dental Tool
- Single Sided Blade
- Tweezers
- X-acto Knife
 Close-up image of materials needed
Enlarge picture of material requirements
COMMENT
Make sure your oven is turned on to 265°F/130°C before we start!
Make sure your oven is turned on to 265°F/130°C before we start!
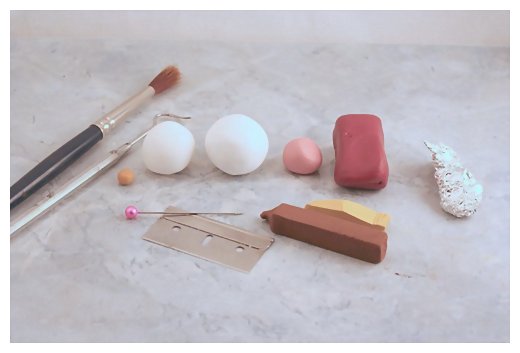
 1. First we will make up the mixes you will need for your leg of lamb.
Enlarge picture showing the materials that you need to begin
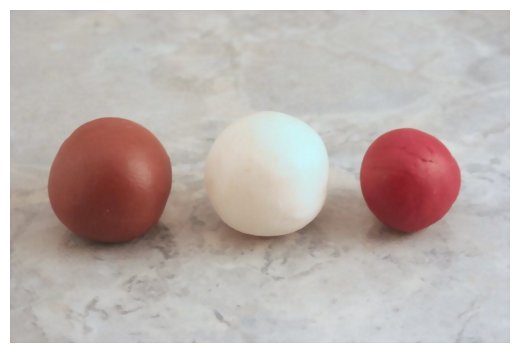
 2. Basic Red Meat Mix
Take a ½ (1.27cm) ball of Bordeaux red, ¾ (1.91cm) ball of brown and ¾ (1.91cm) translucent. Combine all three colors and mix well. You can use your pasta machine to hurry this process, otherwise knead well! Once completed, set aside.
Enlarge picture showing how to make the red meat mix
TIP
Wash Your Hands!! Otherwise, the red clay will shade the lighter mixes pink.
Wash Your Hands!! Otherwise, the red clay will shade the lighter mixes pink.
 3. Ham Pink Mix
Now take 2-parts white, 2-parts translucent, 1-part brown, ½ part bordeaux then mix together well.
Enlarge picture showing how to make the pink meat mix
TIP
If the colour is too dark add a bit more white until you are happy! Then wash your hands again.
If the colour is too dark add a bit more white until you are happy! Then wash your hands again.
 4. Fat Mix
Take the translucent, white and ochre clays in ratio of ¾ translucent, ¼ white and a small amount of ochre. Mix well. Dont worry if all the ochre doesnt completely combine, as the visible surface will be covered with pastels and the bones will be appear more realistic!
Enlarge picture showing how to make the fat mix
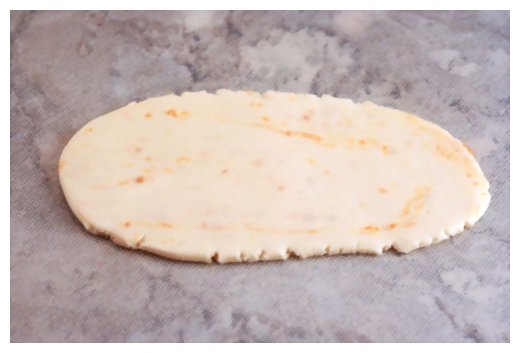
 5. Roll out the mixture.
Enlarge picture showing the rolled out clay
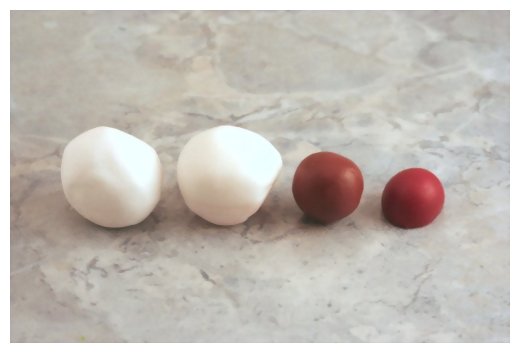
 6. Now we need to make the central bone since this needs to bake while we make up the meat!
Begin by cutting a small amount from your red meat mixture to use as the centre (marrow) of the bone. Cut a piece 2½ times larger than the fat mix. Roll the red mix into a fat log, then roll out with a roller or pasta machine (set on highest setting). Your fat mixture should cover the log.
Enlarge picture showing how to make the central bone
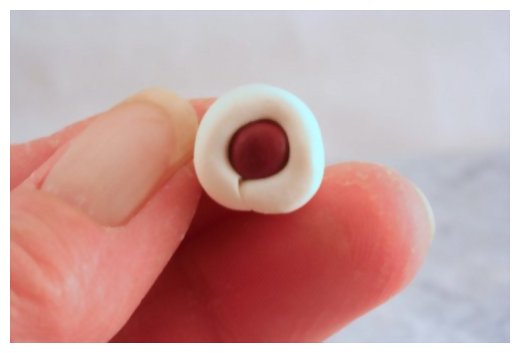
 7. Trim at the join so there is no overlapping then check that you do not have air bubbles in the roll.
Enlarge picture showing how to join the two pieces
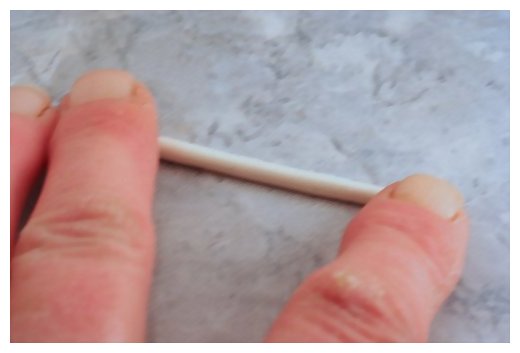
 8. Now roll the log between your fingers to produce a thin log. You may find it easier to keep cutting the log, if it becomes unmanageable in length!
Enlarge picture showing how to make the cane shape
 9. Cut 1-piece 1cm (a little less than a ½") in length and 2 smaller lengths, 2-3mm (0.07"-0.12"). Carefully roll one end to a point. Use your pin to make a hole in the non-pointed ends. Carefully transfer the rolls to your kitchen covered baking dish and bake for 10 minutes.
Enlarge picture showing the cut lengths
 10. While the cane rolls are baking, take your red meat mix and cut about the same amount from your red meat mixture.
Enlarge picture showing how to create the red meat mixture
TIP
Pasta machines make mixing a whole lot quicker and if your clay is old sometimes adding "quickmix" can help to soften it!
Pasta machines make mixing a whole lot quicker and if your clay is old sometimes adding "quickmix" can help to soften it!
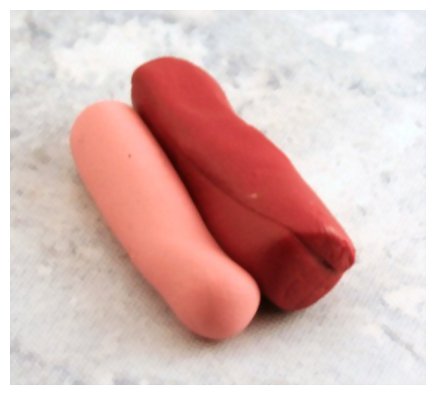
 11. Marble the mixture together by rolling, then folding, then rolling again until the colours are lightly marbled. Shape into a short, fat log about ½" (1.27cm) in diameter.
Enlarge picture showing the marbling effect
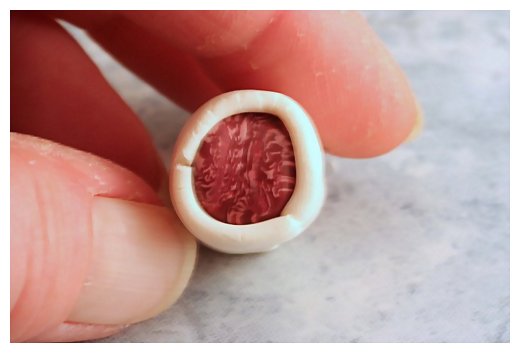
 12. Roll out your fat mix (setting 4-5 on your pasta machine) and pull gently to thin slightly. Cover the marbled mix with the fat mixture, as before to butt join the two pieces. Take your red mix and repeat the process.
Enlarge picture showing the wrapped meat mix
TIP
Again, wash your hands after rolling the red meat mixture into a log!
Again, wash your hands after rolling the red meat mixture into a log!
 13. Your meat log is ready to lengthen and roll!
Enlarge picture showing rolled clay
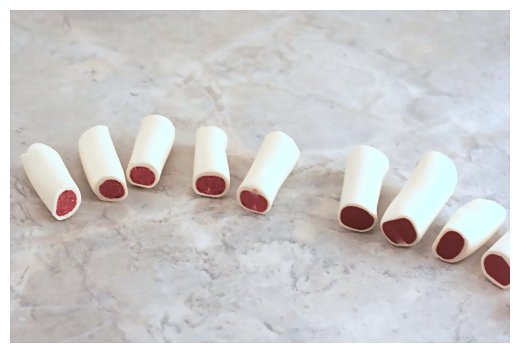
 14. Lengthen and thin your log by rolling. Then cut the log into equal lengths.
Enlarge picture showing the cut lengths
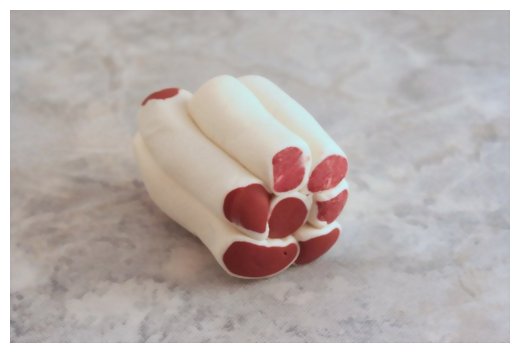
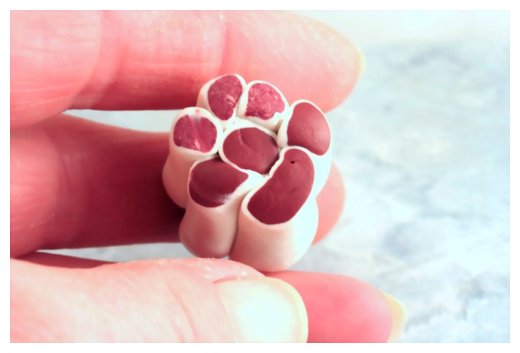
 15. Now you need to begin pressing the logs together in as realistic a combination as you can!
Enlarge picture showing how to press the lengths together
 16. Your pressed logs should look something like this.
Enlarge picture showing progress so far
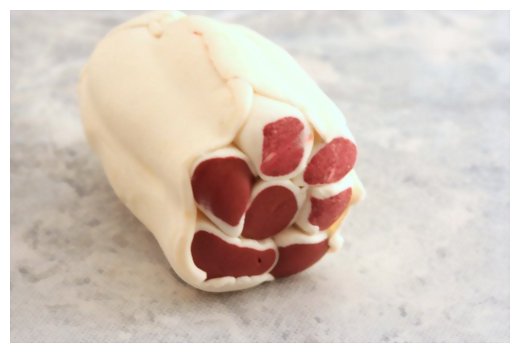
 17. Now you need to add the fat mix (rolled through pasta maker, setting 3) around the whole log.
You don't need to be too careful here, as I tend to tear and pull when I add this fat layer to achieve differing thicknesses.
Enlarge picture showing how to add the fat mix
 18. Squeezing and pulling from the middle to the outer ends, lengthen the cane until it is around 10-12mm (½") thick. If you haven't taken your 'bones' out of the oven, do so now!
Enlarge picture showing how to lengthen the cane
COMMENT
You will have enough of the cane for more than one joint, if you store it in a plastic bag, it should keep indefinitely!
You will have enough of the cane for more than one joint, if you store it in a plastic bag, it should keep indefinitely!
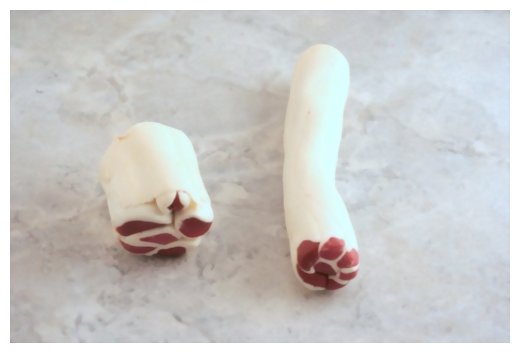
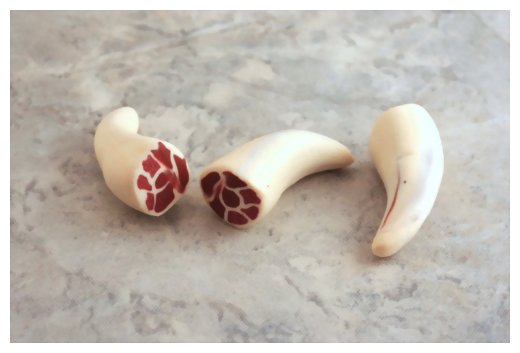
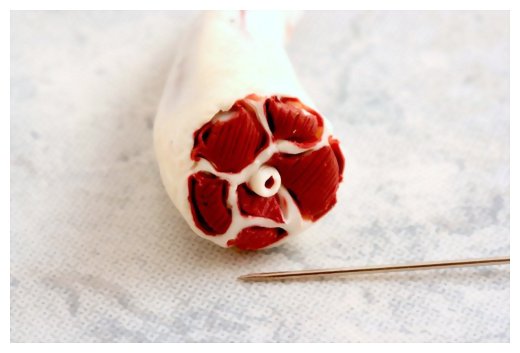
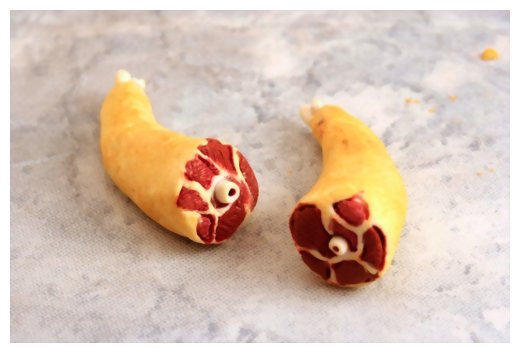
 19. Now you need to shape the leg. First cut a length from your meat cane, approx 25mm30mm (1"-1¼") in length. Shape one end to a round point; moulding until you have a leg of lamb shape you are happy with.
Enlarge picture showing how to shape the leg
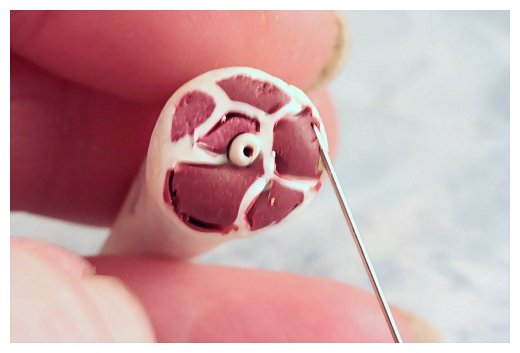
 20. With a dental tool or pin, make a central hole in the longest of the three (3) bones. Then make two (2) holes in the thin end for the other two bones.
Enlarge picture showing where to make the holes
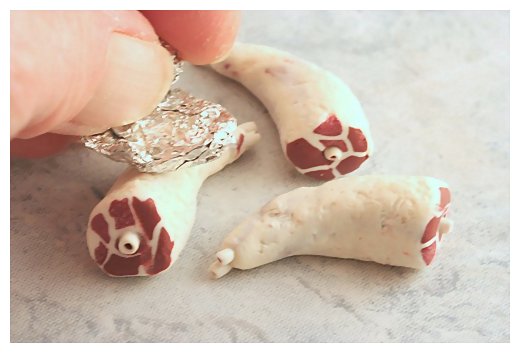
 21. Dot the ends of the cooked bones with glue, insert the longer bone into the hole you made in the step above. Push the bone into the hole, then push the two smaller bones in the thin end. Tweezers are useful at this point to hold the bones! With the crumpled foil texture the fat surface of the joint until you have an effect you are happy with.
Enlarge picture showing how to bone and texture
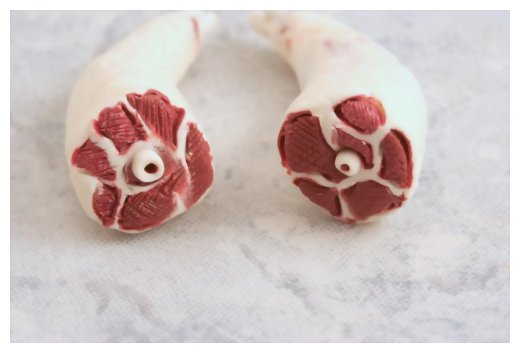
 22. Holding your joint very lightly, take your pin and use it to define the edges between the meat and fat. Gently pull the fat away from the meat. Then do the same with fat running through the meat.
Enlarge picture showing where to texture the meat edges
 23. Next, use the pin to lightly mark diagonal lines across the meat areas and then diagonally in the opposite direction to simulate the fibres.
Enlarge picture showing additional texturing
 24. Check the texture of the fat surface and if necessary, texture the surface a little more.
Enlarge picture showing where to texture a bit more
 25. Colouring and Adding Texture
Check the texture of the fat surface and if necessary, texture the surface a little more. Retrieve your artist chalks, brush, and x-acto knife. Scrape ochre, brown and a bit of golden brown into separate piles of powder.
Enlarge picture showing how to use artist chalks
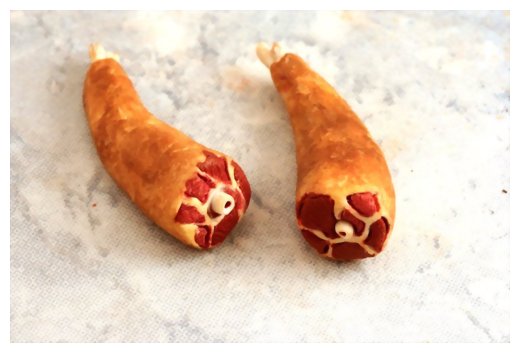
 26. Starting with the ochre, lightly brush the colour over the surface of the lamb. Take care not to get any on the 'meat' face of the joint.
Enlarge picture showing where to shade with chalks
 27. Repeat the step, except using the brown powder. Carefully build up the colour, without being too heavy handed with the colour. If desired, you can add a touch of the golden brown powder.
Enlarge picture showing where to shade with chalks
 28. You now have a nicely roasted leg of lamb. Here you have the option of carving the shank or not. If you decide to not carve it, then bake for 30 minutes or according to the manufacturer's direction.
Enlarge picture showing where to carve
TIP
Test your leg of lamb on the platter youve chosen to display the leg on before baking. Also, keep in mind that if you are adding vegetables, you will need space as well.
Test your leg of lamb on the platter youve chosen to display the leg on before baking. Also, keep in mind that if you are adding vegetables, you will need space as well.
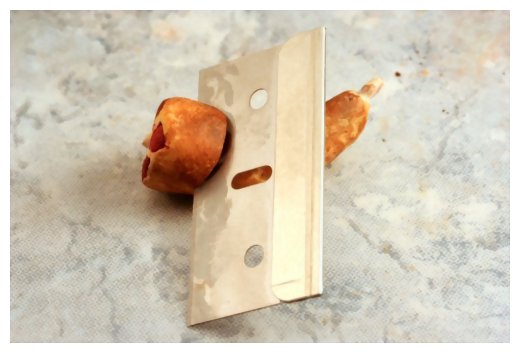
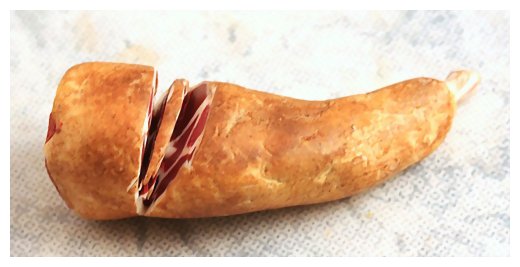
 29. Now it's time to slice your joint!
Take your single sided blade and holding the joint very lightly, so as to not squish the shape, make a slanted cut (towards the front) at about 5-6mm (give or take ¼") up the joint.
Enlarge picture showing the carving
TIP
You may find it easier to texture and slice your leg of lamb, if you glue it into place on the plate first, then let it set.
You may find it easier to texture and slice your leg of lamb, if you glue it into place on the plate first, then let it set.
 30. Then make another cut, carefully to the bone, in front of the first cut to loosen a thin slice. Using your dental pick, gently ease the slice away from the joint. Set to one side. Continue cutting two or three more thin slices. Make sure to expose the bone and ease away. Set aside as before. Pick out the detail on the now exposed cut surfaces.
Enlarge picture showing where to slice the lamb
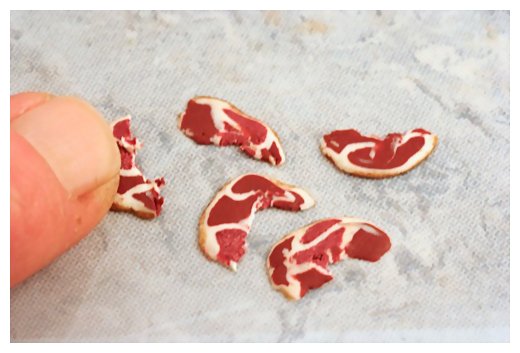
 31. Take the cut slices and flatten them on the tile with your finger. Texture the pieces as before with your straight pin.
Enlarge picture showing how to texture the slices
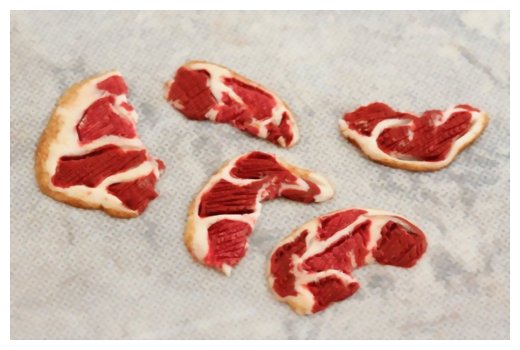
 32. After you have flattened and thinned the cut slices, texture the surface as before with your pin. When satisfied with the pieces, ease the pieces off of the tile using your blade.
Enlarge picture showing how to texture the slices
 33. Texture the inside pieces of the leg with your pin.
Enlarge picture showing how to texture the inside pieces
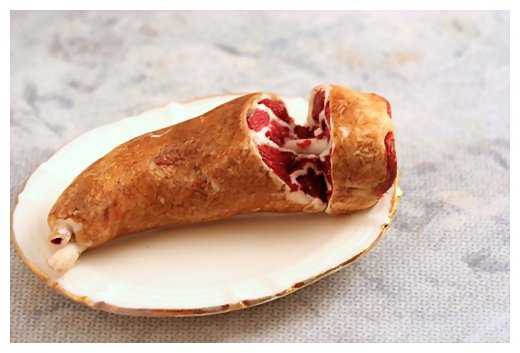
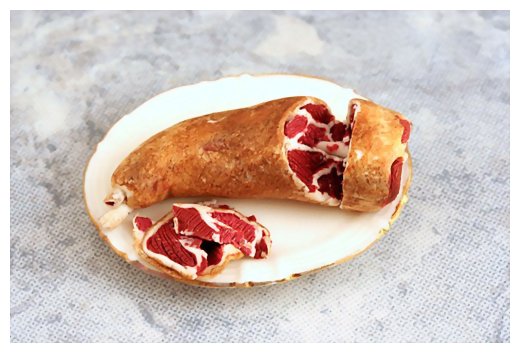
 34. The slices are now ready to arrange around your joint on the platter.
Enlarge picture showing arrangement of leg joint and slices
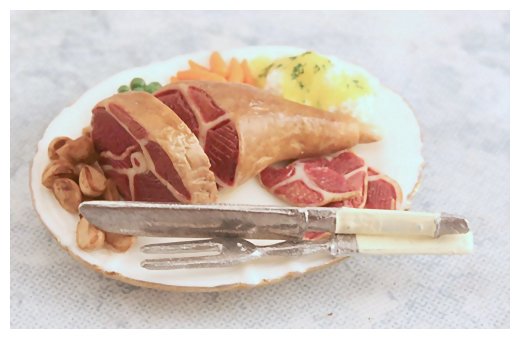
 35. Bake your leg of lamb & the slices for approximately 30-minutes according to the manufacturer's recommendation. After baking and cooling, garnish with vegetables of your choice!!
Enlarge picture showing garnished leg of lamb
MEET THE ARTISAN
 Linda Cummings, IGMA Fellow, of Lins Minis tells us that she is a "mother of 3-girls and a grandmother of the same number. So far!
"I live in the North East of England where it is regularly cold, wet and grey. So I have loads of time to create my minis! I have always been a little on the artsy side, enjoying any kind of creativity, but especially tiny counted cross stitch and water colour painting.
"Having run out of wall space for my paintings, miniatures came along at just the right time and now, all I can say is that, I am HOOKED! I've been living, eating, sleeping and dreaming miniatures for the past 5 years now and as yet no-one has come up with a satisfactory antidote! They are just wonderful, as are the many people, from all over the world who I have virtually met through my mini-making! To them, I say -- Thank you for all the support and friendships make the work all worthwhile!"
Linda is a valued member of the CDHM Forums and she has a CDHM Gallery that you can visit.
Linda Cummings, IGMA Fellow, of Lins Minis tells us that she is a "mother of 3-girls and a grandmother of the same number. So far!
"I live in the North East of England where it is regularly cold, wet and grey. So I have loads of time to create my minis! I have always been a little on the artsy side, enjoying any kind of creativity, but especially tiny counted cross stitch and water colour painting.
"Having run out of wall space for my paintings, miniatures came along at just the right time and now, all I can say is that, I am HOOKED! I've been living, eating, sleeping and dreaming miniatures for the past 5 years now and as yet no-one has come up with a satisfactory antidote! They are just wonderful, as are the many people, from all over the world who I have virtually met through my mini-making! To them, I say -- Thank you for all the support and friendships make the work all worthwhile!"
Linda is a valued member of the CDHM Forums and she has a CDHM Gallery that you can visit.
©
2008-2010 Linda Cummings
Reproduced with permission from Linda Cummings. All photographs and text appearing in this tutorial are the exclusive property of Linda Cummings. Permission is explicitly denied for any republication of text or photographs in this article without the prior express written consent of the author.
Reproduced with permission from Linda Cummings. All photographs and text appearing in this tutorial are the exclusive property of Linda Cummings. Permission is explicitly denied for any republication of text or photographs in this article without the prior express written consent of the author.
BACK
Copyright © 2004-2012
Custom Dolls, Houses & Miniatures / CDHM
Custom Dolls, Houses & Miniatures / CDHM