


Detailed Hand Sculpting
Female, Male & Elderly Variations
with
Julie Campbell
Materials Needed
- Polymer Clay
- 2mm Knitting Needle (Not Essential)
- Ruler
- A Sharp Blade or Craft Knife
- Needle Tool or Pin
- Darning Needle or Small Spatula Shaped Tool
- Smoothing Tool
- Small Filbert Brush for Final Smoothing
 Close-up images of materials needed
Enlarge picture of basic supply requirements
 1. You should have a clean flat surface to work on. I usually work on glass as its easy to wipe over. I also keep a supply of baby wipes handy and wipe my hands frequently during sculpting.
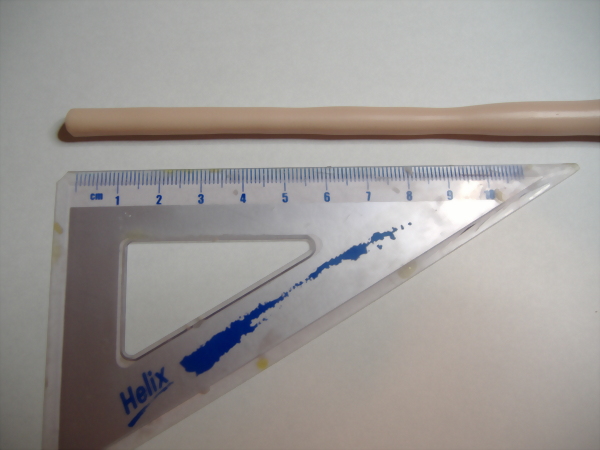
First of all condition your clay well. I use ProSculpt™ which doesn�t need a lot of kneading. Once your clay is nice and pliable roll it into a long sausage the width you would like your lower arm to be.
1. You should have a clean flat surface to work on. I usually work on glass as its easy to wipe over. I also keep a supply of baby wipes handy and wipe my hands frequently during sculpting.
First of all condition your clay well. I use ProSculpt™ which doesn�t need a lot of kneading. Once your clay is nice and pliable roll it into a long sausage the width you would like your lower arm to be.
Enlarge picture showing clay rolling
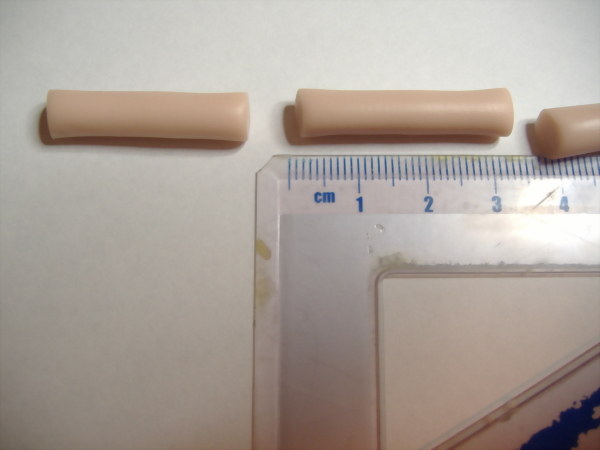
 2. Then cut off 2 logs of equal size. I use a scale chart for my sizing but for a 12th scale doll the logs are approximately 30mm long and 6mm wide.
Enlarge picture showing length to cut
 3. Two equal sized pieces.
Enlarge picture showing cut pieces
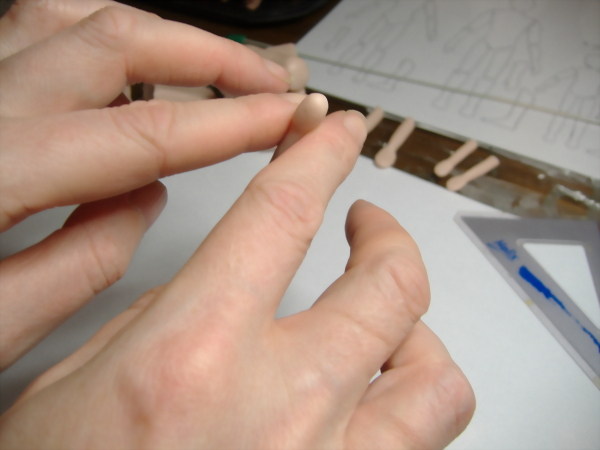
 4. Round the ends of each log then take each log between your two index fingers about 10mm from the end. Roll till you get a paddle shape with indentation for a wrist on each log.
Enlarge picture showing how to hold the clay while rolling
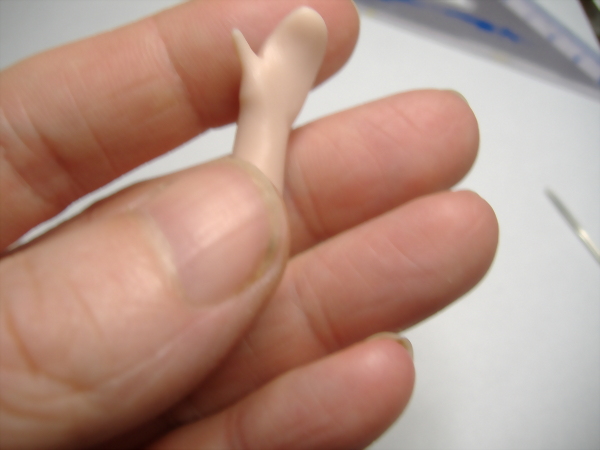
 5. Result of initial rolling.
Enlarge picture showing result of rolling end of clay
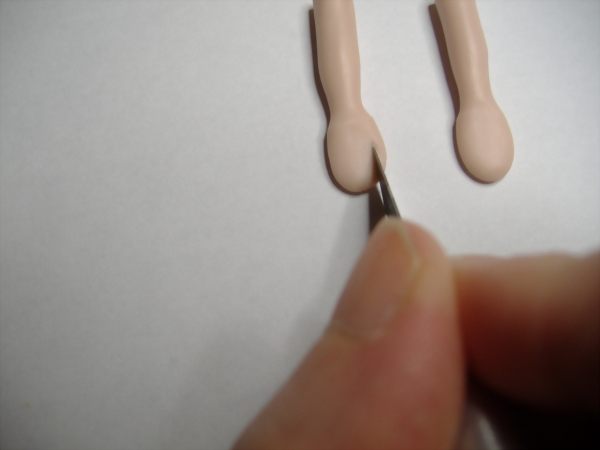
 6. Lay your arms on your board and flatten each hand slightly. Now cut a shallow elongated *V* shape on each hand.
Enlarge picture showing where to cut the *V* shape
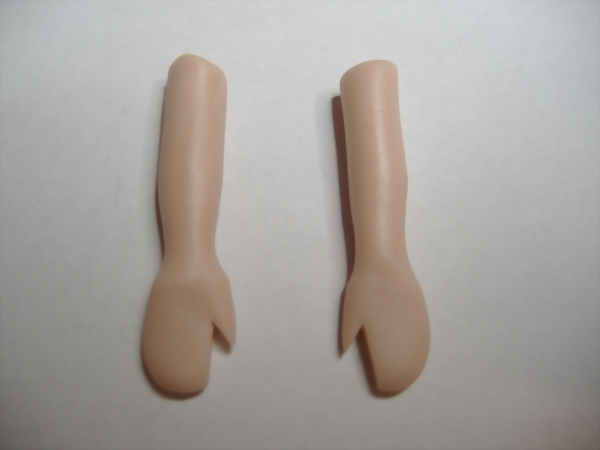
 7. You now have your basic hand shape!
Enlarge picture showing hand before details
 8. Take each hand and shape with your fingers rounding off what will be the finger area and thinning out a little at the tip and then roll your thumb to give a good shape.
Enlarge picture showing how to thin the forehand
 9. Now lay your hands back on the board and make 3 cuts in each hand to the half way point. This is the start of your fingers; make sure you cut right through the clay.
Enlarge picture showing where to cut to make fingers
 10. Very gently take each finger and elongate it. Try to roll it slightly, so you end up with four elongated sausages. Go carefully as as to not snap the clay off.
Enlarge picture showing how roll the clay
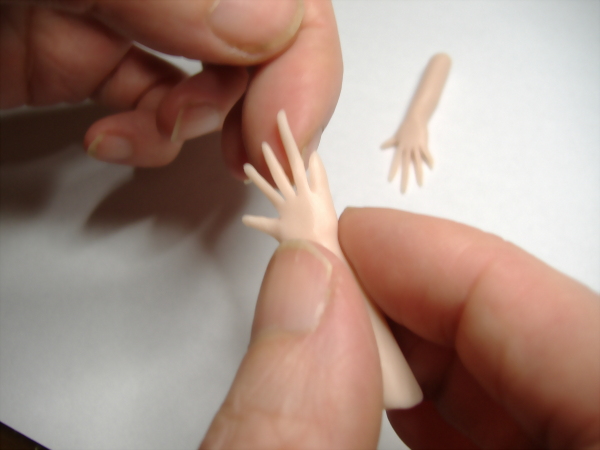
 11. Pull very gently from the top of the finger, you want each finger to taper towards the end. If you snap a finger off don�t panic! Simply use your smoothing tool to re-attach the torn clay again.
Enlarge picture showing how to stretch the clay
 12. This is what it should look like before trimming the finger ends.
Enlarge picture showing progress so far
 13. Now take your blade and trim off the finger tip ends to the size you want. Use your own hand as a guide for the finger length.
Enlarge picture on how trim excess clay
 14. Round the tip ends. You will be refining the detail within the next few steps, so this is just to clean the cuts.
Enlarge picture showing how to smooth the cut ends
 15. Now its time to add some detail and make these look like hands!
Enlarge picture showing how to add detail
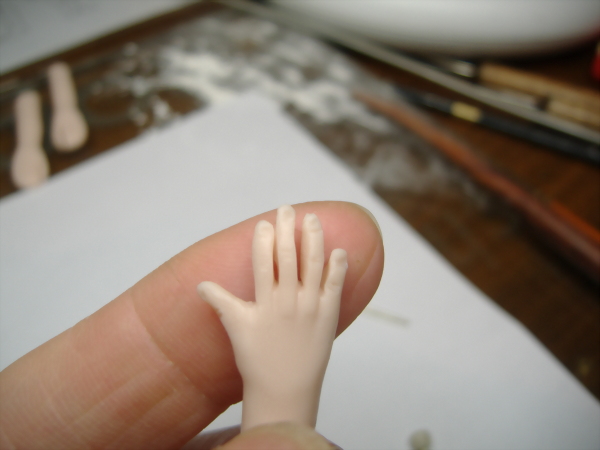
 16. Round off the finger tips gently so they are nicely tapered. Then take your smoothing tool and gently push down between each finger to make a little groove. It should look like this
Enlarge picture showing the method to round off finger tips
 17. Now press down on the back of each hand with your smoothing tool to flatten it slightly.
Enlarge picture showing how to flatten the hands
 18. Your hands should already be looking more realistic.
Enlarge picture showing progress of hands so far
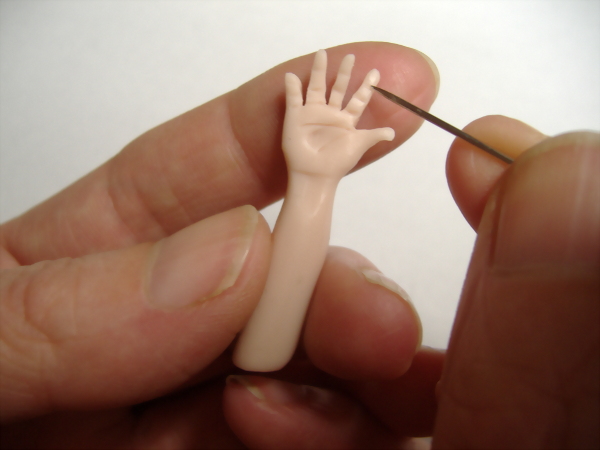
 19. With the flat end of your darning needle gently indent the end of each finger for your nails.
Enlarge picture showing how to creating nails
 20. View of the nail detail.
Enlarge picture showing how to make fingernails
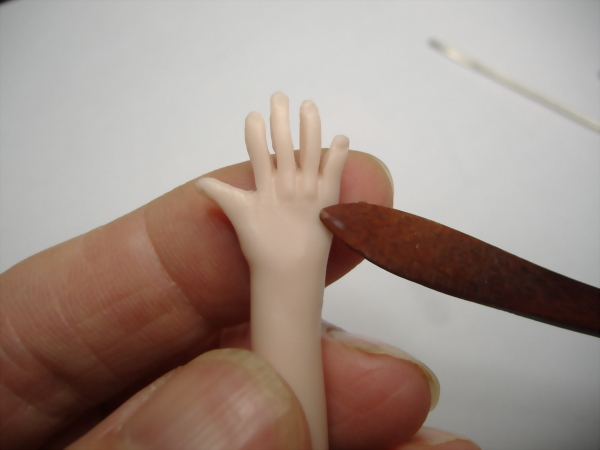
 21. Then with your sharp blade very carefully press down either side of the nail. This gives a lovely nail effect but do be careful not to slice through the finger tip!
Enlarge picture showing how to create detail of nails
 22. Very gently pinch the finger tips a little to keep their shape.
Enlarge picture showing how to maintain shape on fingers
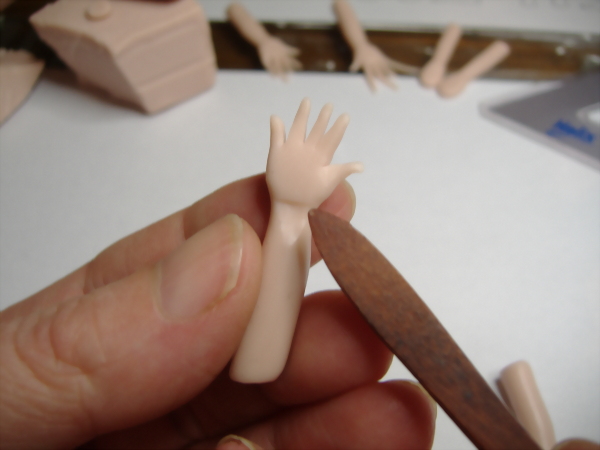
 23. Now its time to turn the hands over and put some detail there too. Press down slightly under the palm to flatten the underside of the wrist.
Enlarge picture showing how to detail wrist
 24. Next you need your spatula tool. You will be making the natural indentation of the palm.
Enlarge picture showing shaping and placement of palm detail
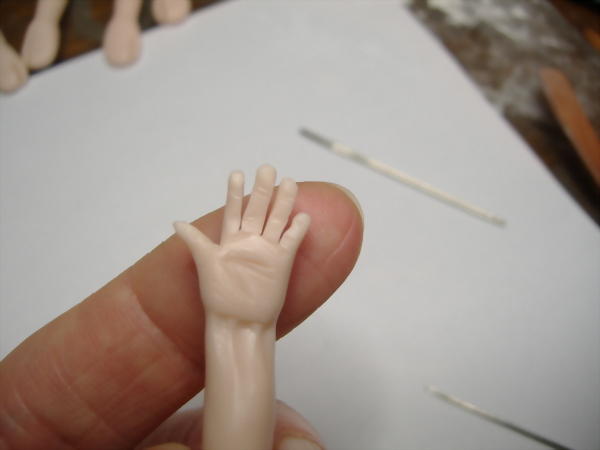
 25. Make a rounded indentation in the centre of the palm.
Enlarge picture showing indentation of palm detail
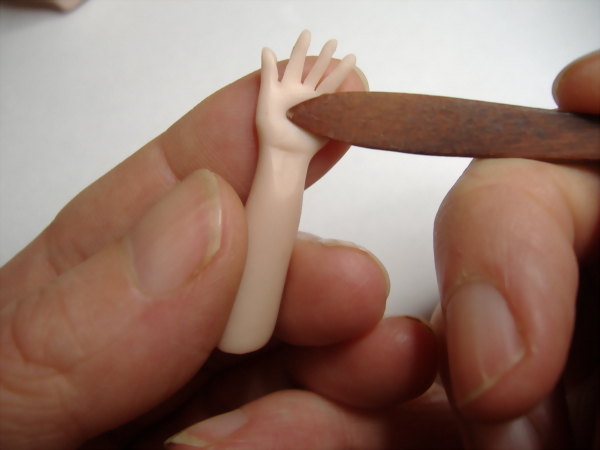
 26. Using your pin or a sharp ended tool draw in the lines of the palm. Again, use your own hand as a guide. Not to deep, but shallow lines.
Enlarge picture showing how to create palm lines
 27. Then draw in the three sections of each finger. Again use your own hand for guidance.
Enlarge picture showing where to create the natural lines
 28. Now gently push the thumb side of the hand down and under a little to give a realistic shape to the hand.
Enlarge picture showing shaping the thumb
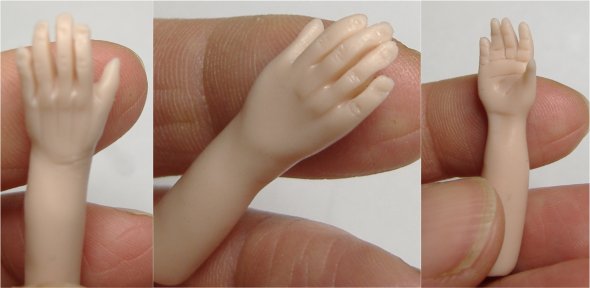
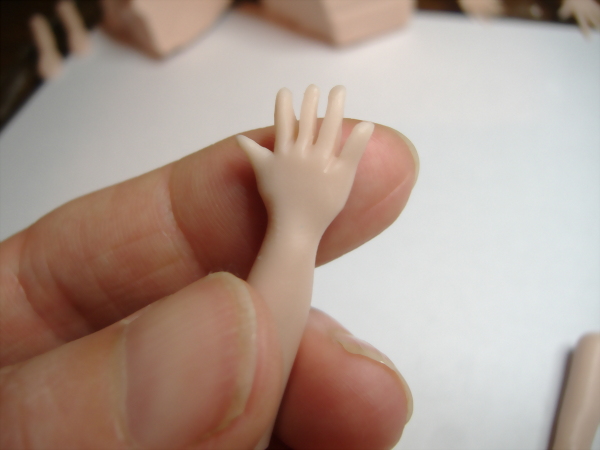
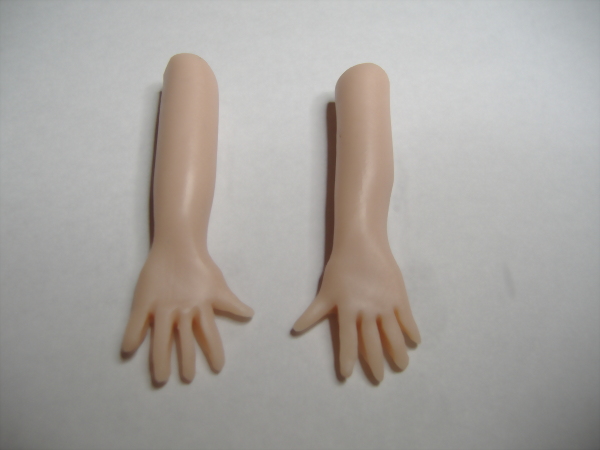
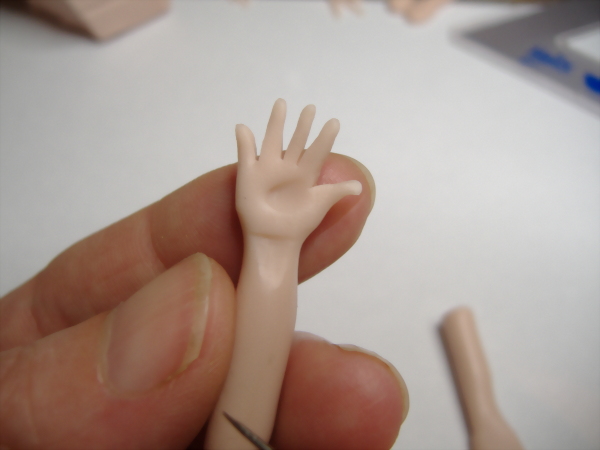
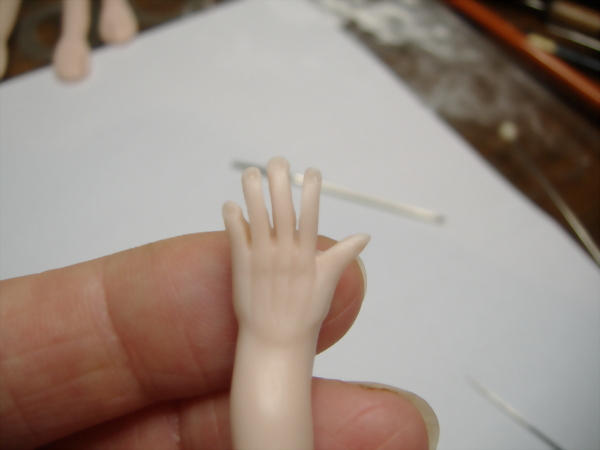
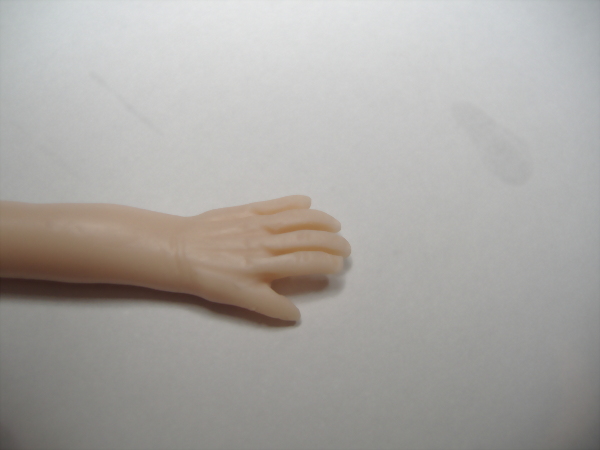
 29. Your hand shape should look like this, see image.
Enlarge picture showing progress so far of hand
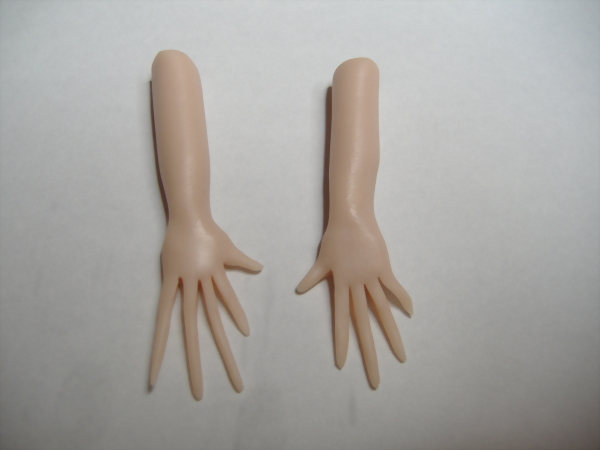
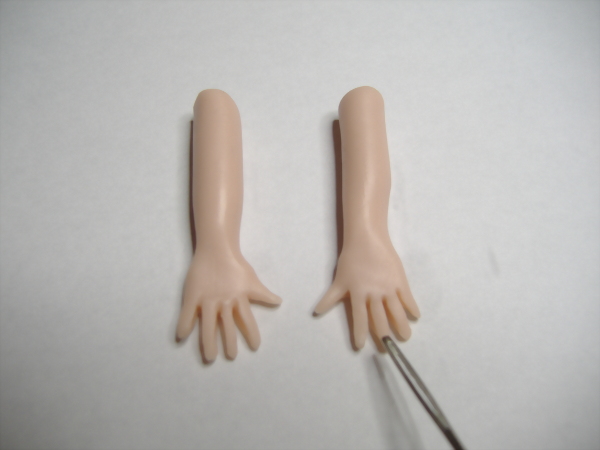
 30. Another view of the hand shape so far.
Enlarge picture showing different view of progress so far
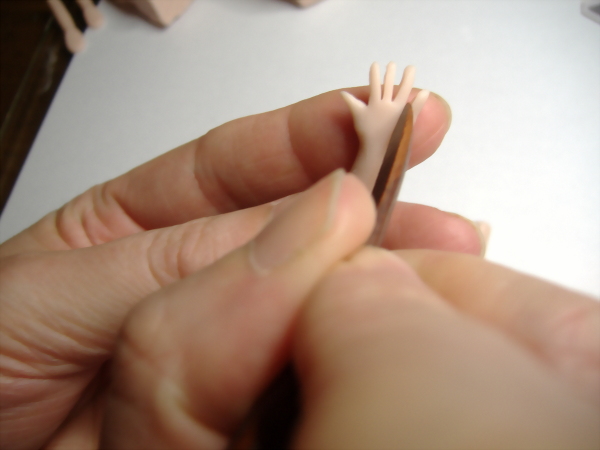
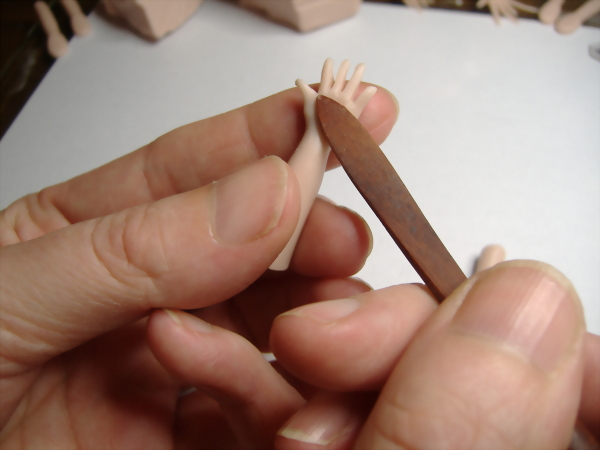
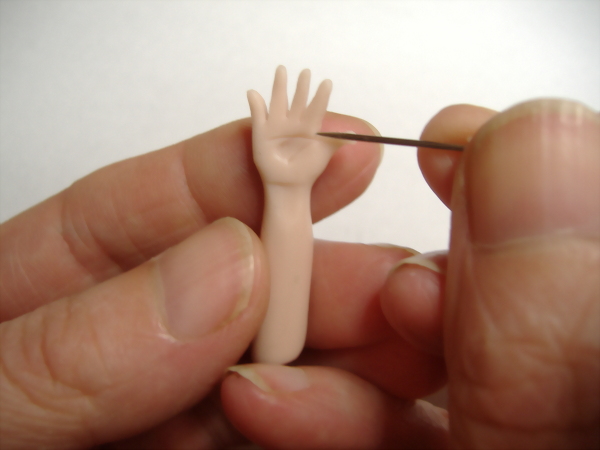
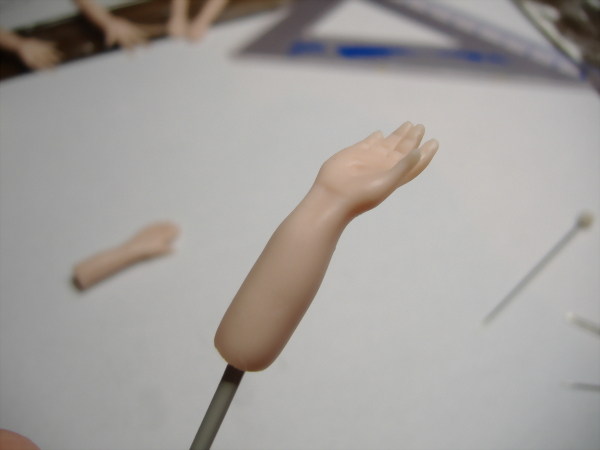
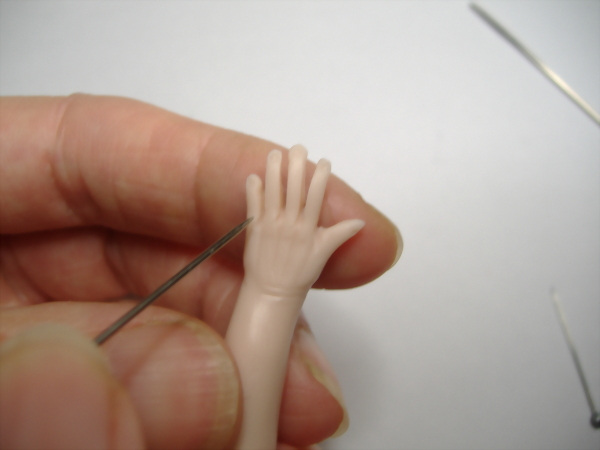
 31. To attach the hand to your doll you will need to insert your wire, I use a 2mm knitting needle to make my wire hole. Cut your arm to the length you want and then push the knitting needle into the end. Once your hand is on the needle you can shape the arm and pose your hand.
Enlarge picture showing how to insert wire to the arm
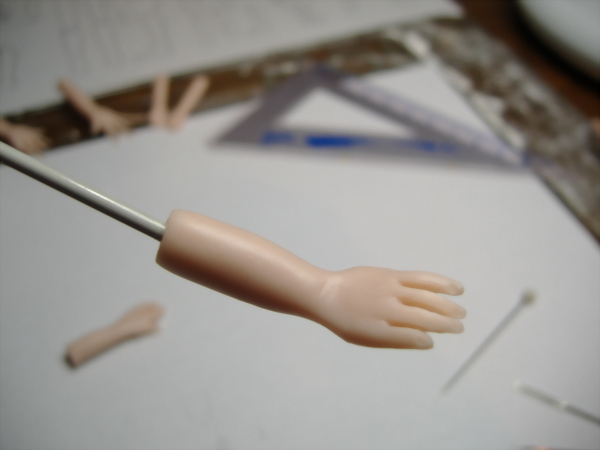
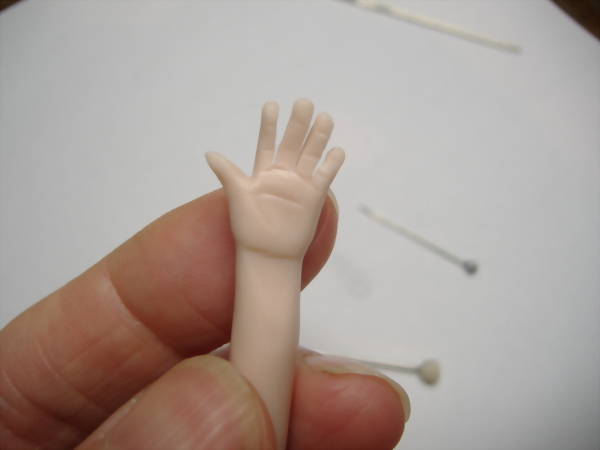
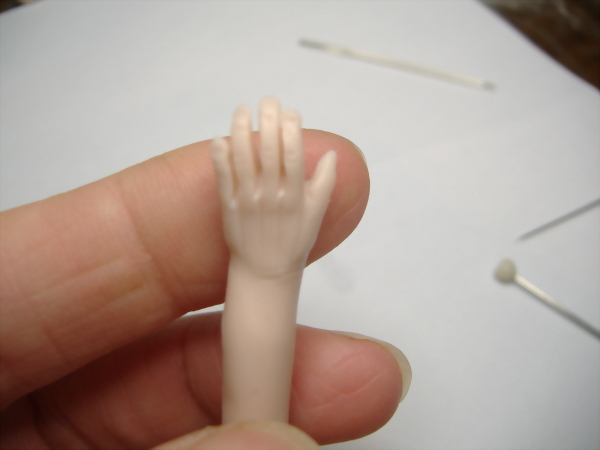
 32. This is when I add any creases to the wrists and take my filbert brush to smooth the hands. If you brush gently between the fingers and onto the hand you get a lovely effect.
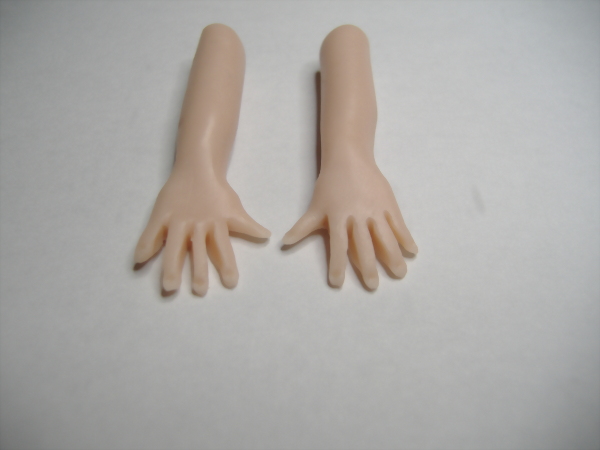
This is your basic ladies hand.
Enlarge picture showing completed hand and arm
TIP
After baking, fairy and lady doll makers might like to take a little 3D gloss and add a drop to each finger nail when the hand has cooled to give a beautiful fingernail effect.
After baking, fairy and lady doll makers might like to take a little 3D gloss and add a drop to each finger nail when the hand has cooled to give a beautiful fingernail effect.
MALE HAND
How to make your basic hand look like a male hand
Now to adapt this for a mans hand. I will show you how I add the extra details that make a hand look more male. I make the hand slightly larger than the females, then follow the same steps until I have the basic hand shape. It doesn�t take a lot of work to alter the first hand.
Now to adapt this for a mans hand. I will show you how I add the extra details that make a hand look more male. I make the hand slightly larger than the females, then follow the same steps until I have the basic hand shape. It doesn�t take a lot of work to alter the first hand.
 M1. Start with a slightly larger roll of clay and give the hand a slightly squarer shape, but you can practise on your ladies hand to make it look more manly this time! I take the hand palm up and press down with my wooden smoothing tool and indent under the palm firmly to give the effect of the tendons in the wrist.
Enlarge picture showing how to press into the palm
 M2. Then I turn the hand over and deepen the indentations between each finger.
Enlarge picture showing shaping of lines in the front of the hand
 M3. Then flatten the hand slightly just underneath the knuckle area to give a pronounced knuckle effect.
Enlarge picture showing how to make knuckles in the fingers
 M4. Lay the hand palm down and using your needle or pointed tool, carefully draw in a few lines where each finger joint would be. Three or four lines is sufficient at each joint and give a nice male look to the hand.
Enlarge picture showing shaping and defining the joints
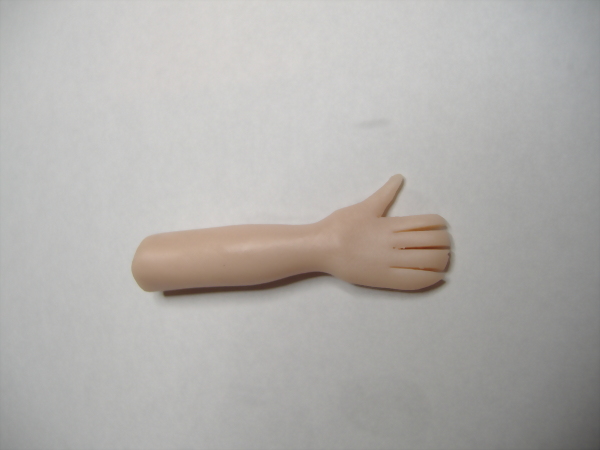
 M5. Tap the end of each finger a little to square it off and you can also take your blade and slice very carefully into the top edge of each nail .
You should now have a nice manly looking hand!
Enlarge picture showing final male hand
ELDERY HAND
How to make your basic hand look like an aged/elderly hand
 E1. To age the hand is quite simple and works the same on a male or female hand.
First lay your hand palm up.
E1. To age the hand is quite simple and works the same on a male or female hand.
First lay your hand palm up.
Enlarge picture showing how to age the hand
 E2. Take your needle tool and start to add lines to the palm, use your own hand for guidance, if needed, and draw in as many lines as you like, add a few more lines at teach finger joint and you will see it age immediately.
Enlarge picture showing where to add lines to the palm of the hand
 E3. Using your smoothing tool indent further at the wrist. Press down on either side of the indent you already have there. This gives a really good effect.
Enlarge picture showing where to add lines on the wrist
 E4. Now turn the hand over and deepen the indentations between each finger running down the hands.
Enlarge picture showing where to add definition to the fingers
 E5. Smooth over with your brush or smoothing tool to give the effect of gentle folds of skin.
Enlarge picture showing where to use the smoothing brush
 E6. Now take your tool between each finger and gently pull it over to the side to give the effect of the loose skin between each finger.
Enlarge picture showing how to add that aged look to the fingers
 E7. Add as much detail as you like around the knuckles , the more lines the older your hand will look.
Enlarge picture showing knuckle aging
 E8. You now have an aged hand.
Enlarge picture showing completed aged hand
FINAL INSTRUCTIONS
Your hands are now complete and ready to be posed. Use your own hand to practice the pose and if your pose your fingers from each joint you will find the indentations you have made there, allow the fingers to fall easily into a natural position.
Your hands are now ready to bake, I always bake for at least 30 minutes for a strong hand and have often baked for twice as long with no ill effects.
MEET THE ARTIST
 Julie Campbell is a busy mum of three teenagers, working from home creating miniature character dolls. She says that she believes that dolls are the finishing touch for any dolls house or miniature setting and as such should be very special. Her dolls are created with love, care, and with great attention to detail.
Julie is a valued member of the CDHM Forums. Visit the Galleries today. .
© 2007-2012 Julie Campbell
Reproduced with permission from Julie Campbell. All photographs and text appearing in this tutorial are the exclusive property of Julie Campbell. Permission is explicitly denied for any republication of text or photographs in this article without the prior express written consent of the author.