


Making a Miniature
Bonsai Turner's or English Oak Tree
with Artist Jax Perrat
of Ceynix Miniature Trees
Materials Needed:
- 20 Floral Wires: Gauge 26/28, 0.46mm: Thin, Green Painted
- Florist Tape, Brown
- Woodland Scenics Polyfibre
- Flock, Fine
- White Glue (PVA) with Fine Applicator or Brush
- Spray Adhesive, Scenic Spray or Hair Spray
- Wire Cutters
- Scissors
- Polystyrene / Modeling Plasticine
- OPTIONAL: Enhanced Trunk Supplies
- Pot of Acrylic Paste/Artist Paste (you will use only a teaspoon)
-
Acrylic Strong Pigment Paint
- Grey, Recommended: Paynes Grey Acrylic
- Burnt Umber (Brown) - Paint Brush, Small and Round (Inexpensive Variety)
- Paint Brush, Small (Higher Quality for Dry Brushing)
 1. Start with your floral tape and cut a length about eight inches long. You don't want it too long or it gets in the way as you work. You can always cut more if you need it. Now cut that piece in half vertically.
Enlarge Picture using the floral tape.
TIP:
It's even better if you use non-stick scissors or the tape will happily attach itself. Also, you will get tacky hands when working with the tape, so wash your hands often.
It's even better if you use non-stick scissors or the tape will happily attach itself. Also, you will get tacky hands when working with the tape, so wash your hands often.
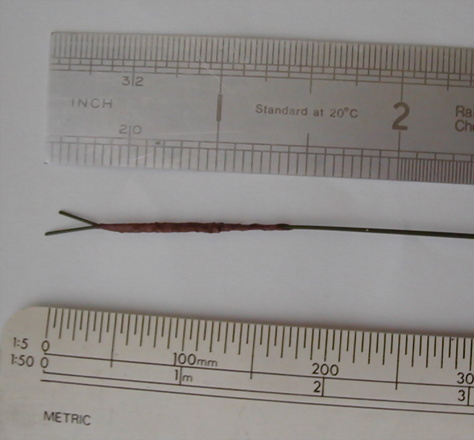
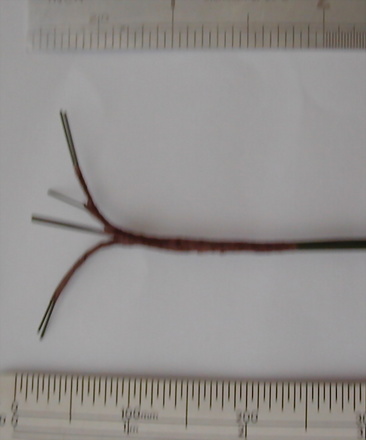
 2. Take two-wires and bind them together. This is how I start any size of tree -- just two wires.
Enlarge Picture of wrapping the two-wire method.
TIP:
You need to keep the tension on the tape as you wrap, but not so tightly as to tear the tape though. I generally start in the middle of the wire and work up towards the ends. Do not separate the wires at the ends at this stage.
You need to keep the tension on the tape as you wrap, but not so tightly as to tear the tape though. I generally start in the middle of the wire and work up towards the ends. Do not separate the wires at the ends at this stage.
 3. Repeat the process with the remaining wires. I used 5 x 2-wires and 3 x 3-wires. Always with 3-wires then 2-wires but, generally an odd number of wire; nature likes odd numbers. So I used a total of 19 wires. I don't cut any of my wires off until I am ready to plant the tree. How you want the ends will depend on your planting method.
Enlarge Picture of adding additional wires.
TIP:
At this stage you should have one bundle with five pairs of wires and one bundle with three triplets of wires. Thus you end up with eight separately wired bundles.
At this stage you should have one bundle with five pairs of wires and one bundle with three triplets of wires. Thus you end up with eight separately wired bundles.
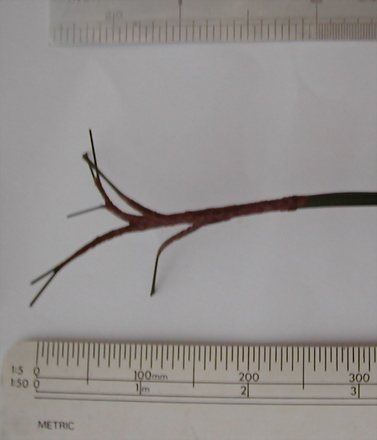
 4. Now take a double and a triplet set of wires and tape them together. This will form the top of our tree where we want a lot of foliate across the top to emulate nature.
Enlarge Picture of merging the limbs together.
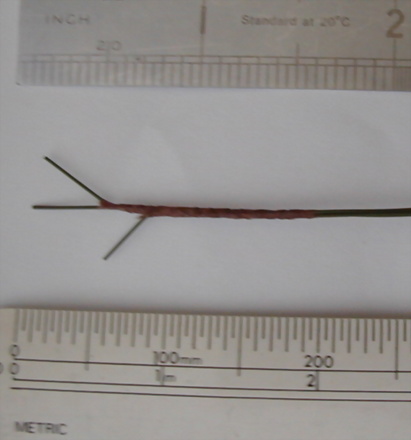
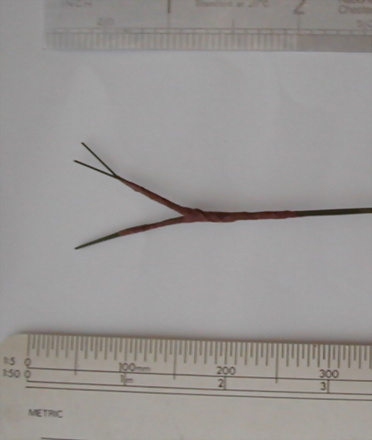
 5. Now add a further branch lower down the trunk, take your pick from your remaining six branches.
Enlarge Picture of adding lower branch to trunk.
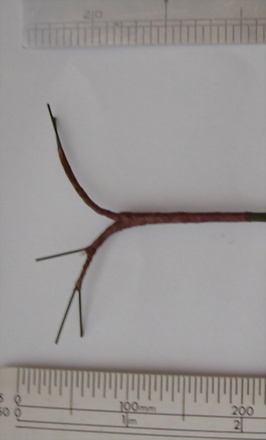
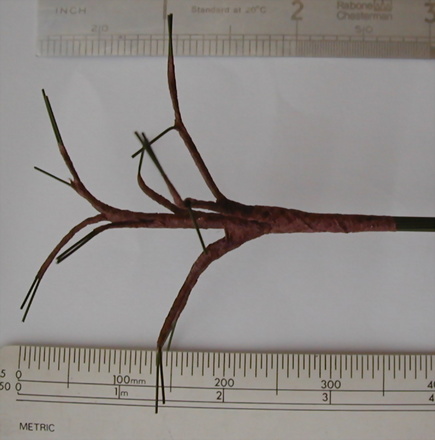
 6. And repeat this process again. You can slightly arrange the branches after you've taped them on, but you really want to try to get them in the right position to start with. The right position, of course, depends on the type of tree you're doing.
Enlarge Picture of repeat the process of adding lower branches.
 7. You now have four branches remaining. As separate items, tape two together twice so you have two larger branches.
Enlarge Picture of taping two wires together for larger branches.
 8. Now tape each of the separate branches in turn to the tree.
Enlarge Picture of taping separate branches to the main trunk.
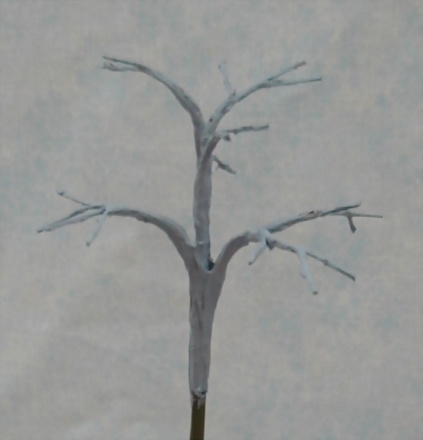
 9. Now put your tree aside for a moment and get out the artist paste and high pigment grey paint. You only need about a teaspoon of paste; this is why it's expensive if you don't already have it in stock. Because of the amount I use I put the paint straight in my pot, but you may want to put some out separately and colour it. A nice neutral grey should do. Don't over do it to start with; you can always add more paint if it doesn't look right.
Paint the entire tree with the paste, following the direction that the bark would run naturally. This will take around ten minutes and you will need something into which to stand the tree when done. Now you see why I don't cut the wires down until I've finished a tree!
Enlarge Picture of painted grey trunk and limbs.
TIP:
You want a paste that is white as it will be fine. I do not recommend the 3M brand although the color, ochre colour is nice, it is far too coarse and doesn't spread well.
You want a paste that is white as it will be fine. I do not recommend the 3M brand although the color, ochre colour is nice, it is far too coarse and doesn't spread well.
ENHANCED TRUNK OPTION FOLLOWING
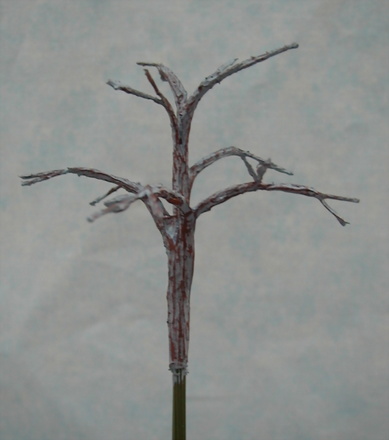
Dry Brushing using the high pigment brown acrylic.
Dry Brushing using the high pigment brown acrylic.
 10. You can use the paint straight from the tube, but if you are not used to dry brushing then its best to put a little paint on the brush and use a kitchen/paper towel to wipe most of it off. Brush across the previous brush marks, highlighting the ridges. Be careful to not overload the brush or you will just end up with brown blobs all over the trunk. On a tree this size it will take you around 10-15 minutes to do the dry brushing.
Because the tree is dry brushed it dries almost immediately. At this stage we set the tree aside.
Enlarge Picture of results of Air brushing with the brown acrylic paint.
TIP:
A decent brush is needed for dry brushing to obtain the effects that you want; however, it will get ruined with brushing across the acrylic paste.
A decent brush is needed for dry brushing to obtain the effects that you want; however, it will get ruined with brushing across the acrylic paste.
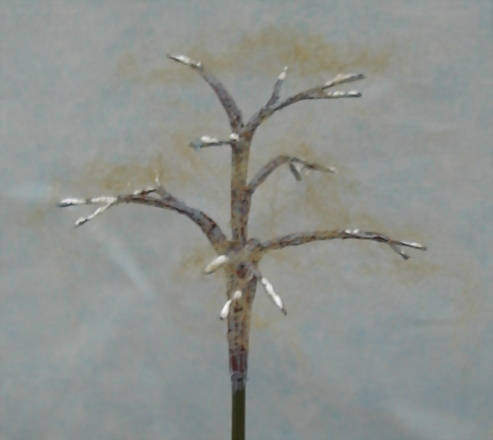
 11. Next we take our polyfibre. You only need about a tablespoon worth for this tree. Tease it out, stretch it into a fine netting.
postiche, or black/dark brown dolls hair can also be used instead of polyfibre. You just have to fold it around and stretch it out until you have a tangled mass. If you end up with too large a hole, just fold the polyfibres over and start teasing again. Starting at the lowest branches pull a piece of the polyfibre out that is large enough to stretch across a couple of branches. Drop a dab of PVA on the end wires and pat the polyfibre onto this. Some people don't use glue, but I like to be sure. We start at the bottom because it's easier to get to each branch rather than trying to glue under one with polyfibre. So now we just have to work our way up the tree finishing with a piece right across the top. Foliage only tends to be on the outer edges of branches because that's where the sunlight reaches for them to do their work. This part doesn't take long, it's the teasing that takes the time. You can see from this photo, that the PVA was still wet, it's the only way I could get it to show up and also show you where to look for the polyfibre which is not easy to see.
Enlarge Picture of completed first layer of polyfibre on the branches.
TIP:
A polyfibre can be purchased at railroad & miniature supply stores & sites. One packet will make many trees.
A polyfibre can be purchased at railroad & miniature supply stores & sites. One packet will make many trees.
 12. Now for the messy part. Get your adhesive spray or hair spray. Spray the entire tree either in a contained area, like a box or outside. Spray the tree liberally so you can see the drops on the polyfibre. Hold the tree above newspaper. Sprinkle your foliage onto the polyfibre and it will adhere where there is adhesive or hair spray.
Enlarge Picture of first layer of flocking.
TIP:
Alternative One to using the standard "flock".
Cut a four inch cube square of upholstery foam; drench the foam into acrylic paint of the tree foliage color you want. Squeeze all the paint out of the foam, let dry till the foam is hard. When the foam is thoroughly dry, you can grate, using a normal kitchen grater, the foam cube. Using different grades of grater cut gives different grades of foam.
Alternative Two to using the standard "flock".
Some types of toy filling will also do, although you may have to dye them first. If you are doing a light coloured tree then the tan coloured filling will do. If you are doing a really dark coloured tree then you may want dark brown or black rather than green.
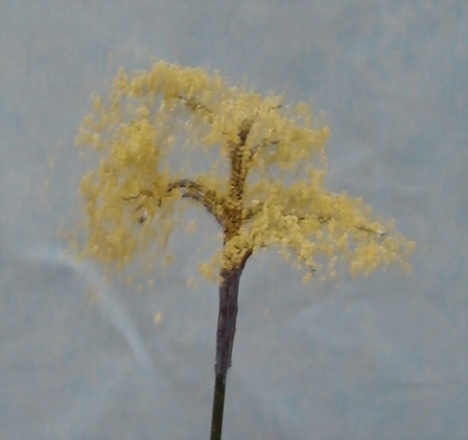
 13. Re-apply as needed. Recover the flock from the newspaper and then give the tree a quick spray over again with the hair spray and leave to dry for a couple of days. I find that this method, which I developed around twenty years ago, gives the transparency of real trees.
Enlarge Picture of final flocking and drying.
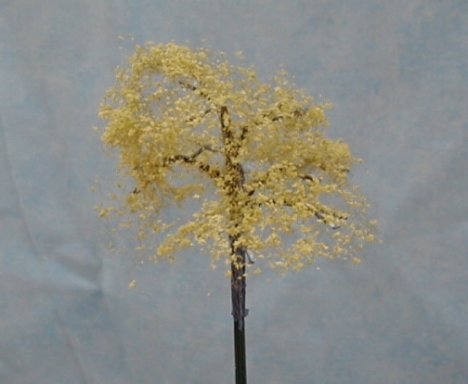
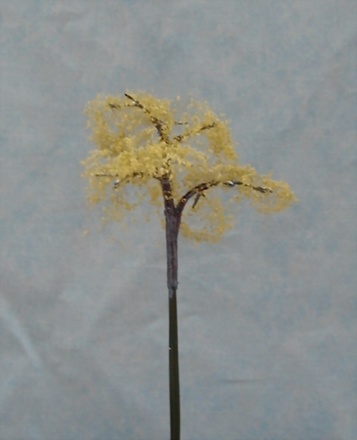
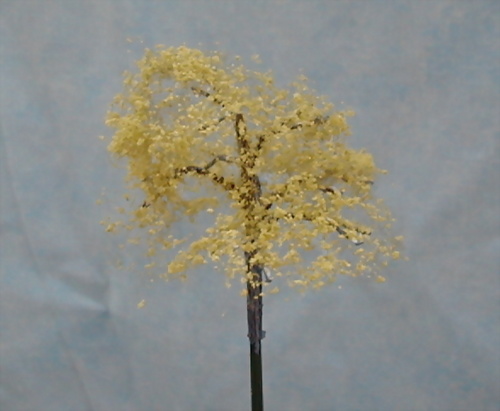
 14. Finished bonsai Turner's or English Oak Tree.
Enlarge Picture of completed bonsai tree.
MEET THE ARTIST
Jax Perrat aka Ceynix Miniature Trees has been making trees for around 30 years. She teases that she's had plenty of experience.
Jax is a valued member of the CDHM Forums. Visit the Galleries today.
Jax Perrat aka Ceynix Miniature Trees has been making trees for around 30 years. She teases that she's had plenty of experience.
Jax is a valued member of the CDHM Forums. Visit the Galleries today.
© 2007-2013 Jax Perrat of Ceynix Trees n' Trains and CDHM.org
Reproduced with permission from Jax Perrat. All photographs and text appearing in this tutorial are the exclusive property of Jax Perrat.
Permission is explicitly denied for any republication of text or photographs in this article without the prior express written consent of the author.
Permission is explicitly denied for any republication of text or photographs in this article without the prior express written consent of the author.