


Learn To Make 1:12 Scale
Miniature Drapes with
Vanessa Parry
Materials Needed:
- Cardstock - 4"x8" Thin Piece
- Ruler
- Pencil
- Scissors
- Glue - Tacky Type
- Cotton Fabric
- Lace or Braid
- Hairspray: Extra Hold
- Fine Dressmaking Pins - Have A Good Supply
NOTE: The pins used for bridal fabrics make the smallest holes - Foam Pad or Mouse Pad
- Knitting Needle
- Table Knife or Pergamano Embossing Wheel For Scoring
- Moist Wipes
INSTRUCTOR SUMMARY
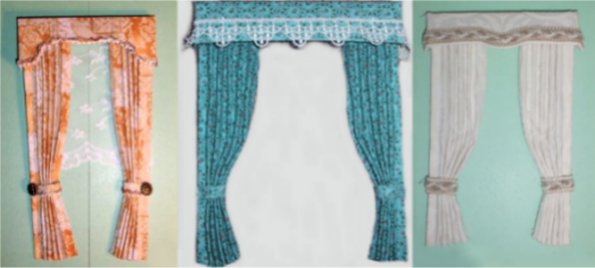
This is a 'no sewing' required curtain tutorial.
Because of scale issues, if you want curtains with a realistic looking 'fall', it is not possible to make them functioning, i.e. able to be drawn open or closed. This tutorial will show you how to make an open pair. They do not hang from a rail but are fixed to a solid pelmet.
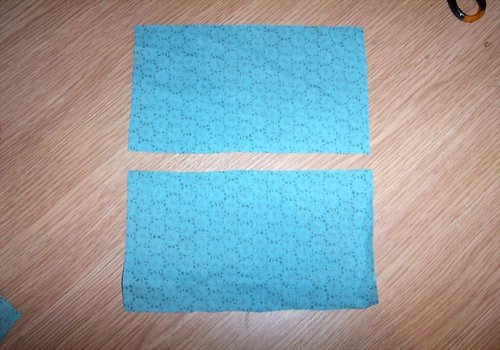
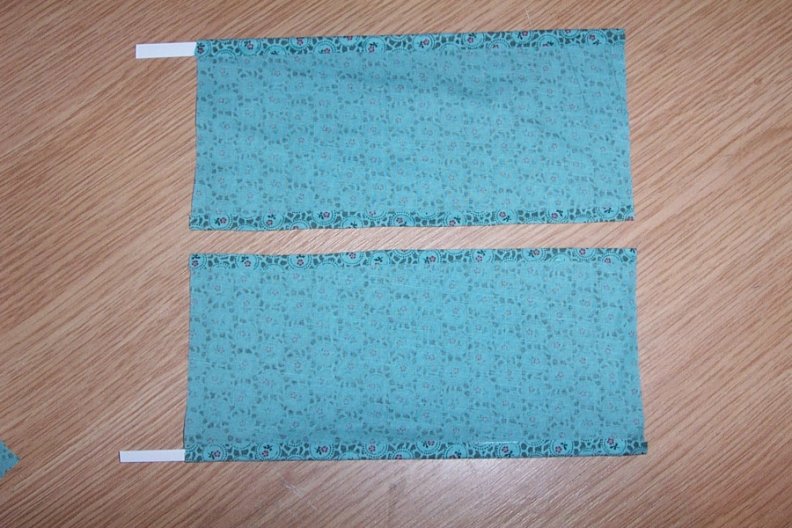
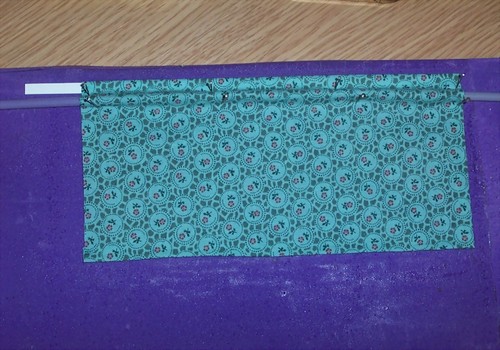
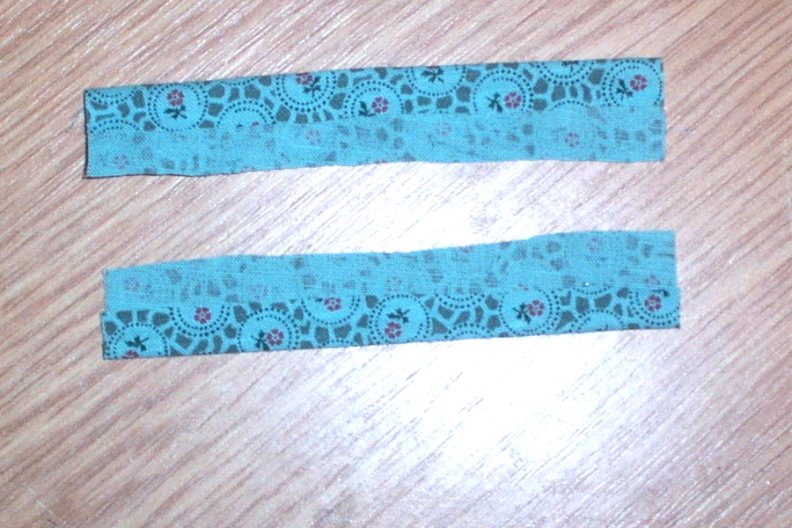
 1. Cut two pieces of fabric for your curtains. Each should be the width of your window. Length will be a personal preference for you but when you've worked it out add ¼" for the hem and ¼" for fixing at the top. If this turns out to be too long you can always trim away at the top before you fix.
Enlarge picture showing size of fabric to cut
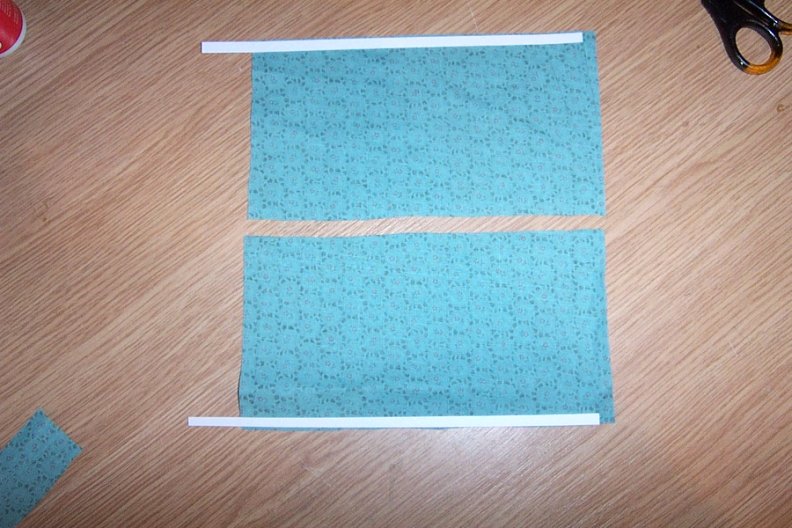
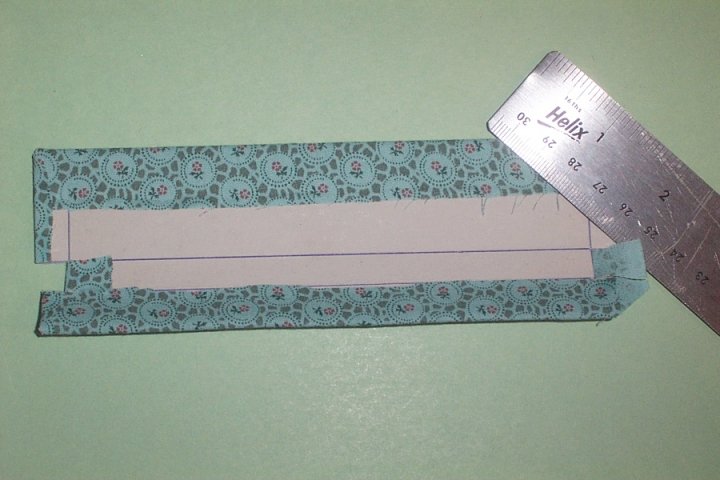
 2. Cut two thin strips of card, approximately ¼", the length of the fabric you've just cut, plus an extra ¼". The extra ½" makes it easier to handle later. Decide which is going to be the wall edge of each curtain piece. If you have a patterned fabric make sure you get the pattern going to same way on both pieces. From now on you're going to work each step with both curtains. This will ensure you don't get two left curtains or one upside down.
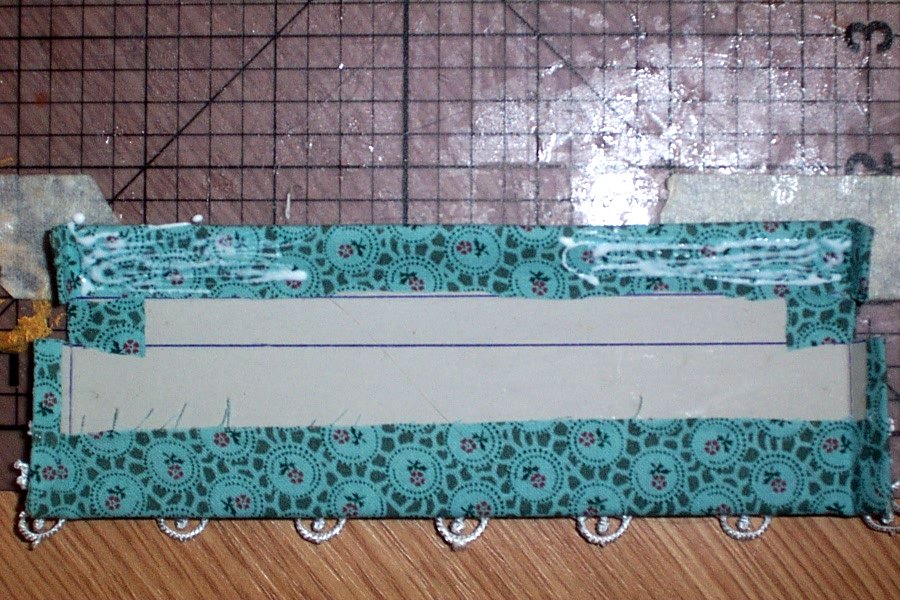
Turn your fabric so that the wrong side faces you. Glue your strips of card to the outside window edge. Make sure that you leave ¼" clear at the bottom hem edge and that you have the excess card at the top edge. This will help you identify the top edge.
Enlarge picture showing size of cardstock
TIP
If you are using silk fabric to make your curtains, don't use glue. Use the double sided iron-on bonding web they use for hemming trousers/skirts. I've never found a glue that will remain invisible on silk.
If you are using silk fabric to make your curtains, don't use glue. Use the double sided iron-on bonding web they use for hemming trousers/skirts. I've never found a glue that will remain invisible on silk.
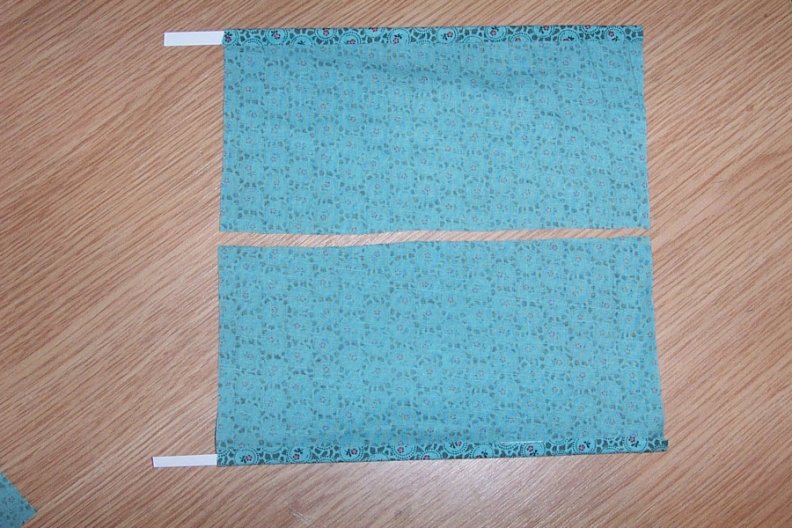
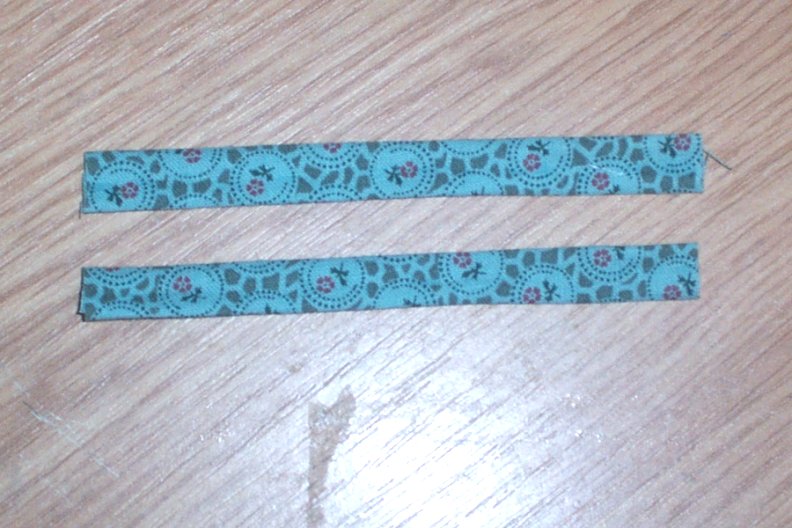
 3. When the card is dry, turn the edge inward and glue it in place so that the card is now invisible and you have a clean hemmed edge at one side of your curtain. Now you can tell which is the top edge, because you have a bit of card sticking out.
Enlarge picture showing how to cover the card
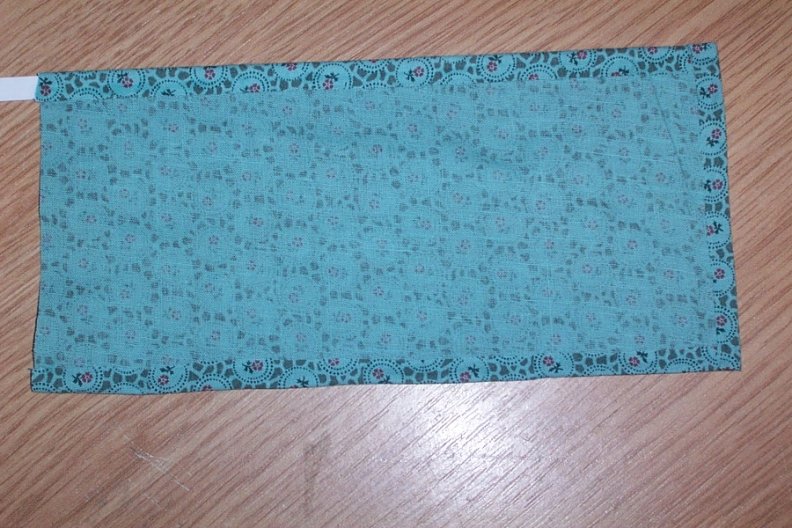
 4. Turn and glue the hem at the other side of your curtain. No card on this edge, since you want it to be flexible.
Enlarge picture showing how to glue the opposite side
 5. Turn up and glue the ¼" hem at the bottom of your curtain. You should now have two hemmed curtains.
Enlarge picture showing how to glue the hem
TIP
Sticky tables, sticky fingers, sticky sofas, sticky lots-of-other-things that shouldn't be sticky happens while making curtains. Use your moist wipes frequently to remove the glue.
Sticky tables, sticky fingers, sticky sofas, sticky lots-of-other-things that shouldn't be sticky happens while making curtains. Use your moist wipes frequently to remove the glue.
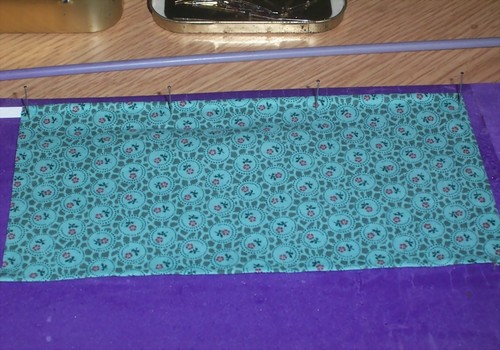
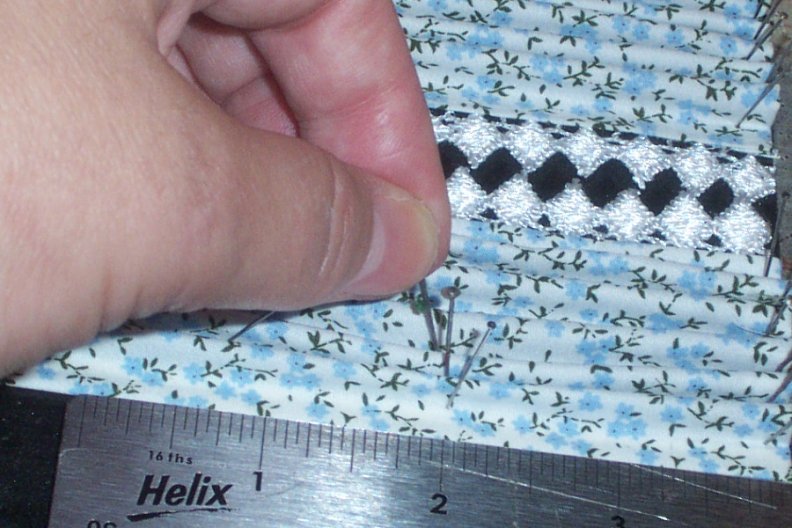
 6. Next, gather your foam pad, knitting needle and pins to prepare for pleating. First, pin your first curtain to the pad along the card stiffened edge. At the inner edge of the card so that you have a flat section at the outer edge. I usually use four pins and recommend you use as few pins as you feel you can get away with. You will need at least one at the top edge and one at the bottom hem.
Enlarge picture showing how to begin pleating
 7. Slip your knitting needle beneath the fabric and butt it up against the line of pins.
Enlarge picture showing how where to place the knitting needle
Q&A
Q: Is there a certain size that the needle should be or does the size we want our pleats indicate what size needle we should use
A: The pleat size determines your needle size. I recommend not trying to get your pleats too small. If you take a look at all my curtains they only ever have five or six pleats in each.
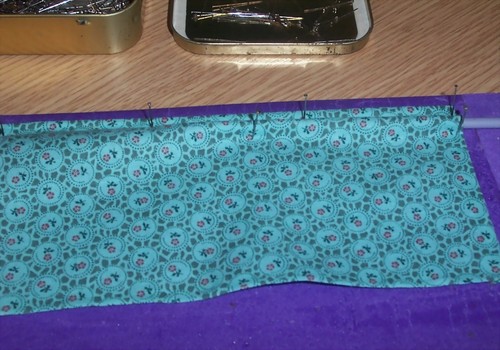
 8. Push the fabric up to form a fold over the needle and pin it in place close against the needle.
Enlarge picture showing how to push the fabric over the knitting needle
TIP
Use a pin to pull your fabric into place over the needle. It works better than a finger and you can see what you're doing. Plus, as soon as the fabric is in place you can use the pin to fix it to the pad. I use about 3 pins per fold, but if you don't feel confident with that few, use more. A lot will depend on your fabric and I've been known to use more on occasion.
Work one curtain at a time, but make sure you end up with the same number of pleats' (folds) in each.
 9. When you have the first fold pinned in place, slide out the knitting needle and slip it under the fabric again, butting it up against your new line of pins. Form another fold, as you did the first time. Then continue the same steps, until you have all your fabric pleated. Repeat with the second curtain.
Enlarge picture showing the second pleat
Q&A
Q: Does this method make the cloth dry hard or will it be movable?
A: It will depend to a large extent on your fabric. Silk will come out as stiff as cardboard. Cotton will vary. Fabrics with a high man-made fibre content are the most difficult and in some cases impossible. Silk is one of the few fabrics I've found that doesn't seem to spread open after a while. So it's ideal if you want to make straight curtains. The best fabrics are cotton and silk or fabrics with a high percentage of either.
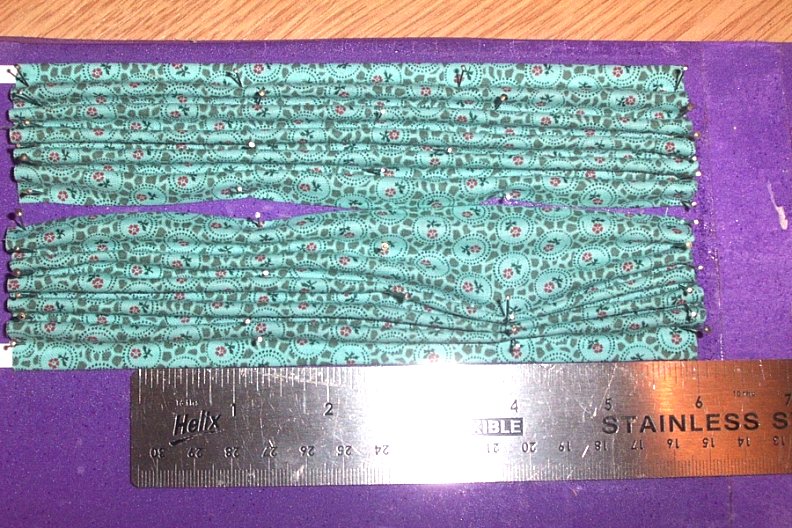
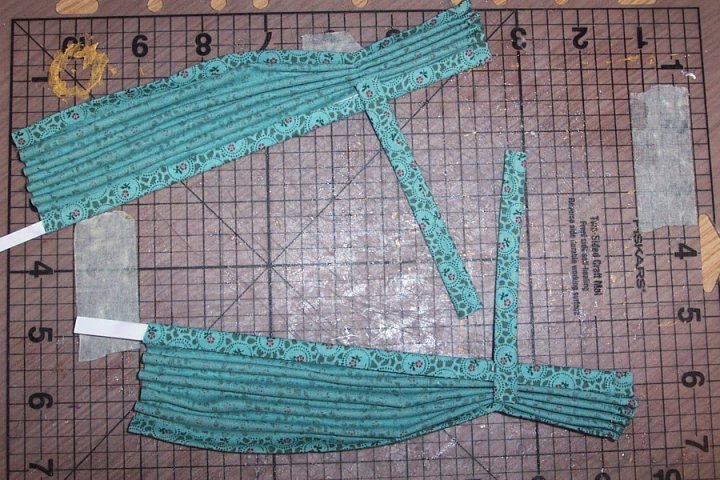
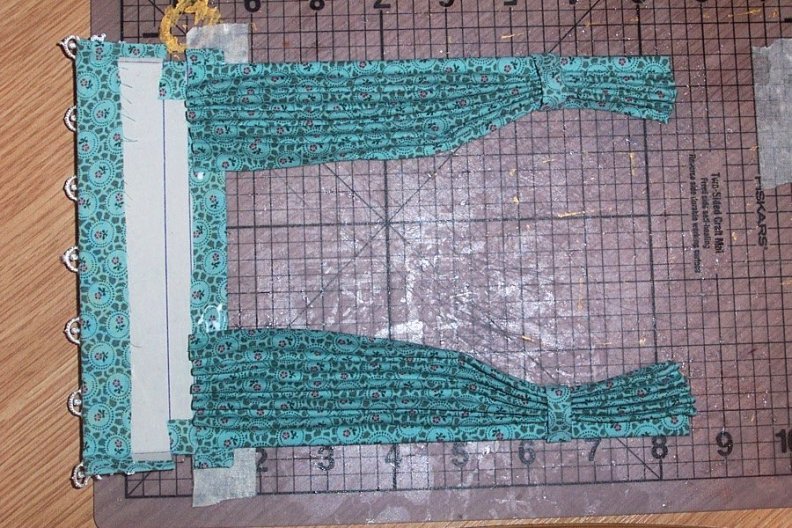
 10. Both curtains have been pleated now.
Enlarge picture showing completed pleats
TIP
You can stop here if you want a straight pair of curtains. Spray your curtains with hairspray and set them aside to dry. Make sure the curtains are good and wet.
If you want tie backs for your curtains continue with the next steps. I recommend using the tie back method as lots of fabrics will spread after hanging a while, leaving you with curtains wider at the hem than at the top.
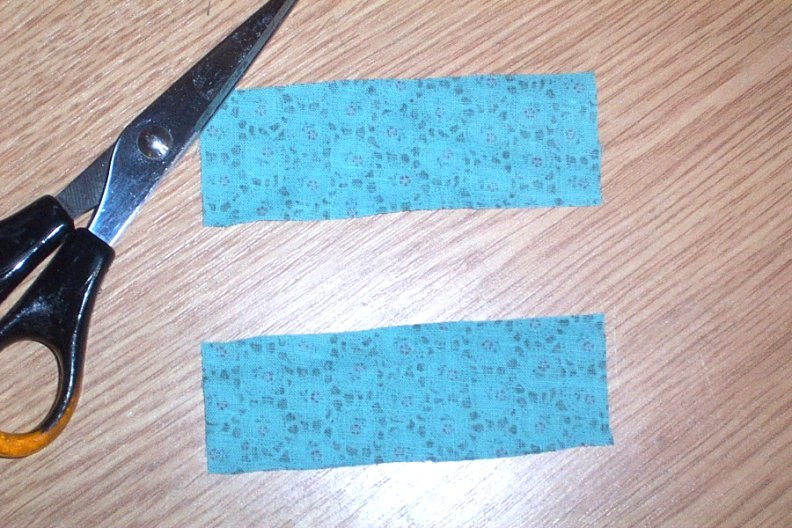
 11. To make the tie backs cut two strips of fabric 3"long by ½" wide.
Enlarge picture showing size of fabric for tie backs
 12. Turn in one side of the length and make a hem. Glue along the edge, press down, then glue to the opposite side.
Enlarge picture showing where to fold the hem line
 13. You should end up with two long strips about half an inch wide.
Enlarge picture showing tie backs
 14. Measure up your curtains at the card edged side, somewhere between 2½" and 1" from the bottom hem. The longer the curtain you are making, the greater the distance. I would use 2½ inches for an 8½ inch long curtain and 1 inch for a 5½ inch curtain. Mark this point by pushing a pin through the fabric and into the foam pad.
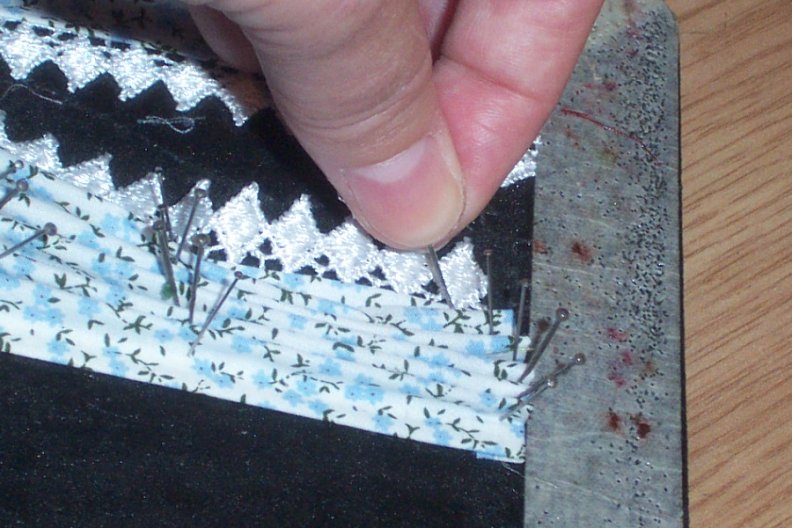
Mark both curtains this way at the same time. This way you ensure they are both the same. This step is difficult, so be patient with yourself. Using a pin, gently push the fold nearest your card edge towards the pin you've just placed and pin it in position close against the card. Repeat this with the second pleat.
Enlarge picture showing how to begin pleating
 15. You cannot move more pleats up close unless you remove some of the pins now. From the hem and possibly from further up too. Try not to remove any pins above your tie back if you can help it. Carefully remove the remaining pins between your tie back area and the hem. If you're very careful about it the folds will still be visible so that you can then drag them up to the edge of the curtain at the tie back mark too.
Enlarge picture showing how to make the second pleat
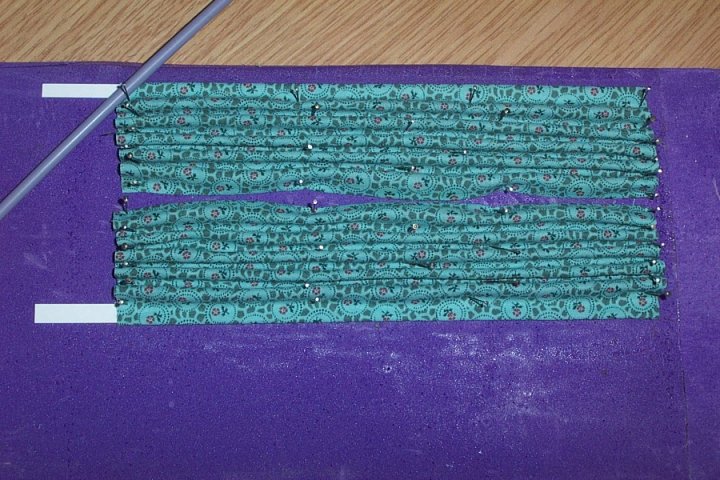
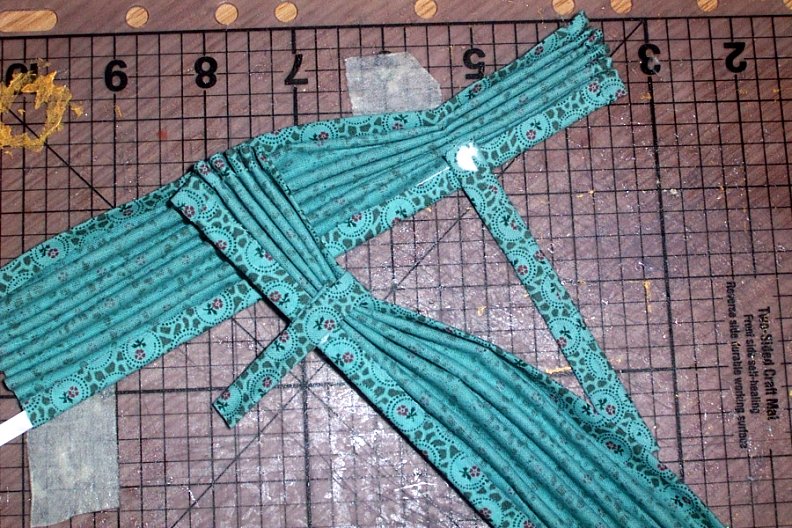
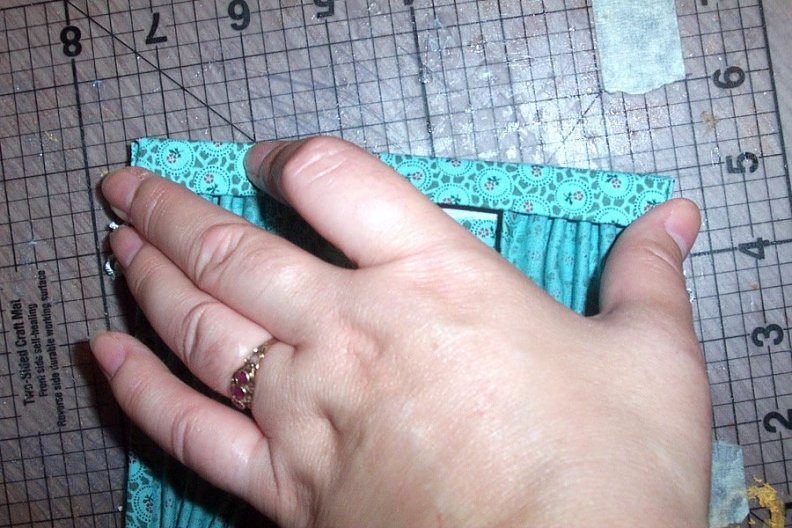
 16. This will leave you with a fan like section below your tie back. Carefully drag the folds back so that they lie parallel to the card edge and pin them in place. Continue with pleating.
Enlarge picture showing the set-up for the second pleat
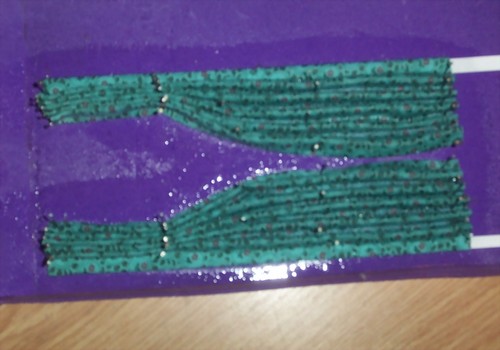
 17. You should now have two very realistic looking pleated curtains and the last step is easy. Using your can of hairspray, spray them thoroughly. Now you just lay them on one side to dry and bring them back with you next week. Don't unpin them in the meantime.
Enlarge picture showing hairsprayed pleats
TIP
Saturate the curtain pleats with hairspray heavily, make sure they are good and wet.
Saturate the curtain pleats with hairspray heavily, make sure they are good and wet.
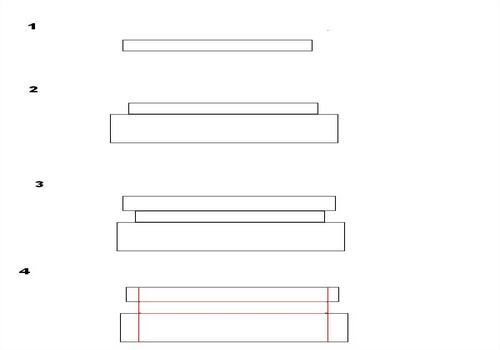
 18. Next comes the pelmet. Measure your window width. If you are using decorative architrave include that in the measurements; then add half an inch. The extra half-inch is to ensure there is an overlap of ¼ inch each side of the window, just as you would if you were dressing a full size window. Now draw a rectangle the length you have just calculated and 3/8 inch deep.
Diagram 2 on the pattern, draw another rectangle, attached BELOW the first one. This should be one inch deep and extend 3/8 inch wider at either end than the first rectangle you drew. Diagram 3 on the pattern, draw another rectangle, this should be half an inch deep and extend 2/8 inch wider at either end than the first rectangle you drew. Take a look at diagram 4, score along the lines (marked in red on diagram). Cut out your shape. Fold all the score lines inward then flatten them again. This is your basic curtain pelmet shape. The front of the pelmet is the bottom rectangle.
Enlarge picture showing pelmet diagrams
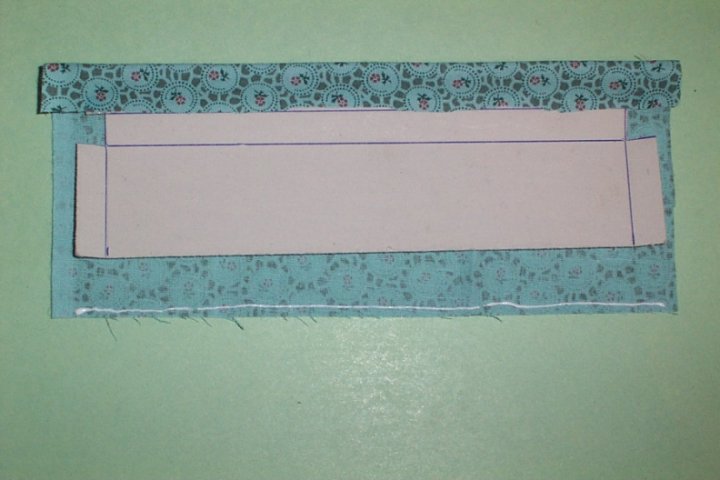
 19. Now you need to cover the pelmet you just made. Cut a rectangle of fabric the same size as your pelmet, plus ¼ inch all around, then lay face down. Spread glue along one long edge of your fabric and fold it in.
Enlarge picture showing fabric cut for pelmet
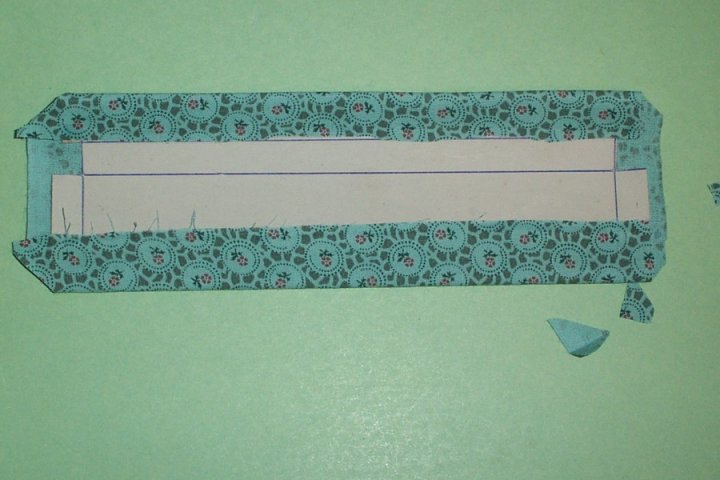
 20. Fold the other edge of your fabric over the pelmet and glue in place to give a nice neat edge. Snip the excess fabric at the pelmet corners diagonally to reduce the bulk.
Enlarge picture showing other hem
 21. Snip in from the edge of the fabric to the center rectangle of your card pelmet at both edges of the indentation. Fold that fabric in and glue in place.
Enlarge picture showing where to fold the fabric
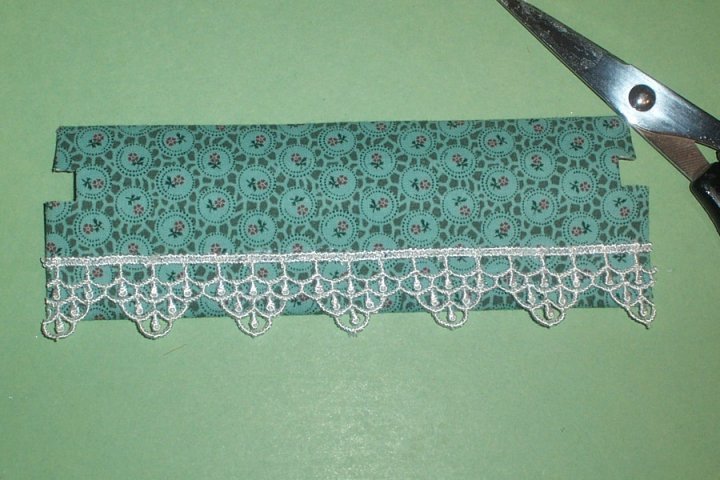
 22. Fold in all the remaining raw edges and glue in place. You have now completely covered your pelmet. Decorate the front pelmet (the largest rectangle) with braid or lace. Whatever takes your fancy.
Enlarge picture showing the remaining edges being folded
 23. Turn your curtains right side down. Attach a tie back to each curtain (as shown) with a dab of glue at the card side. Make sure you have the right side of the tie back facing you.
Enlarge picture showing where to attach one end of the tie back
 24. When the glue is dry, wrap the tie back around the curtain from front to back and glue in place on itself at the stiffened outside edge of your curtain. Attaching the tie back at a slight downward angle for a realistic look. Snip off any excess fabric. Let dry.
Enlarge picture showing where to place the tie back in the front
 25. Now bring in your pelmet and lay it face down. Snip off any excess card left at the top of each curtain. Spread glue on the inside back edge of the pelmet. On the inside of the rectangle that you have not decorated. Only put glue where you're going to attach the curtain.
Enlarge picture showing where to apply glue for pelmet
 26. Press the curtains into place on the glue. Only press down in the valleys of the folds or you will squash your pleats flat. If your fingers are too large to get in the valleys, use the flat of your knitting needle or the flat of a pair of tweezers to press. Make sure you get the curtains edges at right angles to the pelmet. Let dry. Once dry, apply glue on the outside face of the back side pelmet tabs.
Enlarge picture showing how to attach the pelmet
TIP
I use a pre-gridded craft board to make sure I get proper right angles, you can 'eye it' or simply mark the right angle on a card with a pen or tape.
I use a pre-gridded craft board to make sure I get proper right angles, you can 'eye it' or simply mark the right angle on a card with a pen or tape.
 27. Fold your pelmet forward, affix the side tabs of the front to the side tabs of the back. This will form a little box pelmet.
Enlarge picture showing how to affix the side tabs to the pelmet
 28. Flip over, gently press down the front of the pelmet.
Enlarge picture showing how to secure the front pelmet
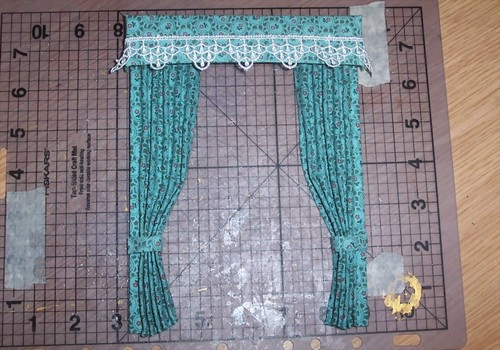
 29. Your curtains are now finished.
Enlarge picture showing completed curtains
MEET THE ARTIST
 Artist Vanessa Parry is a self-taught artist, doing business as Elwendell Miniatures in the UK.
Vanessa says, "I am relatively new to miniature work, having started to decorate my first adult dolls house only about four years ago.
"Like most dolls house makers, I consider the making of things to go into my house much more fun than going out and buying them. So when I came to look for curtains to dress my house, I decided to make my own. Having been quite successful I began to wonder if making and selling curtains would help fund my new dolls house hobby and that led me to selling online. I now turn my hand to many little miniature items for dolls houses, from tiny books to dressed Tudor beds, and enjoy creating them very much".
Vanessa is a valued member of CDHM Forum. Visit the Galleries today.
Artist Vanessa Parry is a self-taught artist, doing business as Elwendell Miniatures in the UK.
Vanessa says, "I am relatively new to miniature work, having started to decorate my first adult dolls house only about four years ago.
"Like most dolls house makers, I consider the making of things to go into my house much more fun than going out and buying them. So when I came to look for curtains to dress my house, I decided to make my own. Having been quite successful I began to wonder if making and selling curtains would help fund my new dolls house hobby and that led me to selling online. I now turn my hand to many little miniature items for dolls houses, from tiny books to dressed Tudor beds, and enjoy creating them very much".
Vanessa is a valued member of CDHM Forum. Visit the Galleries today.
© 2008-2012 Vanessa Parry and CDHM.org
Reproduced with permission from Vanessa Parry. All photographs and text appearing in this tutorial are the exclusive property of Vanessa Parry. Permission is explicitly denied for any republication of text or photographs in this article without the prior express written consent of the author.