


Learn To Make
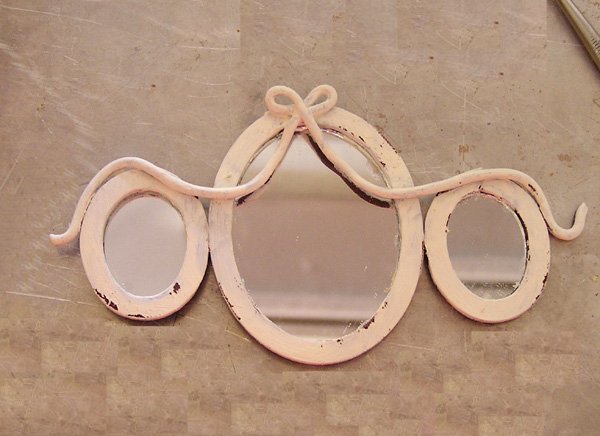
Shabby Tri-Mirror with Ribbon
by Heidi Ashworth
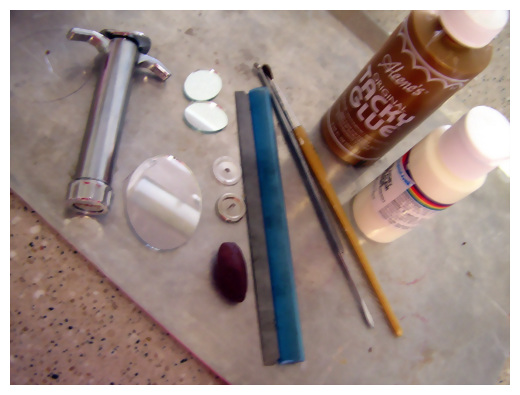
Materials Needed
- One Two-Inch Oval Mirror
- Two One-Inch Oval Mirrors
- Brown Polymer Clay
- Cream or Off White Acrylic Paint
- Fine Sand Paper
- Clay Extruder With The Shape Discs That Come With It
- Clay Tools Such As Clay Knife And One With A Straight Edge
- Pencil
- Flat Baking Sheet
- Glue, Tacky Or Super Glue
- Paint Brush, Small
 Close-up images of materials needed
Enlarge picture of basic supply requirements
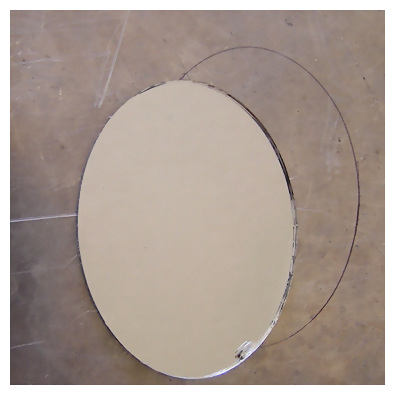
 1. Take the large mirror and trace around it onto the surface you are working on.
Enlarge picture tracing the large mirror
TIP
I use an old flat baking sheet, an air bake pan, because it doesn't have a ridge around it. However, you can use the under side of any pan you don't mind getting pen marks on.
I use an old flat baking sheet, an air bake pan, because it doesn't have a ridge around it. However, you can use the under side of any pan you don't mind getting pen marks on.
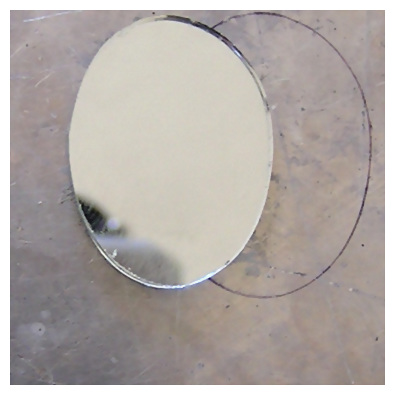
 2. Now take the two smaller mirrors, trace these in separate areas. This will be the pattern for the clay.
Enlarge picture tracing the smaller mirrors
TIP
Work and condition your clay a little before you put it in the extruder.
Work and condition your clay a little before you put it in the extruder.
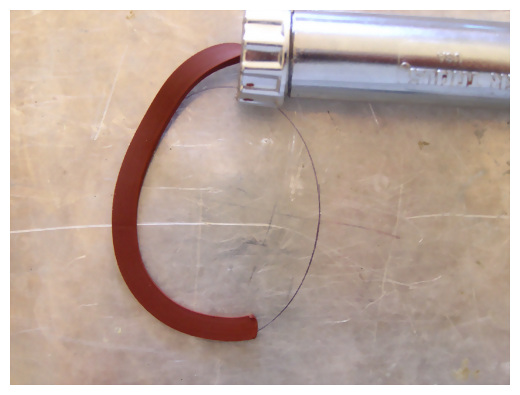
 3. Next take your brown polymer clay and press it into the extruder. I used the medium flat disk however, if you prefer, you can use the half round disk for a softer look. Extrude the polymer clay a line that is approximately enough to form it around the large pattern that you drew. Once you get your clay all around the pattern, cut the ends at an angle and smoosh the ends together. Repeat this process for the smaller patterns.
Enlarge picture showing polymer clay extrusion
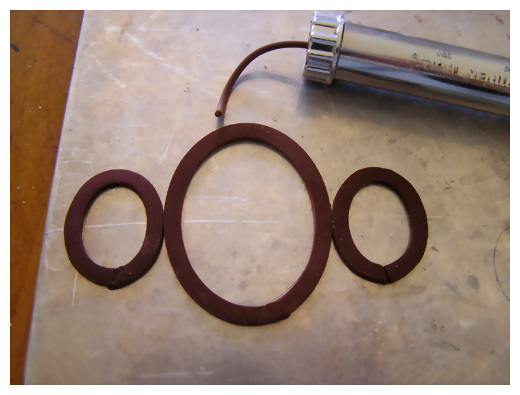
 4. After you have your large oval formed, you need to decide where the small mirrors shapes will go in juxtaposition to the large one. It is good to make the clay stick to the pan because that will keep the shape intact, especially if the clay is cold and stiff. Once the three shapes are formed, join them together and set aside.
Enlarge picture showing how to position your mirror together
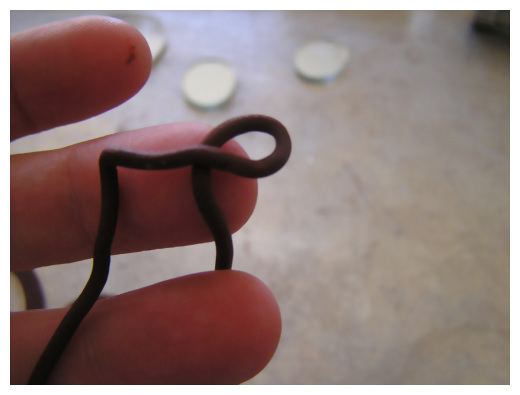
 5. Next we will move onto the ribbon being extruded and tied. Here you can use any size round dot disk you wish. A flat disk, will produce a flat ribbon look which is really pretty. I did a very simple ribbon but you can jazz it up any way you want. Extrude a piece of clay about 8" long. Begin tying the clay, in the traditional shape of a bow. Take your time, otherwise the clay will break.
Enlarge picture showing how to make the ribbon
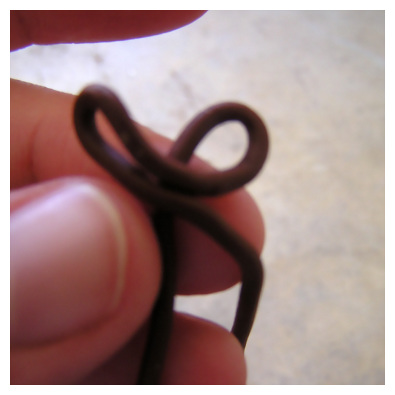
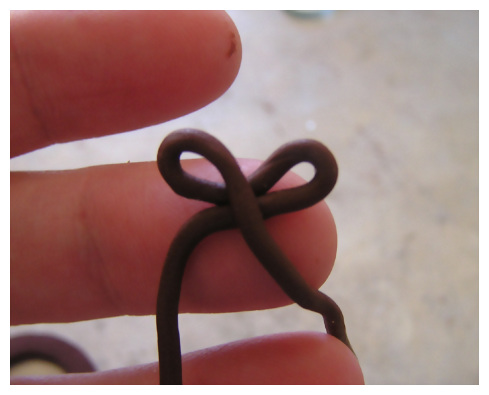
 6. Continue tying the polymer clay length into a ribbon shape, leaving long lengths to drape across the mirrors.
 Remember take it slowly so as to not break the length of clay.
Enlarge picture showing how to loop the ribbon
 7. Completed polymer clay ribbon.
Enlarge picture showing completed polymer clay ribbon
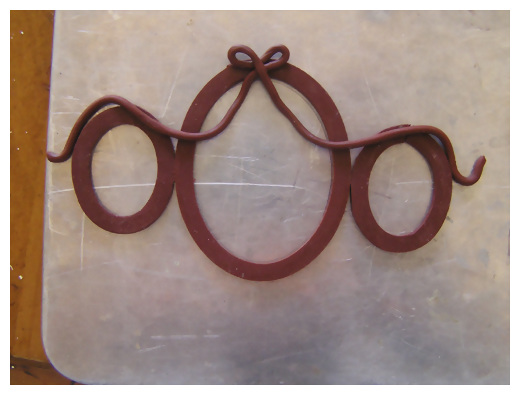
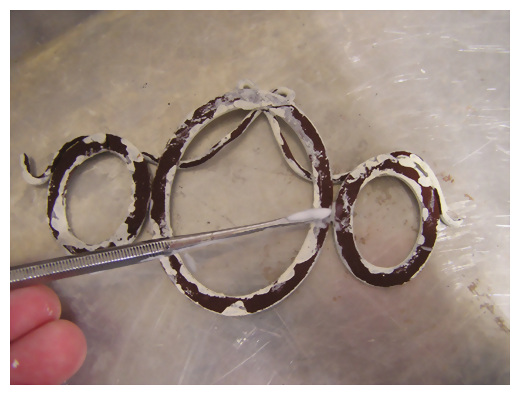
 8. Attach the completed ribbon section to the large oval frame at the top and give it a little push to adhere the clay. Drape the tail of the ribbon over the two smaller oval frames.
Enlarge picture showing how to attach the ribbon to frame
TIP
Now the fun part! Embellish your frame any way you want. You can take a clay tool and make little indentations all along the frame, either a straight line from side to side or you can use a tool that has a rounded end and make little "dents" like a mermaid fish tail affect. You can be really creative and personalize the mirror to your own style. You can make tiny flowers, tiny balls of clay, or stylize with tiny sculptures.
Check the mirrors in the frame to make sure there are no gaps. Because the clay shrinks when baked, it could have gotten too big on the inside. So, if that happened/happens, then you can extrude a small line of clay as filler. Just place the filler around the frames that have shrunk, then rebake. It is a much smaller amount of clay, so ten minutes should be the bake time.
BAKING
Bake the clay according to the directions on the package. For example, some say "bake 15 minutes for every 1/4 inch of clay". After baking, let the clay cool. Once cooled, the frame will remove easily. It is okay if the frame is flexible, the clay will continue to harden as it cools. Ideally, your three ovals and your ribbon will be stuck together still. However, they might not be so just glue them in place. In my example, I decided to use wax paper underneath as I glued and painted so that it would look nicer than my usual--the beat up old pan. DON'T use the wax paper! The paint sticks to it and makes it peel off of the frame. Use your pan if you don't care, or use a piece of cardboard or even just a piece of computer paper.
Bake the clay according to the directions on the package. For example, some say "bake 15 minutes for every 1/4 inch of clay". After baking, let the clay cool. Once cooled, the frame will remove easily. It is okay if the frame is flexible, the clay will continue to harden as it cools. Ideally, your three ovals and your ribbon will be stuck together still. However, they might not be so just glue them in place. In my example, I decided to use wax paper underneath as I glued and painted so that it would look nicer than my usual--the beat up old pan. DON'T use the wax paper! The paint sticks to it and makes it peel off of the frame. Use your pan if you don't care, or use a piece of cardboard or even just a piece of computer paper.
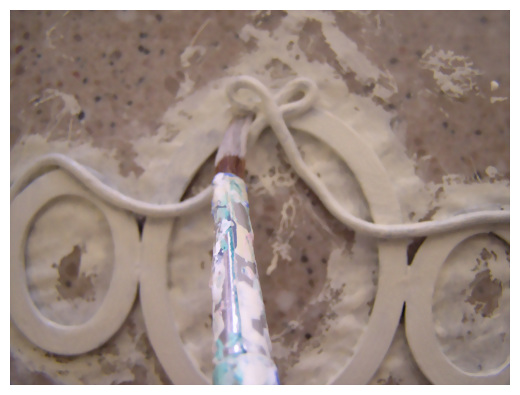
 9. Take your paint and brush and apply the first coat of paint. You will need to be sure to get the edges of the frame, inside and out, and under the ribbon.
Enlarge picture showing first layer of paint
TIP
When you are going to use the distress method, I feel that you should really paint it so that you can't see through to what is underneath. I guess that is just my personal preference--some people do distressed stuff by doing light layers of paint but my philosophy is that these distressed pieces are items that someone painted white a long time ago and that they wanted it to look nice at that time. It is only now that we cherish the distressed look because it means it is an antique, etc. So, even though I am going to just sand it off again, I paint it as many times as it takes to give it a good solid look, usually three or four layers. Of course, if you don't intend to distress, you will want to do that anyway.
When you are going to use the distress method, I feel that you should really paint it so that you can't see through to what is underneath. I guess that is just my personal preference--some people do distressed stuff by doing light layers of paint but my philosophy is that these distressed pieces are items that someone painted white a long time ago and that they wanted it to look nice at that time. It is only now that we cherish the distressed look because it means it is an antique, etc. So, even though I am going to just sand it off again, I paint it as many times as it takes to give it a good solid look, usually three or four layers. Of course, if you don't intend to distress, you will want to do that anyway.
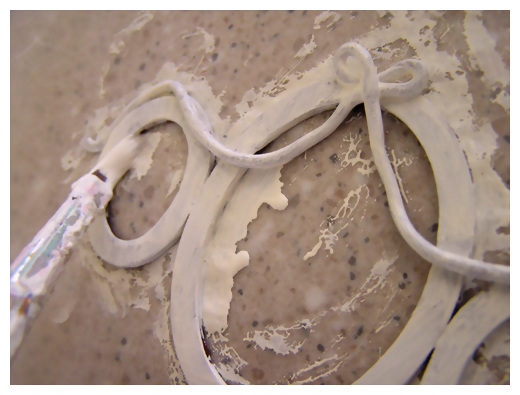
 10. Let the first coat of paint dry. Then paint again. As mentioned above, if you are using the distress method, you may want to repaint several times. In this instance, I have two coats of paint on this frame. Let dry thoroughly.
Enlarge picture showing second application of paint
 11. When the frame is completely dry, turn the frame over. You need to apply a touch of glue to the frame where each oval is touching. This will insure the bonds of the different sections. Let dry. Now you can paint or distress your frame. To distress the frame, use fine sand paper and choose areas where the item would have naturally been worn down. Once you are satisfied with the look, glue your mirrors into place. The frame is going to be bigger than the mirror so you only want to add glue to the inside edge of the frame. Not the inner edge. Let dry. If you do get glue on the mirror, you can gently scrape it off after its dried.
Enlarge picture showing where to secure the frames with glue
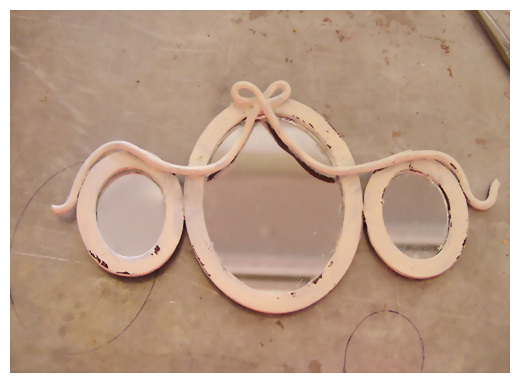
 12. Completed distressed mirror!
Enlarge picture showing completed mirror with frame
TIP
Hanging the mirror is a question I'm often asked. This is a challenge I think every miniature enthusiast faces. I have had some success with Fun Tack, but its not recommended since the mirrors are heavy. A good alternative would be to glue a tiny string from one end to the other one the mirror, just like a real life wire hanger. Then you can hang the mirror on a tiny nail in the dolls house. Also, you can glue the entire mirror to your dollhouse wall, but this is permanent.
Hanging the mirror is a question I'm often asked. This is a challenge I think every miniature enthusiast faces. I have had some success with Fun Tack, but its not recommended since the mirrors are heavy. A good alternative would be to glue a tiny string from one end to the other one the mirror, just like a real life wire hanger. Then you can hang the mirror on a tiny nail in the dolls house. Also, you can glue the entire mirror to your dollhouse wall, but this is permanent.
MEET THE ARTIST
Heidi Ashworth has been into minis for about 23 years. She comes from a family of 7 girls, who were all into dolls. Her mom had a very cute miniature Christmas scene which she always loved. When Heidi was 19, she saw a magazine for House of Miniatures furniture kits ad, and a new passion was born! She bought a dollhouse (had to have a place for the furniture, right?) and Heidi and her boyfriend built the dollhouse together. Heidi has been collecting minis off and on ever since.
Oh, Heidi and the boyfriend did marry, over 21 years ago! She started selling Chic n Shabby minis when she was trying to come up with a concept in her miniatures to sell on eBay. She combined her love of shabby chic interiors with dollhouse miniatures and a new passion was born.
Heidi is a valued member of the CDHM Forums. Visit the Galleries today.
© 2007-2012 Heidi Ashworth and CDHM.org
Reproduced with permission from Heidi Ashworth. All photographs and text appearing in this tutorial are the exclusive property of Heidi Ashworth. Permission is explicitly denied for any republication of text or photographs in this article without the prior express written consent of the author.