


Learn To Sculpt
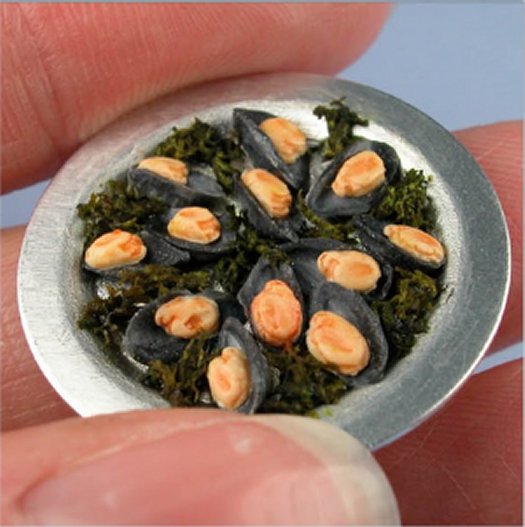
Mussels in the Shell
From Polymer Clay
with Carol Cook
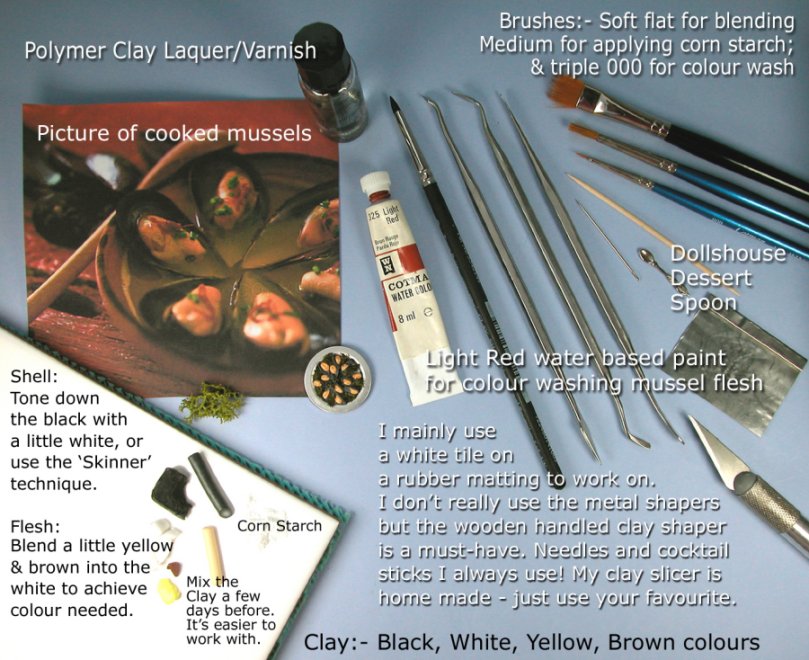
Materials Needed:
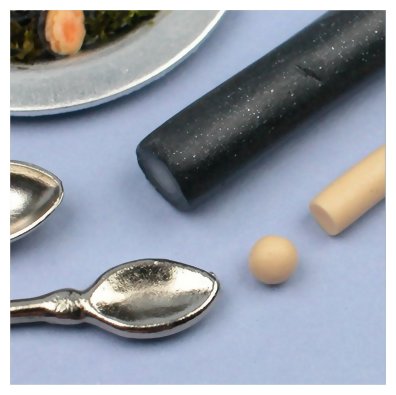
- Polymer Clay: Black, White, Yellow and Brown
- Polymer Clay Lacquer/Varnish
- Brush: Soft Flat for Blending
- Brush: Medium for Applying Corn Starch
- Brush: Triple 000 for Colour Wash
- Dollhouse Dessert Spoon
- Paint: Light Red Water Base
- White Tile with Rubber Mat
- Metal or Wooden Handled Clay Shaper
- Needles
- Cocktail Sticks
- Clay Slicer
- Image of Real Cooked Mussels-in-Shell
 Close-up images of materials needed
Enlarge picture of basic supply requirements
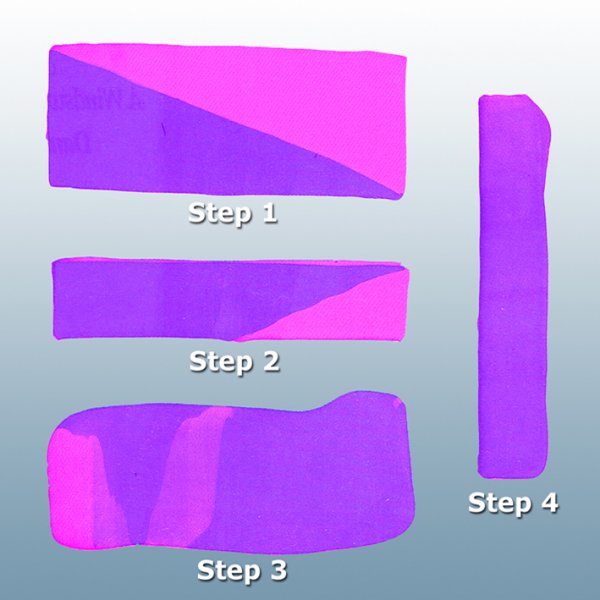
 Step 1: Make the triangles the width of the pasta machine in length and about 1� inches long. Put the triangles together for form a rectangle as shown in image. Pinch the meeting edges together.
Step 2: Fold the rectangle in half as shown in image.
Step 3: Roll it through the pasta machine by placing the fold into the machine. Bring it out of the machine and fold it in half again from the bottom edge to the top edge. Insert the fold again into the pasta machine roller and repeat this 20-25 times. Never turn your sheet and always fold from the top to the bottom.
Step 4: When the sheet is finally blended, fold the rectangle one more time and insert into the past machine on a thinner setting. For example, a machine that has 7 settings, with 1 being the thickest setting and 7 being the thinnest setting. For this final rolling I would use setting 5.
Enlarge picture showing Steps 1-4 of polymer clay canes
 Step 5: When you insert the sheet for the final roll you will pick one color end (light or dark) and roll through the pasta machine one final time. You should now have a very skinny, very long strip of clay with light color on the top and a darker color on the bottom. Lay the long strip out in front of you and roll up into a cane shape from the light end to the dark end.
Step 6: Now you will need to lengthen and reduce the cane down to a size you can use. With the cane between your first finger and thumb of both hands, start rotating and pushing with your thumbs and your pointer or first fingers.
Step 7: Start in the middle and push in the cane on all four sides and rotate it just a little. Push again from all four sides and turn again. After you have done this all the way around the middle, move up just a little and start doing it all the way around the cane again.
Step 8: Continue up the cane. Turn the cane over and start on the other half from the middle. Keep doing this until you reduce the cane to half the diameter. Step 6 shows the cane reduced to half the size in diameter.
Enlarge picture showing last steps of making polymer clay canes
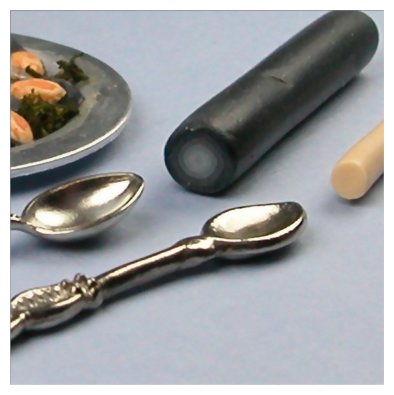
Cane Alternative
You don't have to do the 'Skinner Technique' - a simple rolled cane made up from black clay mixed with a little white to give a charcoal colour, roll down to just about fit the dolls house dessert spoon, bigger is better, as if it's too small you can't make it bigger - but - you can roll it smaller.
The flesh cane is simply white clay with a little brown and yellow to give that kind of mussel flesh tone, just keep adding a little yellow and brown at a time, until a colour you're happy with is reached.
 1. Don't forget your image of cooked mussels! Please take every care in using all craft knives during this tutorial; and any clay slicers or sharp implements.
Enlarge picture showing preparation
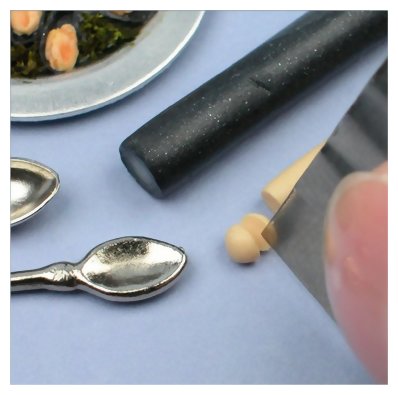
 2. Before starting on the shell, cut a small section of the cane for the 'flesh' part to try in the spoon; for a size that looks proportional. We can roll the cane again to make it smaller if it is too large.
Enlarge picture showing how to measure the cane
 3. Cut the 'flesh' ball you have just rolled (gently) into two halves with your clay slicer. It's easier to roll the slicer forward as you cut through the clay. This avoids that 'squashed' look.
Enlarge picture showing how to cut the flesh ball
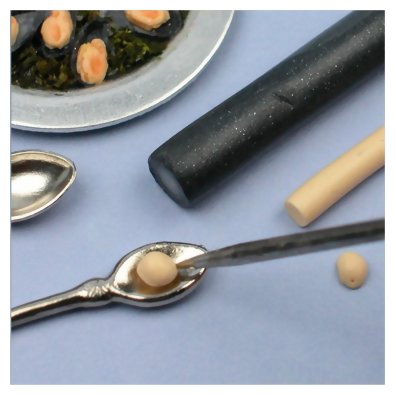
 4. Again, try in the spoon for size. Once more, roll cane again to make it smaller, if its is too large. You only need to know how to make one mussel; afterwards you can make as many as you need for display.
Enlarge picture to show how to measure the cane again
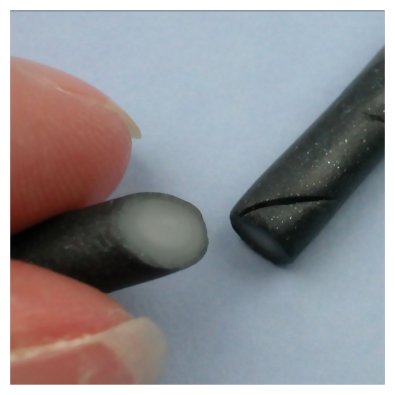
 5. Take the cane for the shell and make an incision with your slicer at 45 degrees. This doesn't have to be too accurate, we're just trying to achieve an oval shape to fit into the dolls house dessert spoon.
Enlarge picture showing how to slice the cane
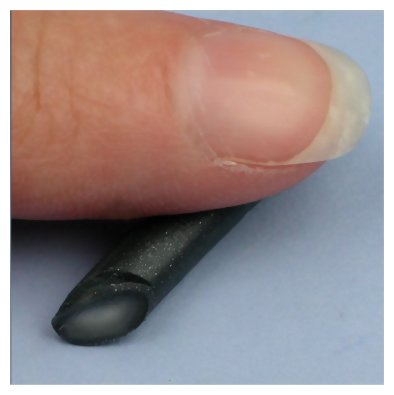
 6. If you are happy that the shape looks ok, try against the spoon for size. As with the flesh cane, roll smaller if it's way too big. Don't worry too much, as we'll be trimming off any excess to fit the spoon.
Enlarge picture of how determine size
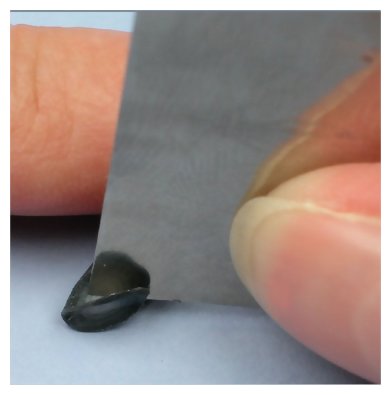
 7. Support the cane with the first finger of your left hand, so that the cane is easy to cut with your right hand. I find the cane held at that same 45 degree angle makes it easier to slice.
Enlarge picture showing additional cutting of cane
 8. Cut fine slices, approximately the greeting card's cardboard thickness or as thin as you are confident sculpting. Cut as many as you need for your display; and a few more over for accidents! For now though, you only need one.
Enlarge picture showing additional slicing
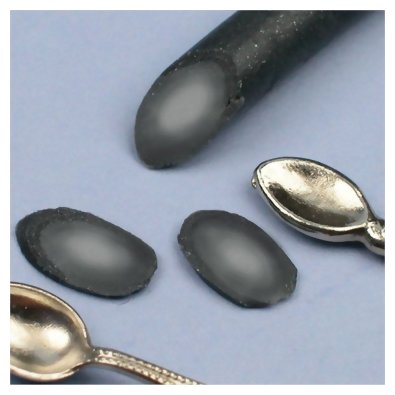
 9. You should have a lovely oval shape now! I as mentioned, you only need one slice at this stage. You can lay it at the side of the dolls house dessert spoon you are using to see your great work so far!
Enlarge picture showing the Skinner method of cane slicing
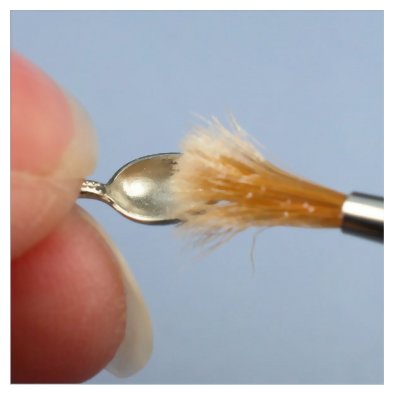
 10. Next, take an old small very dry paintbrush; lightly dust with cornstarch, blowing away any excess. This is going to allow you to 'release' the shell when you have finished sculpting and the clay will not stick to the spoon.
Enlarge picture showing how to dry brush spoon
 11. Pick up the clay slice with your 'needle' type tool and place into the spoon. This is a tricky bit! If you can't get the slice to stay put, hold the spoon with your thumb & second finger, whilst holding the edge of the clay slice with your first finger. Another way to do this would be to put the spoon down, place the clay slice into the spoon, then gently press into position.
Enlarge picture to show how to place the clay onto the spoon
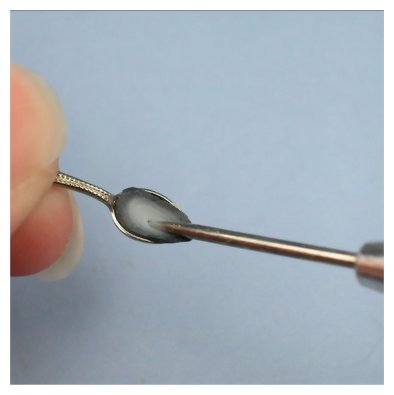
 12. Use your clay shaper to press clay into the spoon. Don't worry about excess, it'll be trimmed. Smooth any dents in the clay's surface gently!
Enlarge picture to show how to use the clay shaper
 13. Please be careful with this next step!
Using your chosen craft knife, trim off any excess, like you are trimming the pastry off a pie plate or dish. Please watch your fingers though!
Enlarge picture to show how to trim off the excess clay
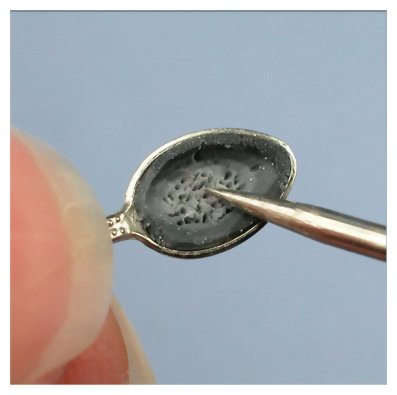
 14. Using your needle type tool, gently 'key' the surface to enable a better adhesion for the mussel flesh. Don't worry about marks showing, you can pat them back down with the clay shaper after the flesh is in.
Enlarge picture showing how to use the needle tool
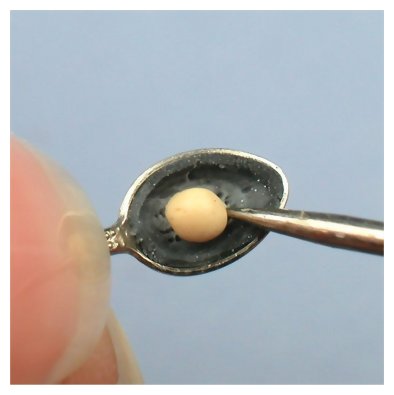
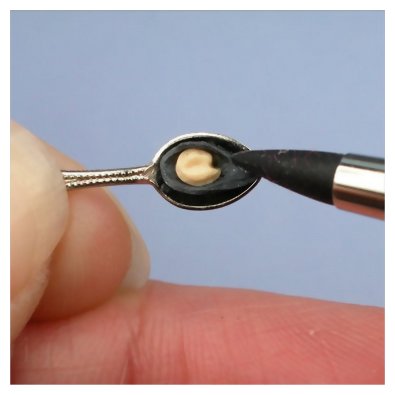
 15. Using your needle tool gently pick up the 'fleshy' dome of clay on the outside edge. Place the fleshy ball into a position that looks ok (see image). Press as you place it so that it adheres a little section into the shell part of the clay.
Enlarge picture showing where to place the fleshy clay ball
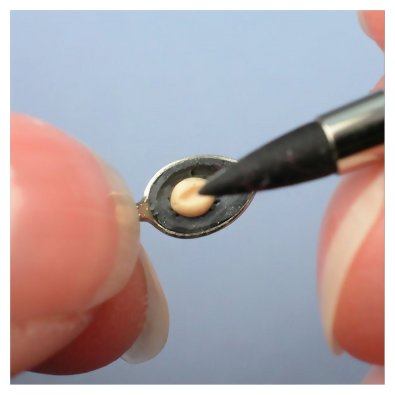
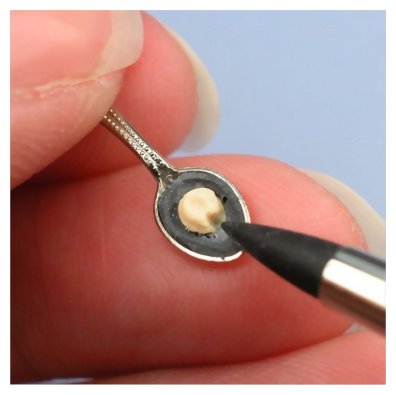
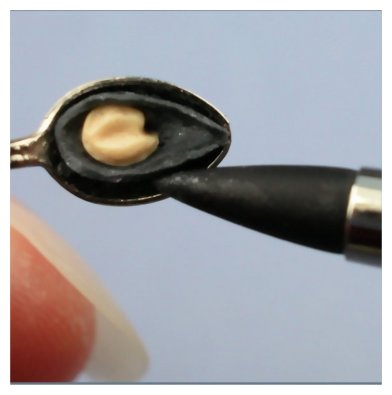
 16. Using your clay shaper, gently press an indentation as shown in the image, with the tip of your tool. This will also adhere both pieces.
Enlarge picture to show how to make the indentation in the middle
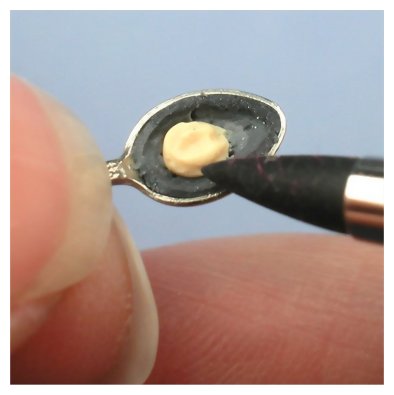
 17. Continue using your clay shaper, gently press indentations in a line close to the base of the flesh part as shown, all the way around. Go to as much detail as you wish, looking at your cooked mussels (real life) image as a guide.
Enlarge picture to show how to make the indentation in the base
TIP
Support the fingers of your right hand on the fingers of the your left hand as you work. This keeps you from working in mid-air. Rest the spoon on your middle finger!
Support the fingers of your right hand on the fingers of the your left hand as you work. This keeps you from working in mid-air. Rest the spoon on your middle finger!
 18. Place an indent into the fleshy ball as shown. You choose how much detail you want to include. After you've trimmed the 'excess shell' as noted previously and when you feel confident enough, you can make it thinner on its outer edge - just experiment!
Enlarge picture to show how to indent and trim
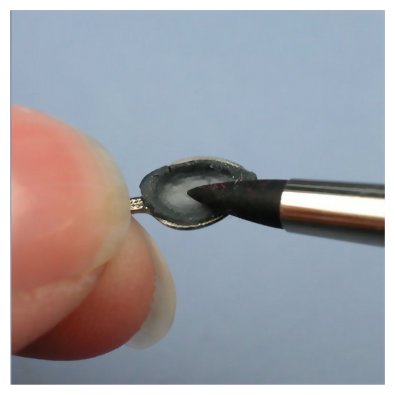
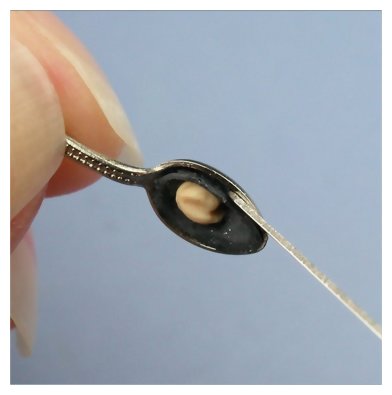
 19. The next stage can be a little tricky! Just take your time. Ease the very edge of the craft knife along the outer edge of the clay shell, moving gently. A little at a time, all the way around the spoon. Keep repeating this process.
Enlarge picture to show how to use the craft knife around the shell
Q&A
Q: I may have sliced my shell too thin; or maybe I pressed it a bit too much to the spoon.
It looks like it's not going to come out of the spoon easily.
A: When you ease the shell out of the spoon - just do a little, little bit at a time - you'll see in a while,
it's just a tricky bit that you need to move slowly on.
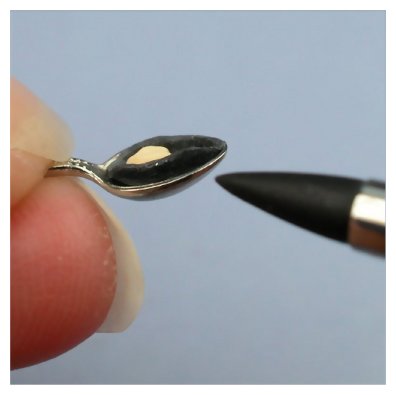
 20. As you repeat easing your craft knife around the edge of the spoon, slowly go further towards the hollow of the spoon. The shell will eventually begin to take shape. Don't release it from the spoon at this stage though.
Enlarge picture to show how to use the craft knife further towards the center
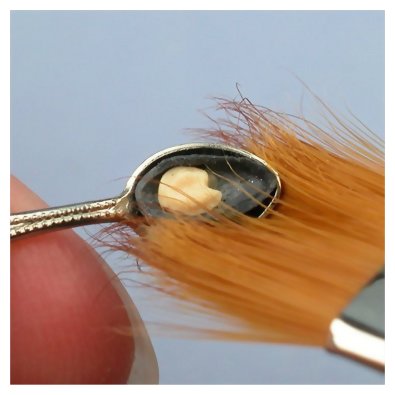
 21. You can also use your soft, flat paintbrush at this stage to gently blend the edges of the shell and flesh. Blend from the outside edge inwards, but remember go gently. You can spoil the shape of the shell if you rush.
Enlarge picture showing the use of the paintbrush
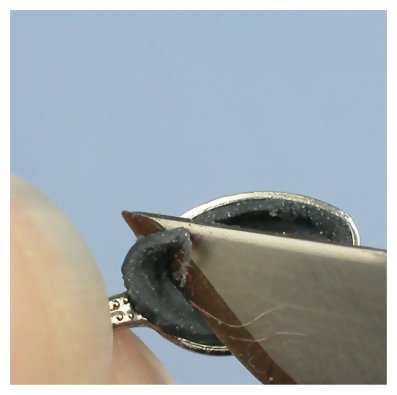
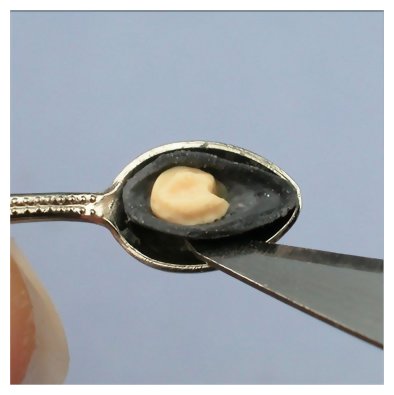
 22. Where you ran the craft knife along the edges, you can now use the clay shaper to achieve a realistic shape to the shell by nudging the outer edges of the shell inwards; leaving the 'point' part in the same position.
Enlarge picture to show how to nudge the outer edges
 23. As you can see in the image, the clay shaper is the perfect tool! Keep on gently shaping the shell - you can also softly blend as you go with the soft flat brush, until you have achieved a result you are happy with. Practice makes perfect!
Enlarge picture to show how use the shaper tool
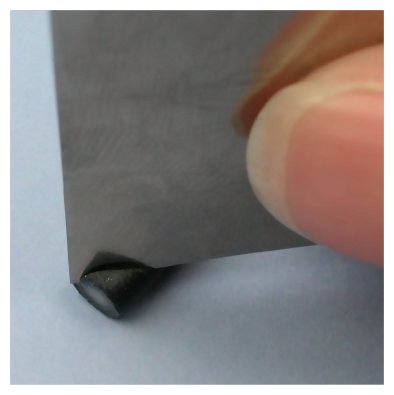
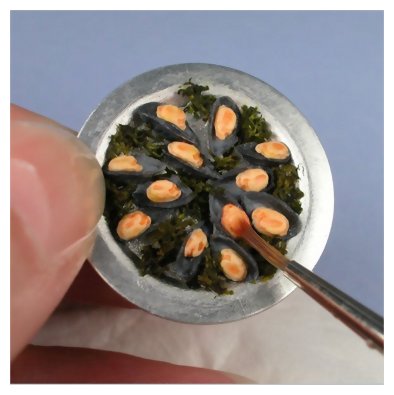
 24. You can now delicately start to ease the little shell from the spoon, going from each side of the spoon. A little at a time, you'll feel it coming away from the spoon. Don't be scared now! Relax!
Enlarge picture to show how to remove the shell from the spoon
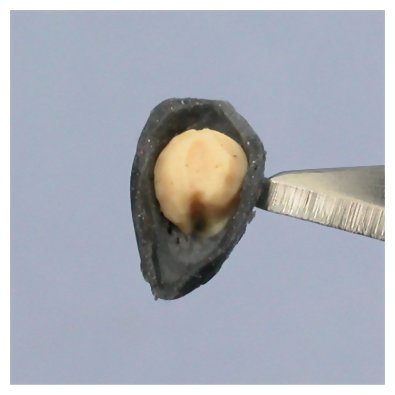
 25. Take your craft knife and push the point of it into the very base of the shell to "grab" the whole mussel in its shell.
Enlarge picture to show how to use the craft knife on the shell
 26. There it is! Keep repeating the stages until you have enough mussels for your display! After the tutorial has finished though.
Enlarge picture to show how to continue using the craft knife on the shell
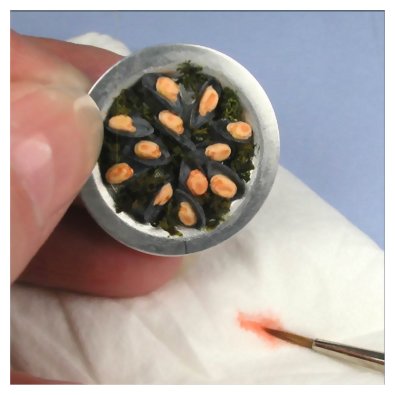
 27. This image shows mussels arranged in a platter that are ready for baking. You have to bake the clay before you are able to complete the final stages of colour washing. So bake the clay according to the package instructions!
Enlarge picture to show stage before baking
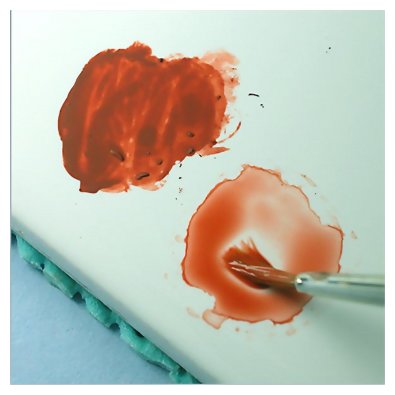
 28. Take a very small amount of your chosen light red water colour paint and mix with water. Load the brush with the mix and 'dot' on a paint palette. Continue adding water until the red is very watery.
Enlarge picture to show how colour wash
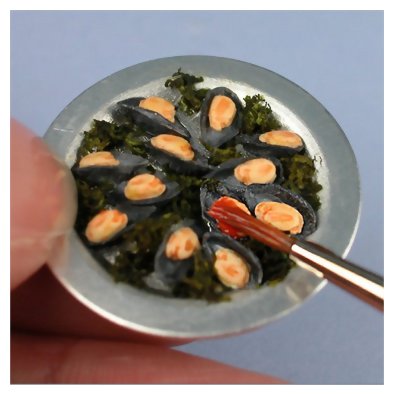
 29. Rinse the smallest brush with water. Load the brush with the red colour wash you've just prepared. Brush over the flesh part of the mussel. If there's too much paint, rinse the brush in water, dry excess water on a towel or tissue then gently put the tip of the bristles back into the paint. This will effectively blot the excess colour wash away.
Enlarge picture showing additional colour washing
 30. Repeat the process on each flesh part of the mussel.
Enlarge picture showing further colour washing of all mussels
TIP
Remember that the paint needs to be really watered down - if it's too watery - let it dry after blotting on the 'flesh'; and add another thick coat - or - just add a teeny bit more paint to the water before painting - test it on the tile before applying to the fleshy bit - remember it'll be a different colour effect too on the flesh colour than on pure white. Just keep testing it until you're confident with it.
Remember that the paint needs to be really watered down - if it's too watery - let it dry after blotting on the 'flesh'; and add another thick coat - or - just add a teeny bit more paint to the water before painting - test it on the tile before applying to the fleshy bit - remember it'll be a different colour effect too on the flesh colour than on pure white. Just keep testing it until you're confident with it.
 31. Keep repeating the steps above until all your fleshy bits are all beautifully colour washed. Remember, if too much paint goes on, rinse and dry the brush, put the brush tip back into the paint and lightly blot.
Let the colour washed mussels dry, overnight or as long as your patience will allow. Then you can seal them with a good polymer clay sealer that matches the clay you have used.
Enlarge picture to show last touches of colour
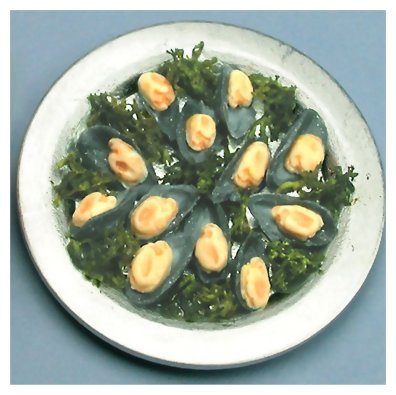
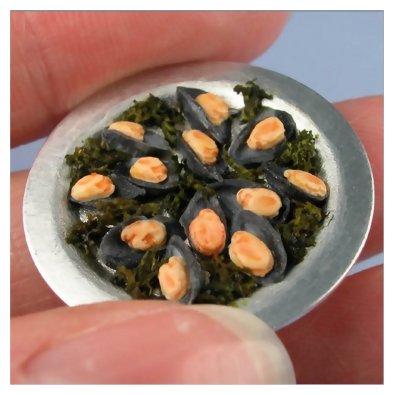
 32. Completed mussels on platter! You can garnish with 'reindeer moss' (mine is called Wink Choice) or any other garnish of your choice.
Enlarge picture to show completed platter of mussels
MEET THE ARTIST
 Carol Cook was born a gifted artist, sculpting and model making since childhood. Enthralled by miniatures in everyday items, unknowingly the seeds were already being sown for a future passion in 1:12 scale dolls house collectibles, says Carol. The 'arty' career followed, then 10 years ago, Carol began scale miniatures. Carol creates exquisite detailing with truly realistic flair in all her creations. Each piece is signed for authenticity.
Carol is a valued member of the CDHM Food Forum. Visit the Galleries today.
Carol Cook was born a gifted artist, sculpting and model making since childhood. Enthralled by miniatures in everyday items, unknowingly the seeds were already being sown for a future passion in 1:12 scale dolls house collectibles, says Carol. The 'arty' career followed, then 10 years ago, Carol began scale miniatures. Carol creates exquisite detailing with truly realistic flair in all her creations. Each piece is signed for authenticity.
Carol is a valued member of the CDHM Food Forum. Visit the Galleries today.
© 2007-2012 Carol Cook Askham and CDHM.org
Reproduced with permission from Carol Cook Askham. All photographs and text appearing in this tutorial are the exclusive property of Carol Cook Askham. Permission is explicitly denied for any republication of text or photographs in this article without the prior express written consent of the author.