


Learn To Make A
Three Layer Wedding Cake
in 1:12 Scale
Vicki Sharkey
MATERIALS
- Polymer Clay
- White
- Translucent
- Leaf Green
- Chosen Colour For Flowers - Cutters
- Mini tear drop cutter OR mini rose leaf paper punch
- Blossom Cutter, � inch
- Blossom Cutter, 1/8 inch
- Round Cutters For Cake Layers - 3 Sizes, (Maximum about 1 inch (represents 12 inch cake) - Razor Blade
- Rolling Pin
- Sewing Needle
- Talcum Powder Or Corn Flour
- Ball Tool, Small
- Trim For Cake (Ribbon, Mini Pearls, Beads, Etc
- Tacky Glue
- Silver Card
- Scissors
- Pencil
- Tile For Baking On
- Optional: Stamens, Matte Finish In Toning Colour Or White/Cream
PREPARATION FOR BASIC CAKE LAYERS
This tutorial is for a round cake, although you can make a hexagonal shape if you prefer.
Mix together half and half amounts of white and translucent polymer clay. You will also need this half and half mix later on so make plenty. Choose your cake color in ivory or any colour you desire, just use the same ratio of colour to translucent.
Roll out to a thickness of �" (approximately 1cm). Cut out the three layers for your wedding cake and smooth the sides, if necessary. You can model the layers freehand if you wish.
Bake according to manufacturers instructions. Set aside.
 Close-up images of materials needed
Enlarge picture of basic supply requirements
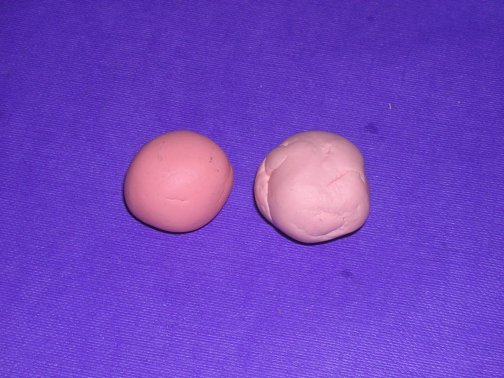
 1. Blend a 1 inch ball of translucent polymer clay with a 1 inch ball of white polymer clay. Then begin adding small amounts of your chosen colour. Mix well, until you reach the shade you want. At this stage you can decide if you want to do two-tone roses, (pale colours look great like this) or not (better for dark colours like red). For two-tone roses take half of this ball of clay and combine it with the same amount of half and half white, plus translucent clay to make a paler shade of the same colour. Put the two shades next to each other to check they are what you want.
Enlarge picture showing clay mixtures
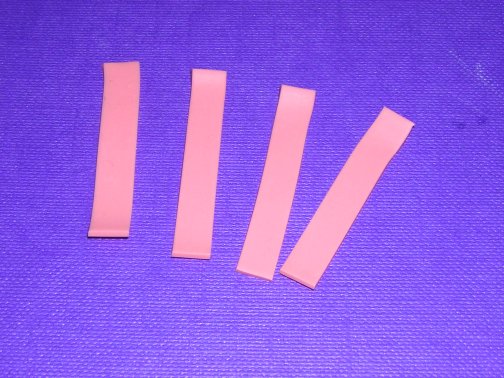
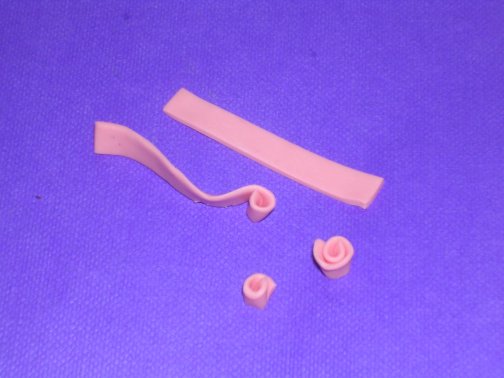
 2. Take a piece of the darker toned clay and roll it out very thinly. Cut a strip of the flattened clay with the razor blade about 3/8 inch wide (4mm). The strip needs to be about 1 inch (2.5mm)long.
Enlarge picture showing how to prepare and cut first strip
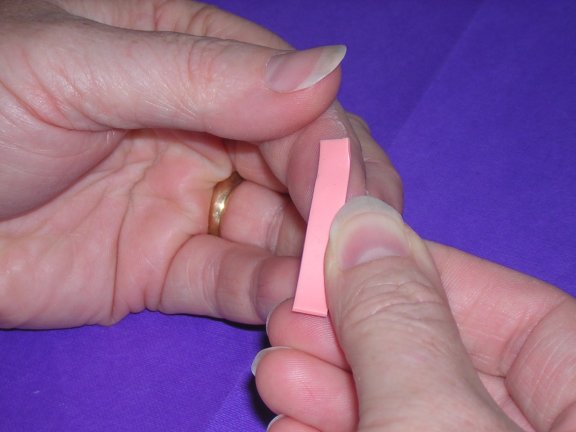
 3. Pick up the strip and soften one long edge between your fingers by squeezing gently. It might make it fan out a little, but thats fine.
Enlarge picture showing how to condition the clay
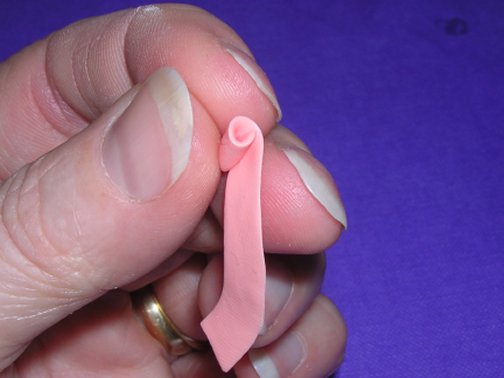
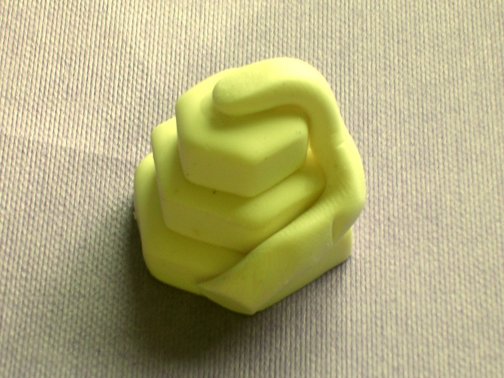
 4. Take one short end and roll it up loosely. This is the beginning of the rose.
Enlarge picture showing how to roll the first strip
 5. For that opening rose bud look, using your razor blade, cut off from the roll after one complete turn. Squeeze the base together a little to form a point, this holds the rose together.
Enlarge picture showing how to create a rose bud
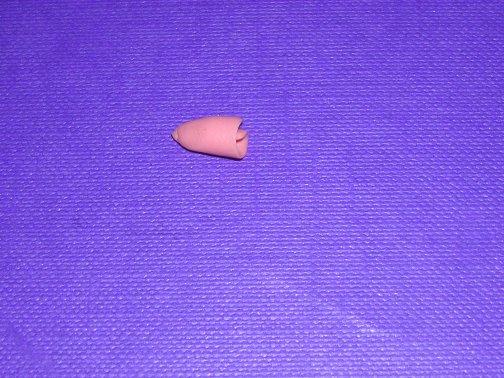
 6. Now trim off the bottom of the rose with the razor blade, so it will sit up on it�s base. Place the rose on your tile for baking. Make about ten (10) roses just like these.
Enlarge picture showing additional rose buds
TIP
You should still only be working with one color or shade of polymer clay at this stage. The lighter shade comes in later steps.
You should still only be working with one color or shade of polymer clay at this stage. The lighter shade comes in later steps.
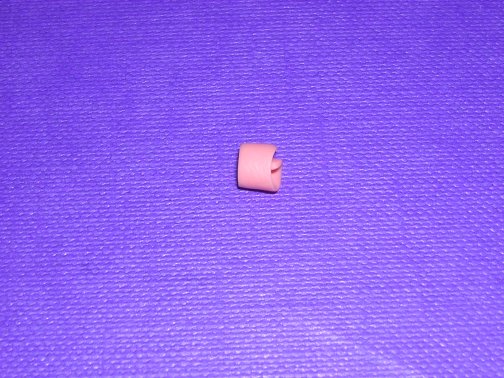
 7. For roses that appear to have bloomed or open; repeat the same steps as above, but add another half turn of clay before squeezing the base and cutting the end flat. Make about 10 of roses as well.
Enlarge picture showing how to make a rose in bloom
 8. Here are the different shapes you should have been working with to complete the rose.
Enlarge picture showing showing different sizes of polymer clay
TIP
Talc is important, it keeps the clay from getting too mushy.
Talc is important, it keeps the clay from getting too mushy.
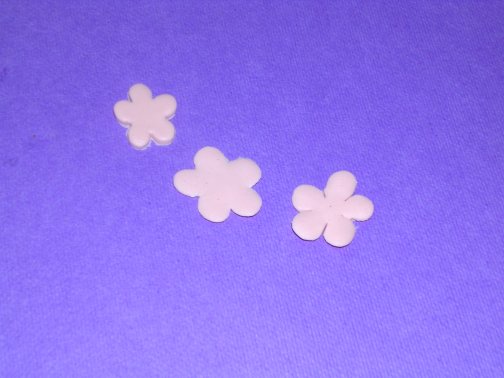
 9. Next, roll out the paler tone clay and cut out ten large flower blossoms using the 2/3" cutter. Gently squeeze the petals between talc powder with your fingers to soften the edges. Take the razor blade and make slight cuts towards the middle. This makes it easier to wrap around the middle. Repeat with all ten blossoms.
Enlarge picture showing the next color of clay
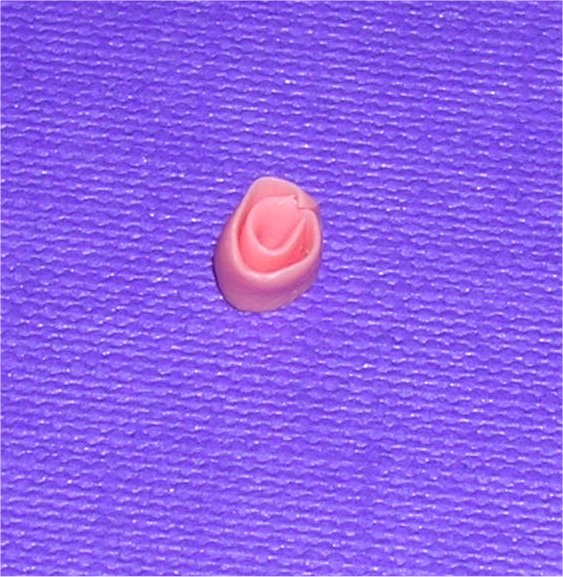
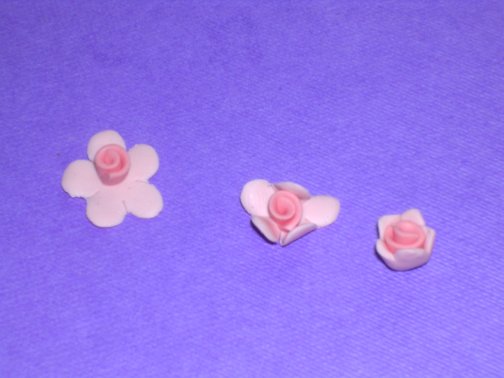
 10. Take one of the rose buds and place it in the middle of the flower you made from the cutter, above. Wrap the pale clay around the middle of the rose bud. Overlap the petals of the larger piece around the bud. Tweak the petals to make them more realistic, then squeeze the base and cut flat. Place the completed rose on the tile to bake. Set aside. If the middles are too large, you can always trim them a bit using the razor blade.
Enlarge picture showing how to place the petals
TIP
An alternative, to would be to make individual petals. In this option, you can place the petals around the middle bud. Just flatten small balls of clay between your fingers and shape petals in the shapes you like.
An alternative, to would be to make individual petals. In this option, you can place the petals around the middle bud. Just flatten small balls of clay between your fingers and shape petals in the shapes you like.
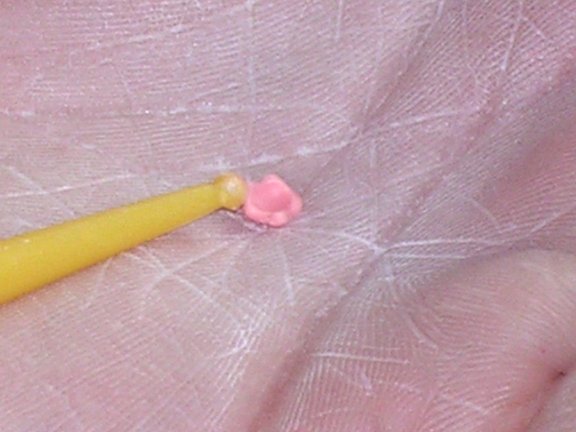
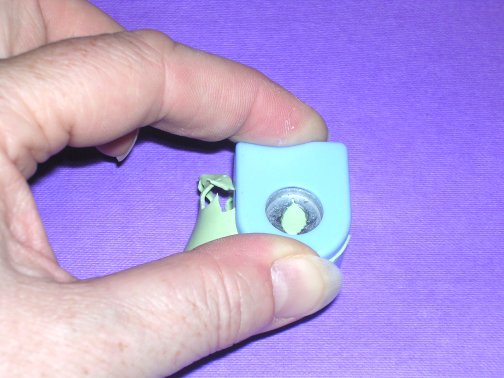
 11. Now mix a small amount of the darker and lighter shades of clay into a ball. Flatten the ball as thinly as possible. Cut out about 12 tiny blossoms, as shown. Rub some talc onto the palm of your hand and then using the ball toll tool, indent. Put one blossom into the palm of your hand and move the ball toll in a circular motion in the centre of the flower, gently. The flower should rotate and start to cup upwards. When you have achieved the look you want. Place onto the tile ready for baking. Repeat with the others.
Enlarge picture showing how to attach the petals
TIP
If you haven't used a paper punch before, it is quite easy as long as the clay is thin enough. It may stick so you could use a needle to flick it off.
If you haven't used a paper punch before, it is quite easy as long as the clay is thin enough. It may stick so you could use a needle to flick it off.
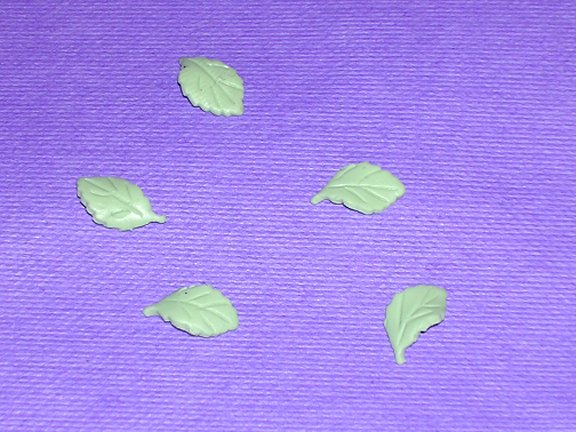
 12. Ok, flowers done, now onto the leaves.
Take a marble sized piece of half and half white polymer clay and translucent clay. Mix with a small amount of leaf green clay, until you get a shade that tones in with your flowers. Roll out as thinly as possible. Using the tear cutter or leaf punch, cut out several leaf shapes.
Enlarge picture showing how to make the leaves
 13. After you have made several leaves, mark the middle vein with a needle or sharp tool. You will need additional leaves if you are using a smaller punch. Recommend at least 12 leaves. Try to give them a little bit of life by having them twisted or turned, when placed on the tile for baking. If you have both large and small cutters, mix up the sizes as I have done, but this is not essential. Set all the leaves onto the tile.
Enlarge picture showing how to add detail to the leaves
TIP
Turn your oven on so that it is pre-heated.
Turn your oven on so that it is pre-heated.
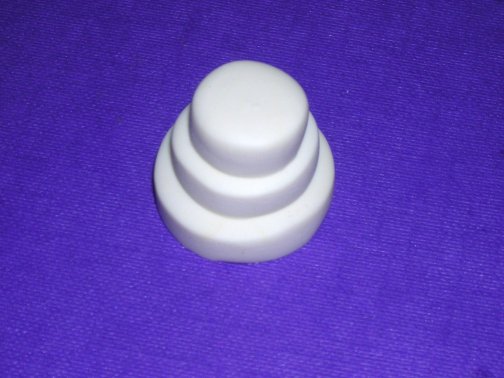
 14. Retrieve the cake layers you made ahead of time. Stack the three layers of your wedding cake together with liquid Fimo� and place on the tile. Now put everything in the oven for the manufacturer's recommended time.
Enlarge picture showing how to stack the layers of the cake
TIP
If you are planning on using stamens, test bake one, while the clay is baking.
If you are planning on using stamens, test bake one, while the clay is baking.
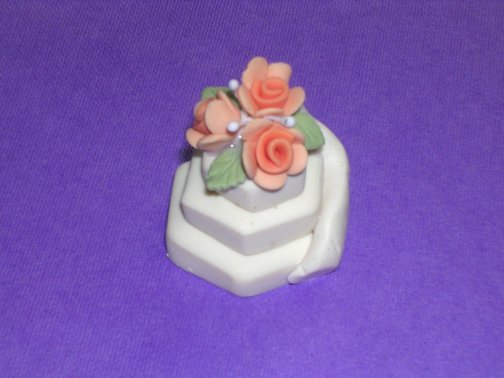
 15. Make a thin sausage shape of white/translucent clay or whatever your basic cake colour is and trail around the cake using liquid Fimo� to attach. Remember your cake has been baked at this stage and will be baked again.
Enlarge picture showing how to make the wrap
 16. Now, again using liquid Fimo�, attach your flowers and leaves to the sausage shape. Dip each piece into liquid Fimo� then push into the clay. Start with three large flowers on the top with leaves in between.
Enlarge picture showing where to place the flowers
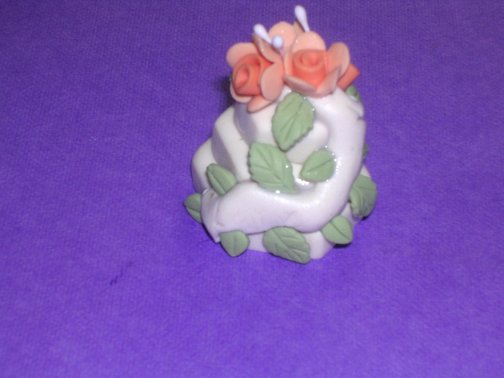
 17. Now work your way down the sausage, finishing at the bottom working both sides. The base of the flowers can be further trimmed down with a razor blade if you find the flowers too long. Insert trimmed stamens in between the flowers, if you are using them. I find it helps to put the leaves in first. The leaves from the punch work well, since they have little stalk.
Enlarge picture showing continued placement of the roses onto the cake
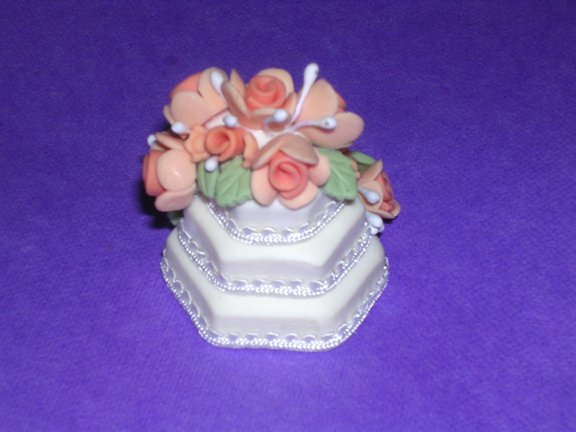
 18. Bake again at the manufacturers recommended amount of time. When cool, add your ribbon or pearls around the base of each of the layers, gluing with tacky glue. You may acrylic varnish the flowers and leaves.
Enlarge picture displaying addition of the ribbons and pearls
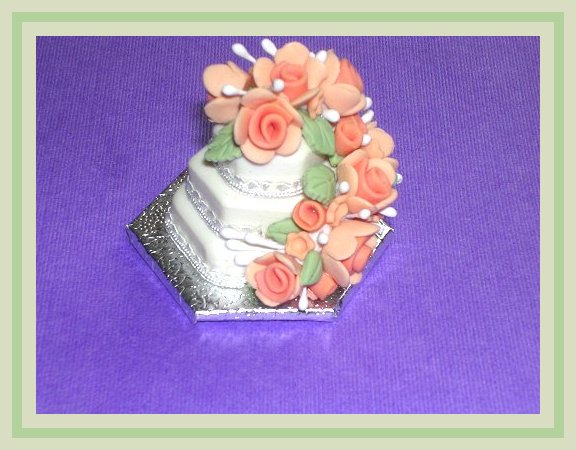
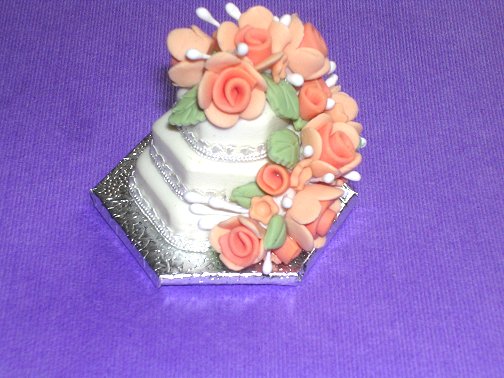
 19. The only thing left to do is to put it onto a cardboard base. In this image, I have covered the cardboard with cake board covering, but aluminum foil can be substituted, or silver/gold card. Presto, you have completed the dollhouse miniature wedding cake.
Enlarge picture showing completed cake on display platter
ABOUT THE ARTIST
 Vicki Sharkey, an educator by profession found making miniatures allowed her to escape into her own "little world" and forget the pressures of her job as teacher, Head of Science and Head of Year in a large middle school, and it works!!
She came into miniatures when her husband purchased a second hand house, three years ago. Vicki says, "I haven't looked back (sound familiar?)". Vicki enjoys working in polymer clay, but also other mediums as well. She now has three shops: a huge Georgian dollhouse, a Parade of Shops, and an Arts & Crafts house that she has just started work on.
Vicki has contributed to Dolls House World magazine with her, "Mrs. Beeton's Recreations" which can be seen in her Gallery.
Vicki is a valued members of the CDHM Forums. Visit the Galleries today.
© 2008-2012 Vicki Sharkey and CDHM.org
Reproduced with permission from Vicki Sharkey. All photographs and text appearing in this tutorial are the exclusive property of Vicki Sharkey. Permission is explicitly denied for any republication of text or photographs in this article without the prior express written consent of the author.