


Learn To Sculpt feet
From Polymer Clay
For your Doll or Fairy
by Tony Rice
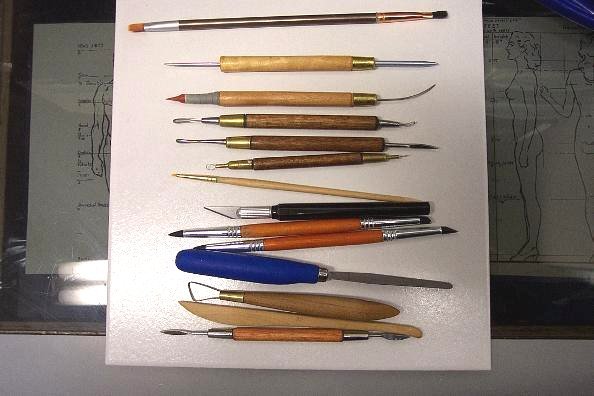
Materials Needed:
- One or two ounces of your favorite Polymer Clay
- Needle Tool
- Craft Knife: X-Acto, etc.
- Wire Loop Tool
- Small Spatula Tools
- Small Filbert Brush for Blending
 Close-up images of materials needed.
Enlarge picture of basic supplies.
Overview
I have tried to present the easiest method for sculpting feet possible. This technique can be modified in scale up and down fairly easily.
Feet are not as difficult to sculpt accurately as hands are, but they still pose challenges. Mushy clay is a serious enemy of the sculptor. It is best to use a firm clay to sculpt with in order to keep the feet from wilting due to the heat of working the clay and to prevent you from accidentally mushing the details.
Study pictures of feet, look at your own feet and look at the ways other sculptors create feet. The is no substitute for practice. A good way to practice is to buy some gray clay in your favorite brand and make feet. Bake the first pair and put them away, then make a dozen or so pairs, kneading them up when you are done. Every dozen or so pairs you sculpt, bake them and then compare them to the first pair you made and baked. This will help motivate you because you will be able to see yourself improve.
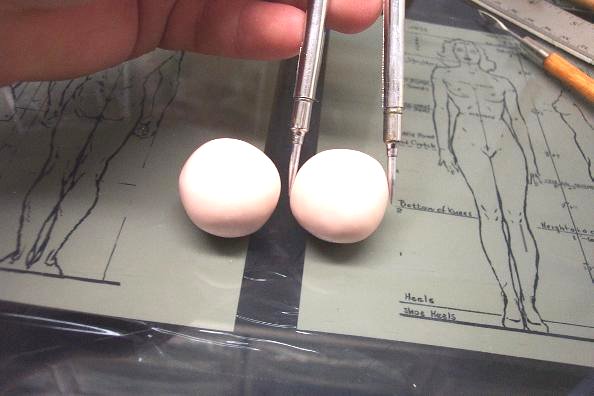
 1. Make two balls of clay, the same size. Use a ruler or calipers to match them up.
Enlarge picture showing the size of the balls of clay.
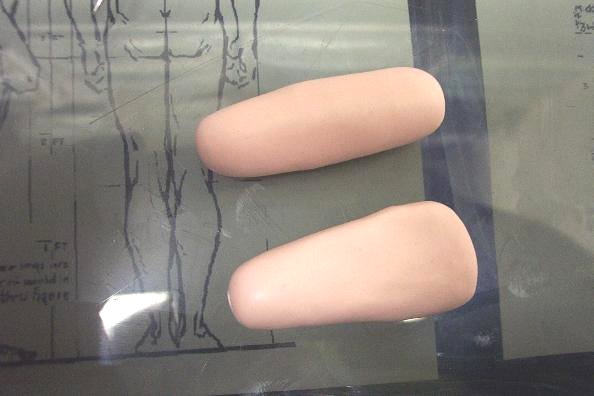
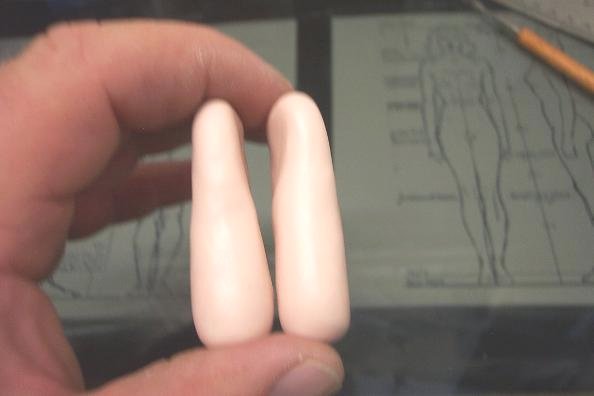
 2. Roll the balls into rods.
Enlarge picture showing balls shaped as rods.
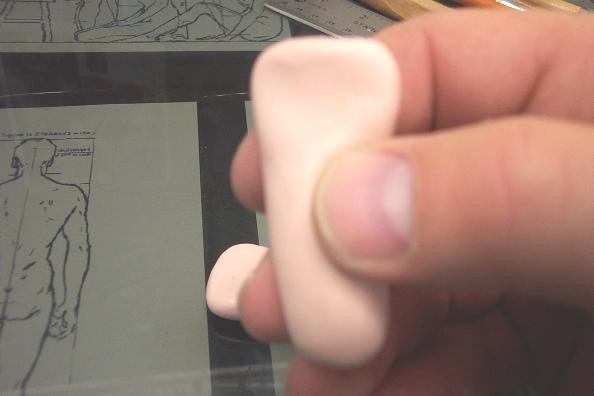
 3. Flatten the end of the rods into blunt fans. Be sure that the heels are thick and round and that the toe end of the foot is thinner.
Enlarge picture showing how to flatten.
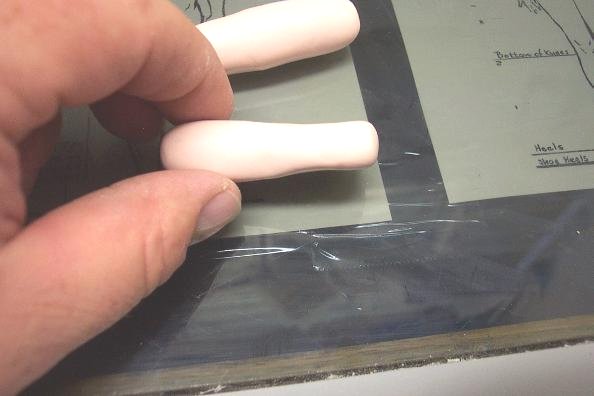
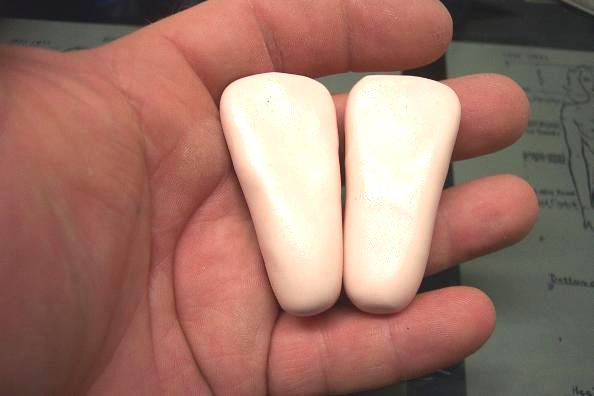
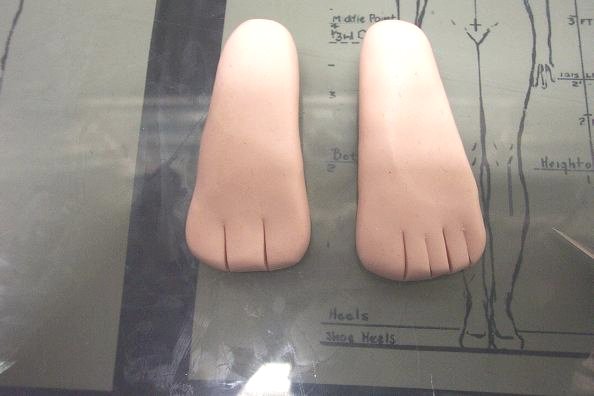
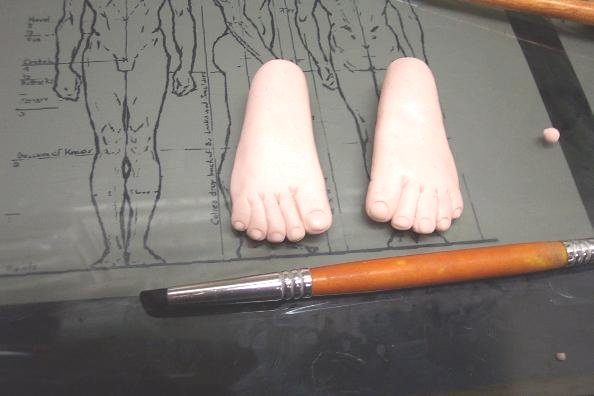
 4. Compare the feet by holding them together and checking them from different angles.
Enlarge picture to show comparison.
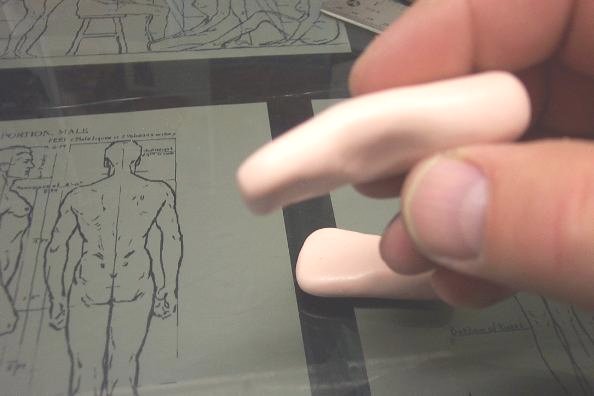
 5. If they lack symmetry use your hobby knife to trim them until they match.
Enlarge picture to check symmetry.
 6. Use your thumb, or a round ended tool if you are making a smaller scale to push in the arch of the foot.
Enlarge picture showing foot arch.
 7. Another angle of the arch.
Enlarge picture showing another angle.
TIP
Q: What differences do you make between male and female feet? Also, child to adult?
A: Womens feet tend to be smaller than male feet. Women's features and body structures feature curves, whereas men's bodies are more angular. Children's feet tend to be shorter, thicker and more dimpled!
Q: What differences do you make between male and female feet? Also, child to adult?
A: Womens feet tend to be smaller than male feet. Women's features and body structures feature curves, whereas men's bodies are more angular. Children's feet tend to be shorter, thicker and more dimpled!
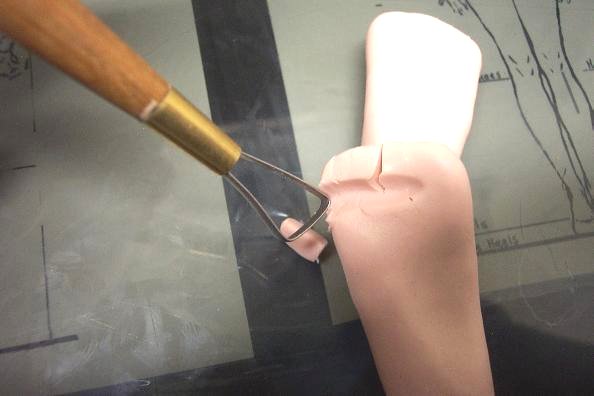
 8. Place the feet with the bottoms down and the toes toward you. Using your hobby knife, slice the toe end to create three even toes. Now divide the two toes toward the small toe in half again. This is a nice easy way to get proportional toes!
Enlarge picture how to create toes.
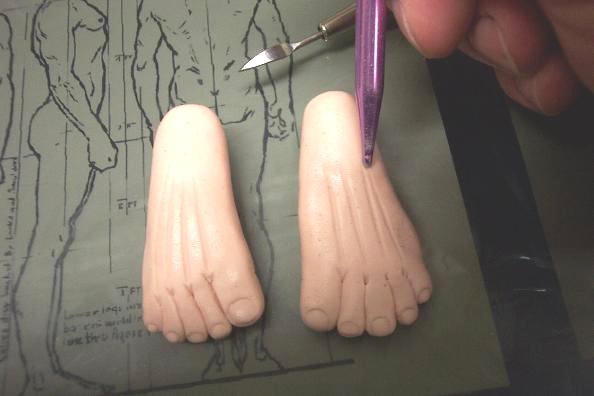
 9. Using a loop tool, carve a groove on the bottom of the foot from the big toe clear out to the pinky toe.
Enlarge picture to show clearing under toes.
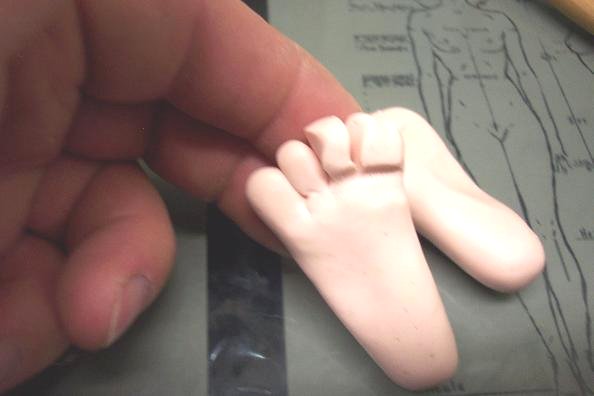
 10. Roll the toes between your fingers until the are round and blunt. Let the foot spin around as you roll the toe to prevent it from breaking off.
Enlarge picture showing how to create round toes.
 11. Check the toes to ensure that they are in proportion to each other. If toes are too long or too thick, take your hobby knife and trim a bit off the ends. Roll and twist the tip back into shape.
Enlarge picture showing proportions.
TIP
Q: My feet are too small. Is there a good way to "squish" the toes rounded with a tool?
A: If the toes are too small, you can add a tiny ball of clay to the end of each toe and blend it in, then reshape the toe. If the feet are really small, then just make the toes by adding balls of clay instead of cutting and shaping them. It is harder to proportion them, but is easier than trying to round microscopic toes.
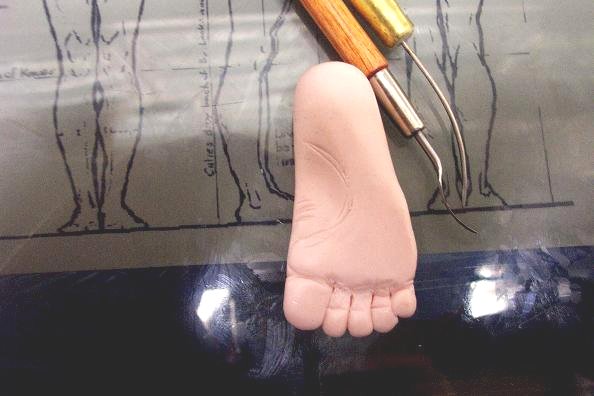
 12. Using a needle tool or a ceramic cleaning tool create the creases and wrinkles on the bottom of the foot.
Enlarge picture showing bottom of foot.
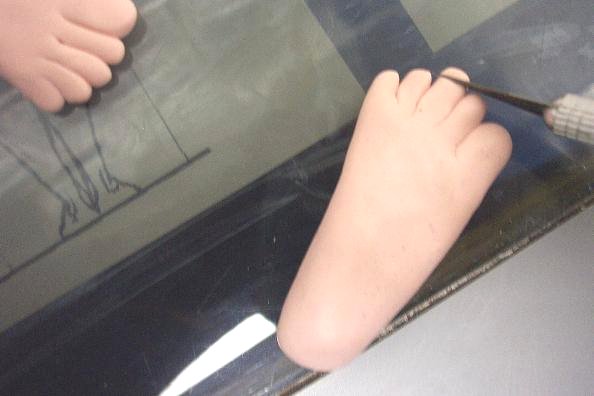
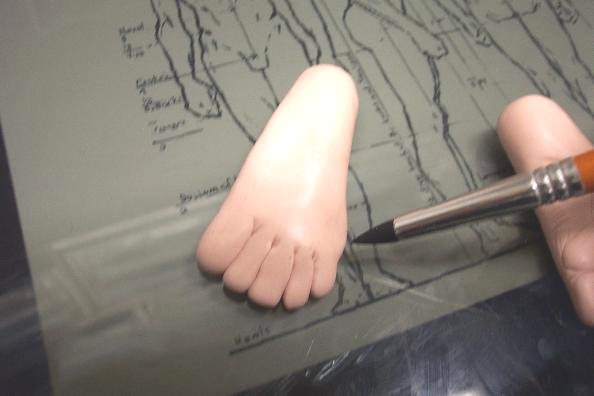
 13. Using a needle tool or a ceramic cleaning tool or a clay shaper or whatever create the little "Y" shaped wrinkles on the top of the foot between the toes. Also be sure to broaded the side of the foot near the pinky toe by gently pinching the clay there. (You can see me pointing to this with my clay shaper).
Enlarge picture showing how to create wrinkles and shape.
 14. Take your needle tool, clay shaper or stylus and gently draw the toenails onto the toes.
Enlarge picture showing how to create toenails.
 15. Almost finished!! Using a stylus or knitting needle draw the tendon onto the top of the foot.
Enlarge picture showing where to create the tendons.
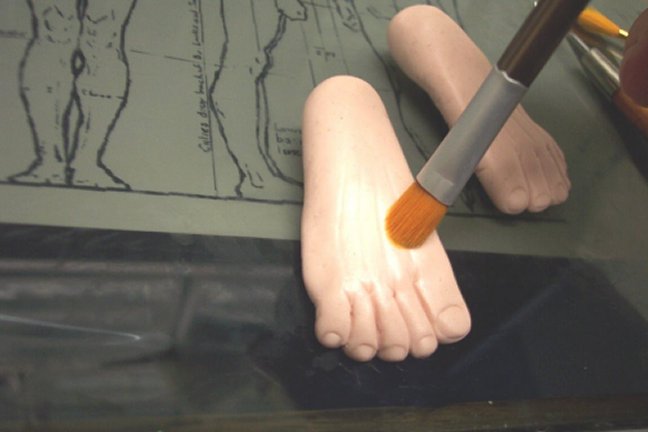
 16. Use your blending brush soften the details on the foot until they look natural. Don't over do it or you will blend away all of your work! Correct the toenails, if you distorted the details.
Pose and bake.
Enlarge picture showing blending effects before baking.
MEET THE ARTIST
I started sculpting in 1992 when my wife wanted to get a twelve inch tall Victorian Santa to use as a Christmas decoration. We couldn't afford it because I was going to college. My wife asked me, Couldn't you make one for me and off I went. Everyone who saw the Santa wanted me to sculpt something for them and I spent lots of late nights and early mornings at my desk sculpting Santas, Elves, Fairies, Trolls, and anything people wanted me to make. I thank God every day for the skills and opportunities He has given me.
Visit the Galleries today.
© 2007-2012 Tony Rice
Reproduced with permission from Tony Rice. All photographs and text appearing in this tutorial are the exclusive property of Tony Rice. Permission is explicitly denied for any republication of text or photographs in this article without the prior express written consent of the author.