


Learn To Sculpt
A Corgi Dog
by Aleah Klay
Materials Needed
- Polymer clay
Optional: White clay for the eyes, and rose colors for the Rose.
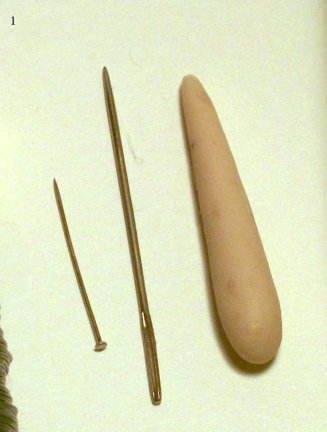
Note: My corgi is done in all Super Sculpey�, so instruction will not include using different colors. If you choose to use different colors and have problems with them during class time just ask questions. - Hand made clay tool (See Below)
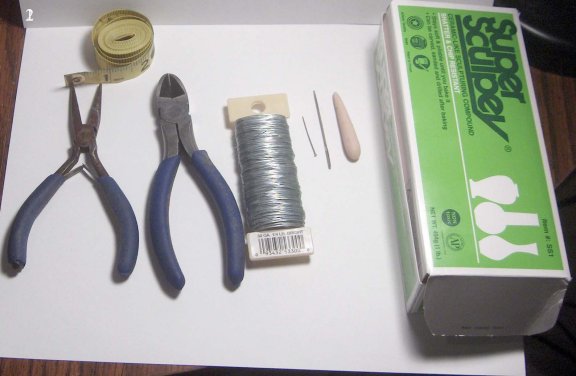
- One large upholstery needle.
Note: You can use a small one as well I think it's easier to use a large one though - Wire cutters
You do not need the pliers; they are in the picture because I thought I'd need them. I didn't - 10 - 8cm (3 inches) lengths of 0.50 (26 gauge) wire
Substitutes: small beading rods or toothpicks - Ruler or Tape measure
- Pre-make hand made clay tool, have it ready for the tutorial.
Take some polymer clay and roll it into the shape as shown below. Make it 1� to 2 inches long at least. Then bake it in an oven at 270�F for 30 minutes.
 Close-up images of materials needed.
Enlarge picture of basic materials needed.
 Close-up images of materials needed.
Enlarge picture of additional materials needed.
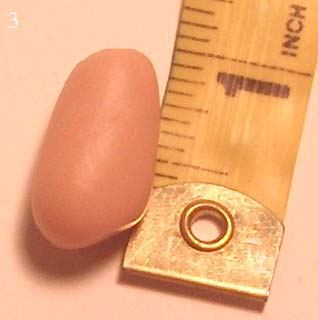
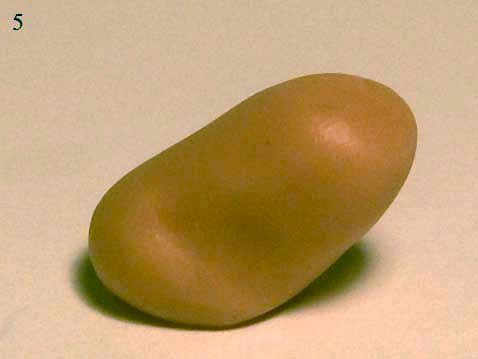
 1. Take some clay and knead it in your fingers if it is tough to work with. Do this until it is easy for you to work with. Now roll clay into a tear drop shape flatten the fatter end this will be the bottom of the piece. It should be about 1 inch tall.
Enlarge picture showing the size of the clay teardrop.
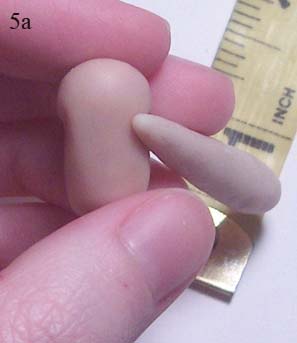
 2. Next take the clay tool and make indents on the sides of the body, this is where the back legs will be.
Enlarge picture showing where to indent.
 3. Continue with the indents for the legs.
Enlarge picture showing pulled indent continuance.
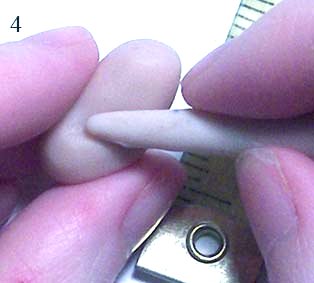
 4. Continue with the indents for the legs on each edge.
Enlarge picture showing how work the indents.
 5. Continue with the indents for the legs, this will slowly take shape.
Enlarge picture showing indents taking shape.
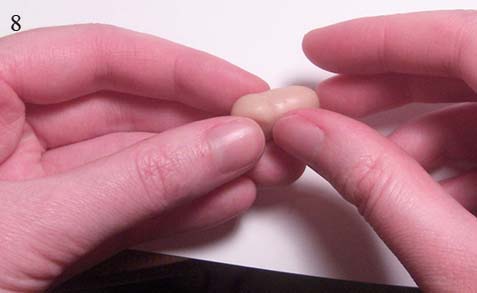
 6. Next use your thumb and fingers to define the chest on the body.
Enlarge picture showing the chest area.
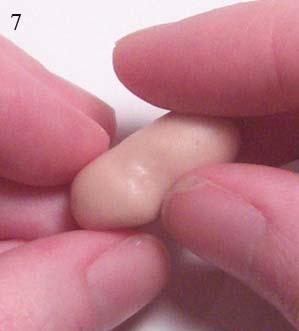
 7. Continue working the clay to form the chest.
Enlarge picture showing the chest.
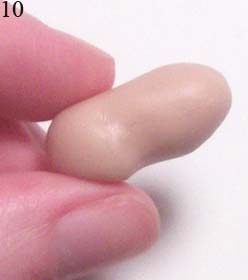
 8. This is what the body should look like to this stage.
Enlarge picture of formed body.
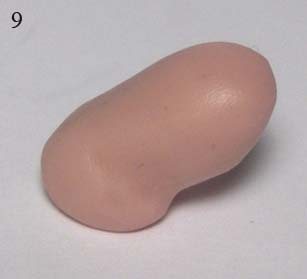
 9. Back side of body to this stage.
Enlarge picture showing underside of body.
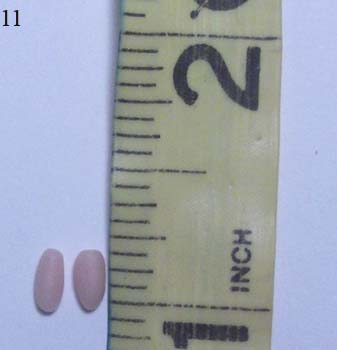
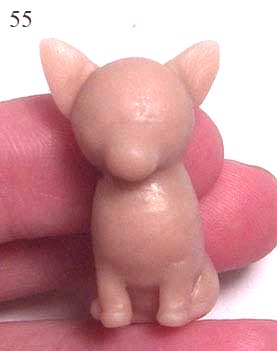
 10. Roll two small � inch teardrop shaped pieces these are the back legs.
Enlarge picture of leg preparation.
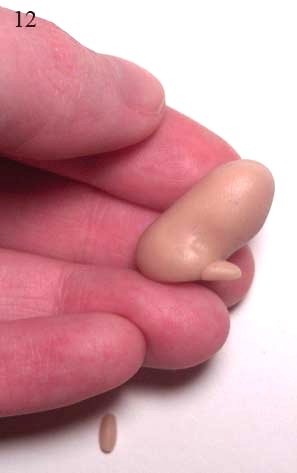
 11. Take one of the tear dropped shaped pieces and attach it to the body.
Enlarge picture showing placement of first leg.
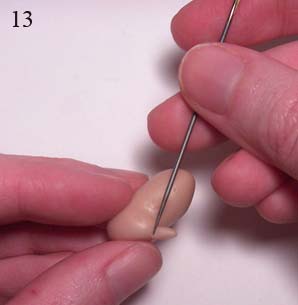
 12. Use a needle to smooth it to the body.
Enlarge picture showing how to smooth the first leg.
 13. Push a small amount of clay from the leg on to the body.
Enlarge picture on how to add smooth clay.
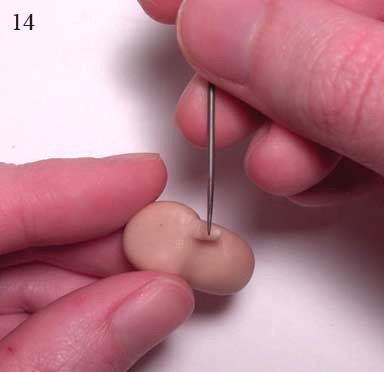
 14. Do this all around the leg until it is blended into the body.
Enlarge picture showing further smoothing.
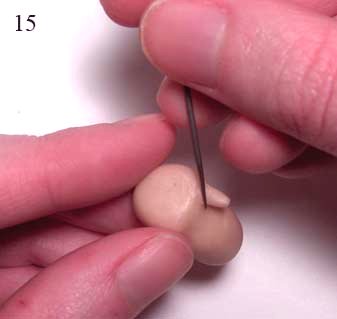
 15. Repeat steps 11-14 for the other leg. Now you have both hind legs attached to the body.
Enlarge picture showing for repeat steps.
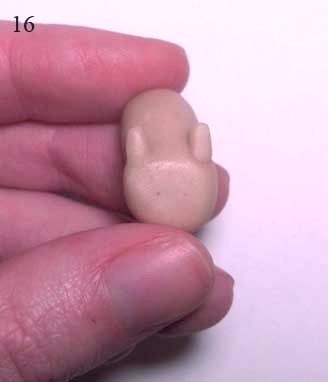
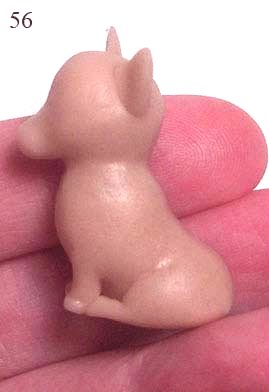
 16. When you are finished with the above step, the body and hind legs should sit as shown.
Enlarge picture showing completed back legs to body.
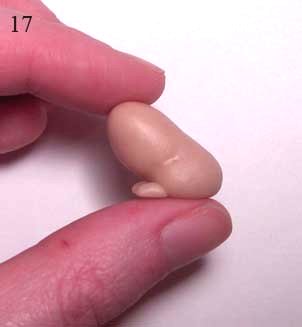
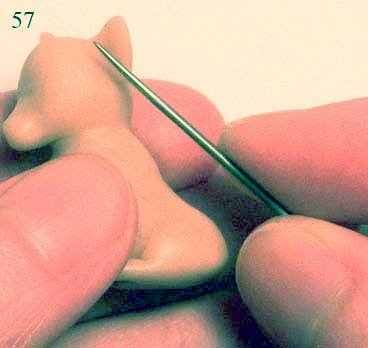
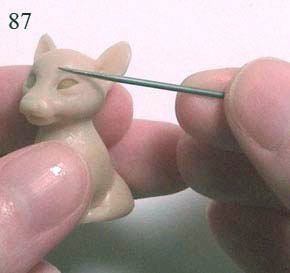
 17. Now take your needle and create a foot at the tip of the leg by rolling the needle so it shapes the foot.
Enlarge picture showing how to create the foot.
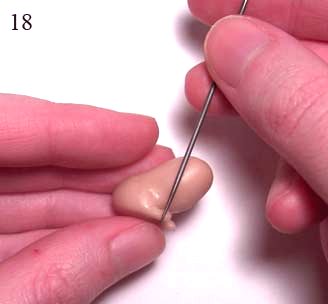
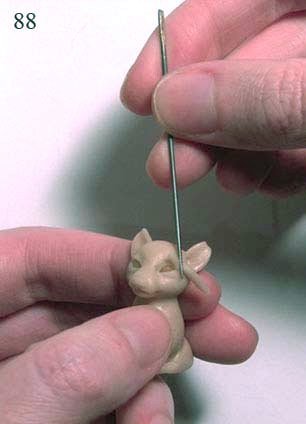
 18. Completed foot.
Enlarge picture showing completed foot.
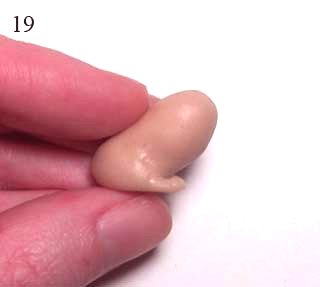
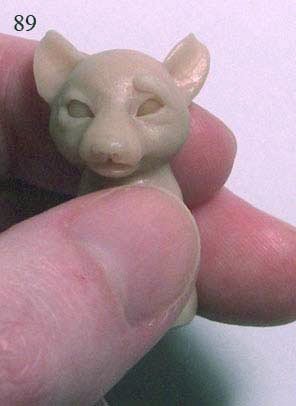
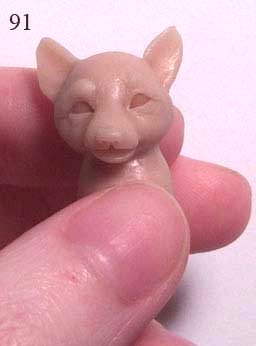
 19. You might have flattened the chest a little bit, if so fix that now.
Enlarge picture showing how to re-define the chest.
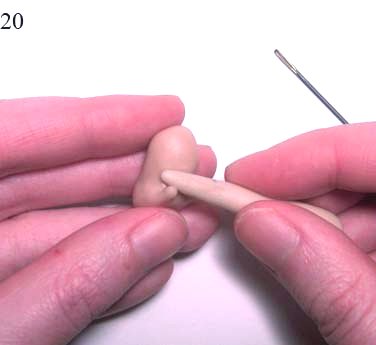
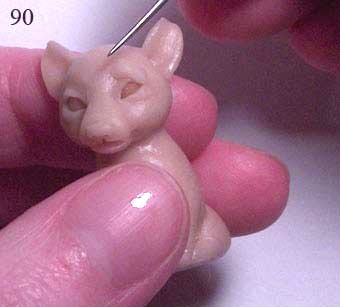
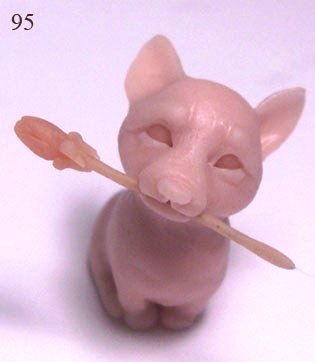
 20. You can use the clay tool to make a more defined chest. Hold the tool at an angle and place the tool where you want the chest to end (closest to the legs) and roll upward once.
Enlarge picture showing how to redefine the chest.
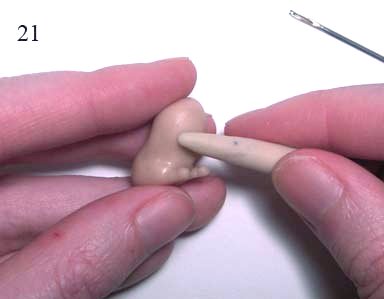
 21. Do the same for the other side.
Enlarge picture showing how to complete the other side.
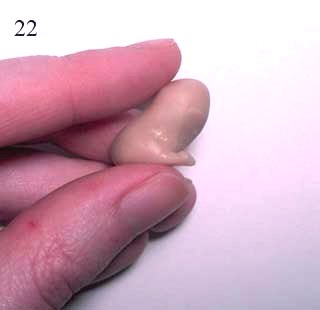
 22. Completed rework.
Enlarge picture showing completion to this stage.
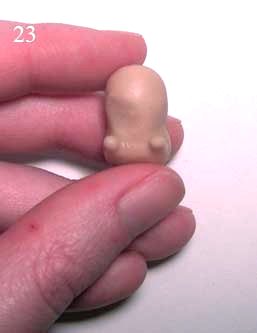
 23. Ok time to start the front legs. Roll two equal sized small snakes the size you want the front legs to be. Place the pieces one at a time where you want the front legs to go.
Enlarge picture showing placement of front legs.
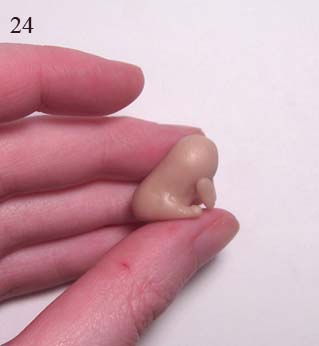
 24. Place the other front leg.
Enlarge picture showing placement of both legs.
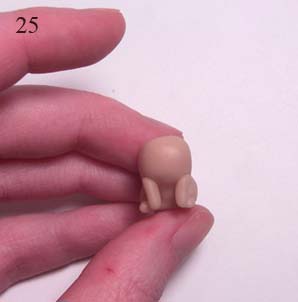
 25. Now roll a small ball of clay around the leg onto the body all around the front leg. Take your needle and repeat the same steps applied for the back legs smoothing the added clay to the body.
Enlarge picture showing use of needle tool.
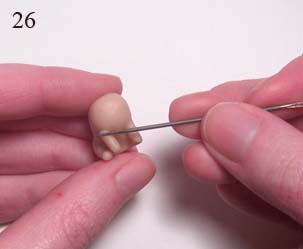
 26. Continue using your needle tool to smooth the added clay.
Enlarge picture showing another view of use of needle tool.
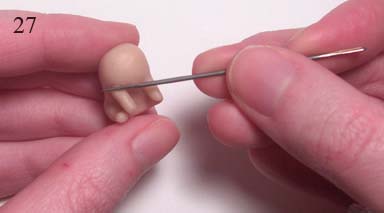
 27. Continue till the clay is smoothed to the body.
Enlarge picture showing steps to continue smoothing legs.
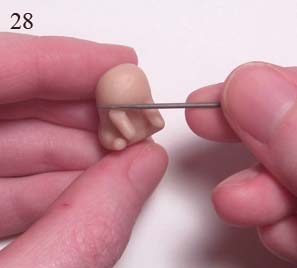
 28. Here is how the front legs should look after smoothing.
Enlarge picture showing completed smoothed legs.
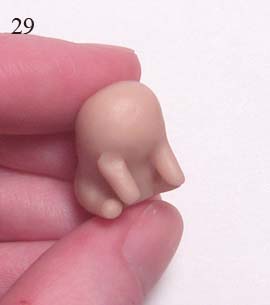
 29. Now its time to create the feet on the front paws with your needle tool, just as you did with the back legs.
Enlarge picture showing how to create the front paws.
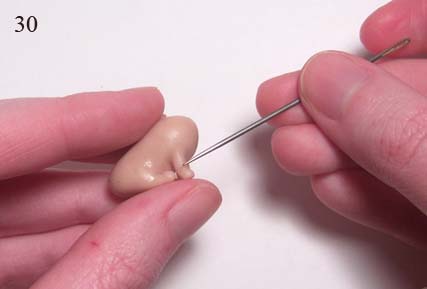
 30. Now using the needle tool make indents on both sides of the upper chest (area between the neck and where the front legs begin).
Enlarge picture showing where to make the indents.
 31. This step refines the chest area on the body.
Enlarge picture showing how the chest area is being defined.
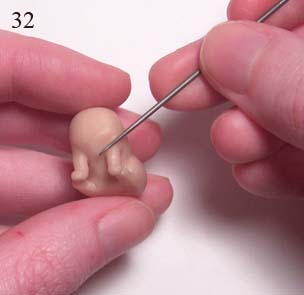
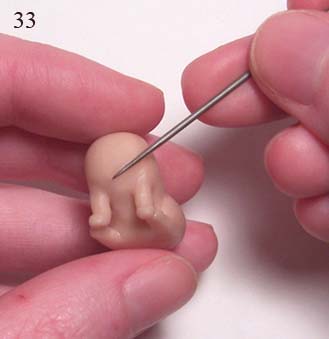
 32. Now we'll begin making the head. Start with a ball of clay which is about � of an inch big.
Enlarge picture showing size to make corgi head.
 33. Then place the ball on the body.
Enlarge picture showing placement of corgi head.
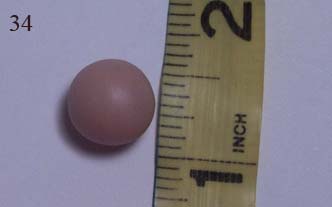
 34. Then place the ball on the body.
Enlarge picture showing another view of the placement of corgi head.
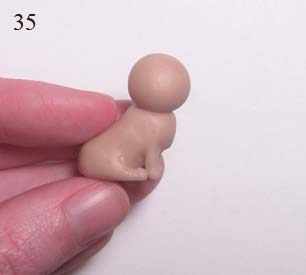
 35. Using your clay tool begin rolling and blending clay from the head down to the body.
Enlarge picture showing the blending and smoothing motions.
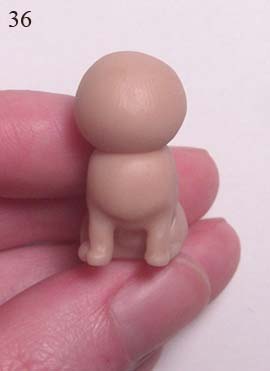
 36. Continue rolling and blending clay from the head down to the body.
Enlarge picture showing another view of the blending and smoothing motions.
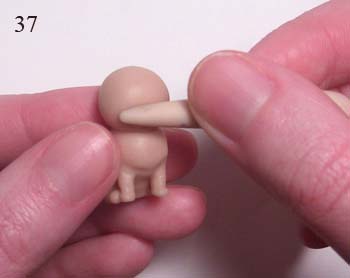
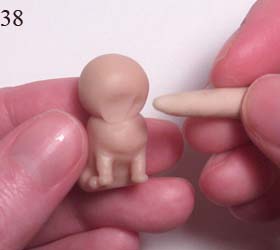
 37. Continue blending clay from the head down to the body all the way around.
Enlarge picture showing the smoothed and blended head.
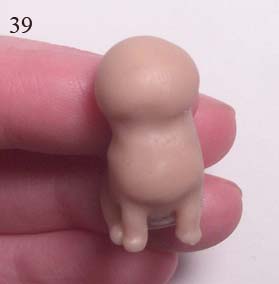
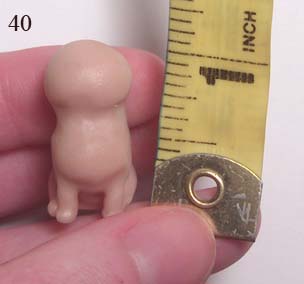
 38. Measure the head/body size at this point to make sure you have scale size.
Enlarge picture showing the scale size.
 39. Now take your clay tool and press around the head to form the neck.
Enlarge picture showing how to form the neck.
 40. Right side view of the smoothed neck.
Enlarge picture showing right view of the formed neck.
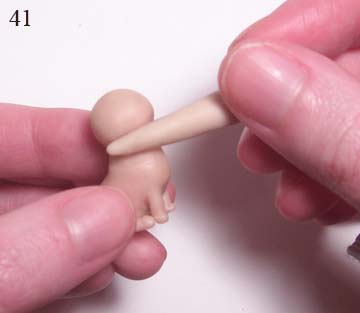
 41. Front view of the formed neck.
Enlarge picture showing front view of the formed neck.
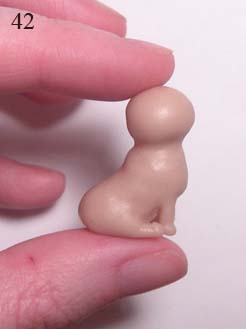
 42. Left side view of the smoothed neck.
Enlarge picture showing left view of the formed neck.
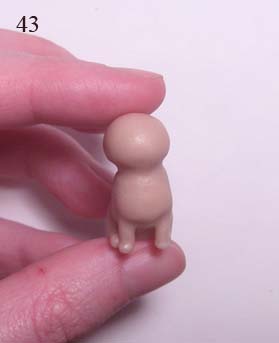
 43. Roll a bit of clay, approximately a 1/8 inch ball, in a fat oblong shape. This will be the snout of the dog.
Enlarge picture showing size of clay for corgi snout.
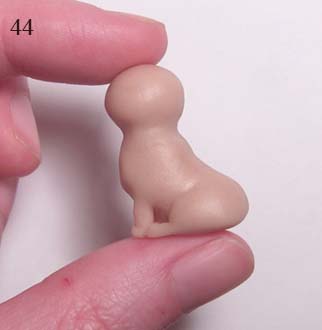
 44. Place the clay ball on the bottom middle of the dogs head. Use your needle to blend the snout to the face.
Enlarge picture showing placement and blending of the corgi snout.
TIP
By the time I�d gotten the snout on this dog, I could tell the dog needed more of a forehead.
If you see the same need follow the steps below.
By the time I�d gotten the snout on this dog, I could tell the dog needed more of a forehead.
If you see the same need follow the steps below.
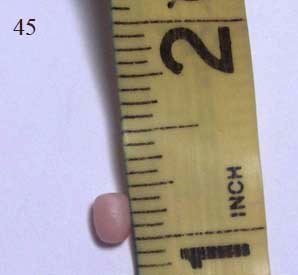
 45. Take a small ball of clay and flatten it and place it to the area on the head where you need to build up the forehead.
Enlarge picture showing how to build up the forehead.
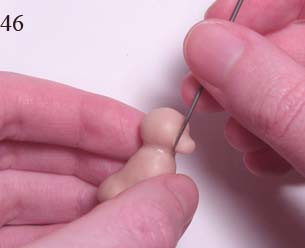
 46. Here is a top view of where I want to build up the crown of the head.
Enlarge picture showing crown build-up.
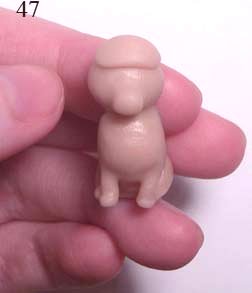
 47. Right view of the build up the crown of the head.
Enlarge picture showing crown build-up from the right side.
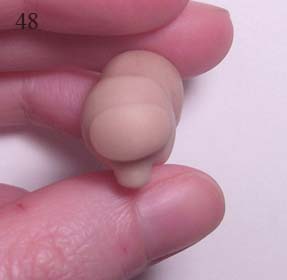
 48. Left view of the build up of the crown of the head.
Enlarge picture showing crown build-up from the left side.
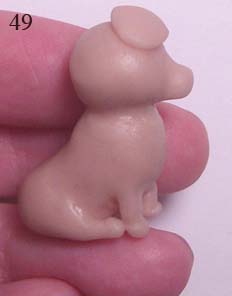
 49. Now you want to begin blending the clay onto the dog�s forehead. Start on the left side. Do not start in the front.
Enlarge picture showing how where to start blending.
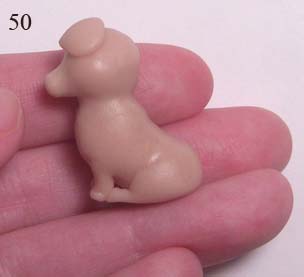
 50. Blending on the right side.
Enlarge picture showing how where to start blend on the right side.
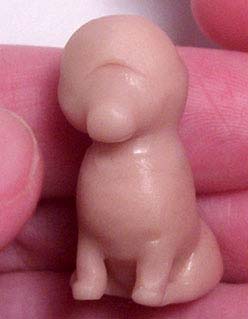
 51. Blending the front section is the last area you want to blend.
Enlarge picture showing the last blending of the front.
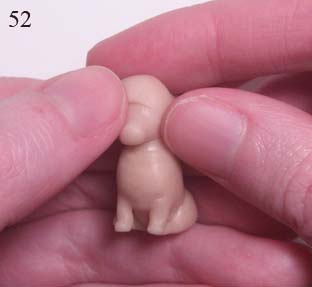
 52. To create the ears take two equal sized triangle shapes. Make them nearly as long as the dogs head. Corgi ears are naturally big.
Enlarge picture showing how to create the ears.
 53. Place the ear pieces on the head.
Enlarge picture showing ears on the head.
 54. Place the ear pieces on the middle back of the head, see image.
Enlarge picture showing how where to place the ears.
 55. Using the needle tool blend the ears onto the head.
Enlarge picture showing where to blend the ears.
 56. Continue blending the ears onto the head.
Enlarge picture showing continual blending of ears.
 57. Blended ears onto the head.
Enlarge picture showing blended ears.
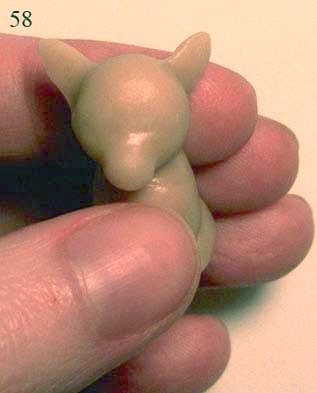
 58. Now we need to go back to the snout. Create a triangle shape that will fit on the snout and leave space all around the snout. Place the triangle on the snout.
Enlarge picture showing how to create tip of nose.
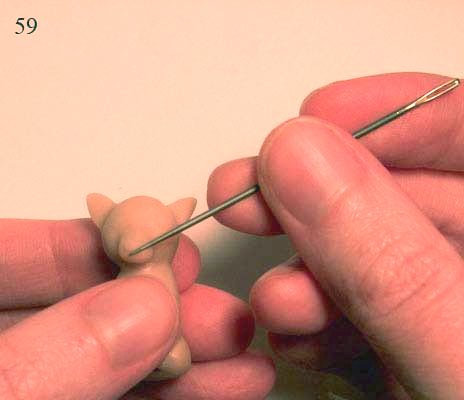
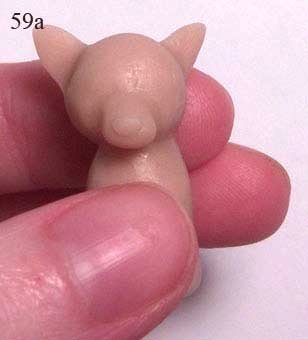
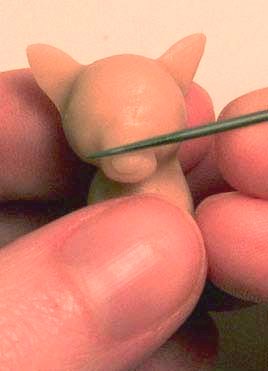
 59. Using the needle tool blend the added piece of clay to the snout.
Enlarge picture showing blending.
 60. Right view of blended snout piece.
Enlarge picture showing right view of blend clay.
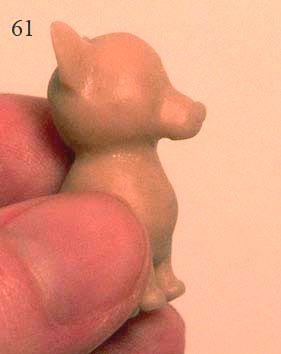
 61. Front view of blended snout piece.
Enlarge picture showing front view of blend clay.
Q&A
Q: What should you do if the clay feels sticky?
A: There are a couple of things you can do. If you notice the clay is a bit sticky a day or more before you're ready to use it, place the clay between a few sheets of paper, top and bottom, along with a book on top. Let it sit for at least a day. That will take out some of the oil and make it less sticky.
Another thing you can do would be to put the clay in the freezer for a few minutes. This method requires that you repeat it as you work.
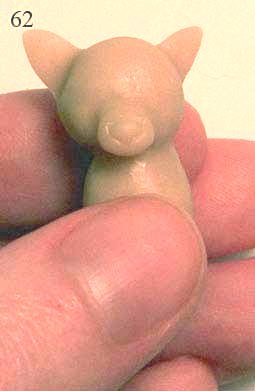
 62. Next are the eyes. Poke holes where you want the eyes to go. When you do this look at the area above the dogs snout. You want the eyes inner holes to be off to the sides of the snout. Using your needle tool, mark the location of the inner and outer right eye area as noted in the picture.
Enlarge picture showing marking right inner and outer eye.
 63. Next are the eyes. Poke holes where you want the eyes to go. When you do this look at the area above the dogs snout. You want the eyes inner holes to be off to the sides of the snout. Using your needle tool, mark the location of the inner and outer left eye area as noted in the picture.
Enlarge picture showing marking left inner and outer area of the eye.
TIP
For this next step you can use white clay instead of Super Sculpey�. It is easier to use white clay for the eyes. I didn't have white clay when I made this tutorial.
For this next step you can use white clay instead of Super Sculpey�. It is easier to use white clay for the eyes. I didn't have white clay when I made this tutorial.
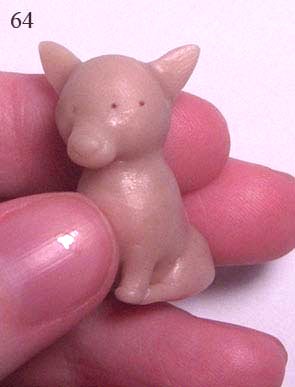
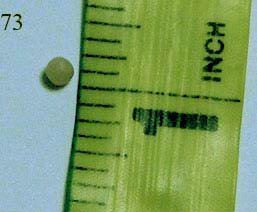
 64. Once you have marked the eyes, roll two equal sized balls, the width of the holes you poked making the eye balls. Set the eyes on a plate.
Bake the eyes in a 275F/130C oven for 20 minutes.
Enlarge picture showing size of eye balls.
TIP
While the eyes are baking you can do some detail work. I usually end up doing more sculpting during baking time.
While the eyes are baking you can do some detail work. I usually end up doing more sculpting during baking time.
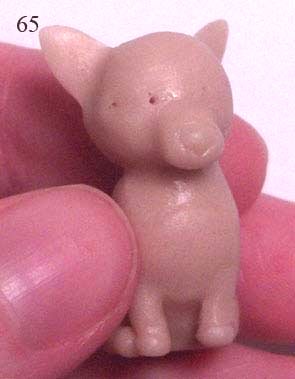
 65. Take your needle tool and put holes in the dogs nose to create his nostrils.
Enlarge picture showing how to create nostrils.
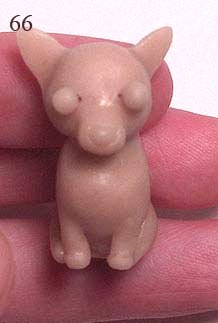
 66. Completed front view of nostrils.
Enlarge picture showing completed nostrils.
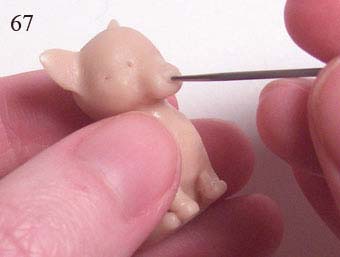
 67. Using the needle tool, cut a mouth slot. The rose, if you choose to make it, will fit here. Also, create the line between the nose and the mouth.
Enlarge picture showing how to create the mouth.
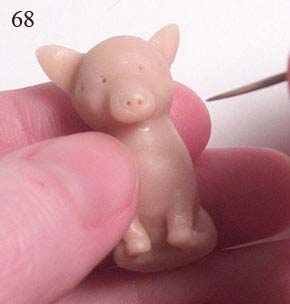
 68. Finished mouth.
Enlarge picture showing the finished mouth.
 69. Lets work some detail into the ears. Take your clay tool and make indents for the dog�s ears.
Enlarge picture showing details of ears.
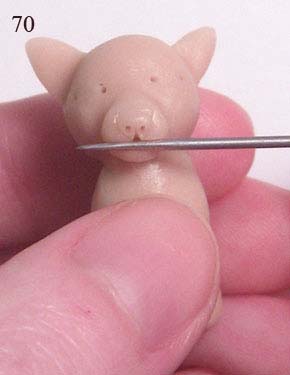
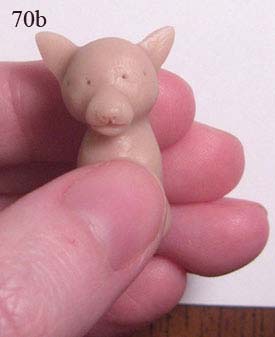
 70. Lets work some detail into the ears. Take your clay tool and make indents for the dog�s ears.
Enlarge picture showing completed ears.
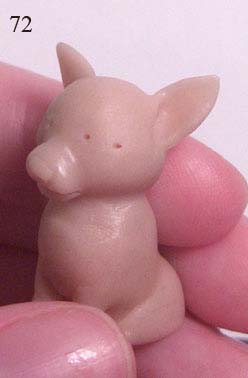
 71. Roll a little ball the size shown in the picture.
Enlarge picture showing creating the tail.
 72. Place the ball on the dog�s backside and blend in to the body.
Enlarge picture showing placement and blending of tail.
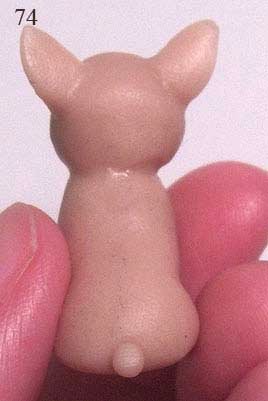
 73. Blending complete!
Enlarge picture showing completed tail.
TIP
By now the eyes have completed cooking. Remove and cool.
By now the eyes have completed cooking. Remove and cool.
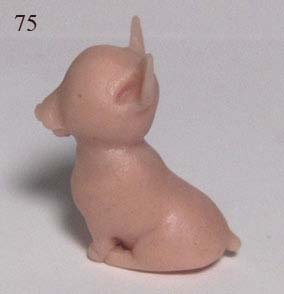
 74. Take the cooled off eyes and place them within the eye markings you made earlier.
Enlarge picture showing placement of eyes.
 75. Push the right eye into the head.
Enlarge picture showing insertions of right eye into head.
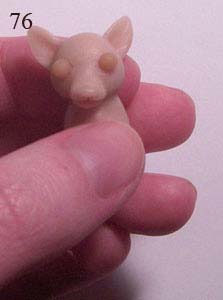
 76. Push the left eye into the head.
Enlarge picture showing insertions of left eye into head.
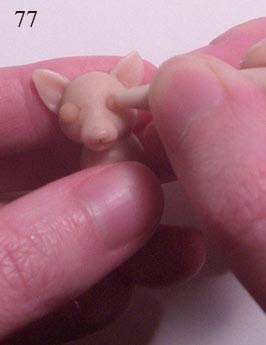
 77. Both eyes inserted into head.
Enlarge picture showing insertions of both eyes into head.
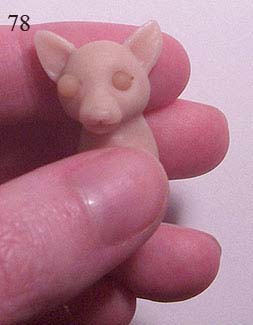
 78. Now we're going to make the eyelid. Take a bit of clay and roll a long snake.
Enlarge picture showing how to make the eyelid.
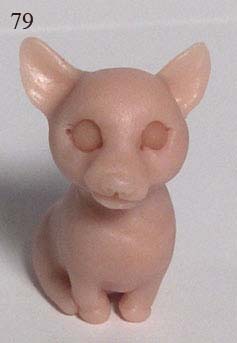
 79. Cut off the excess clay using your needle tool.
Enlarge picture showing how to cut off excess.
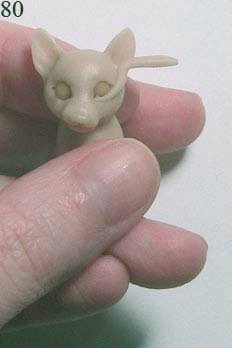
 80. Blend the bottom of the eyelid onto the face.
Enlarge picture showing how to blend eyelid to face.
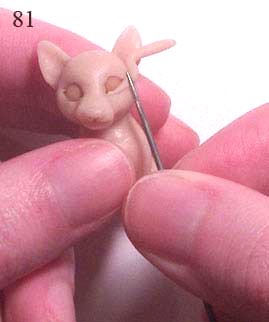
 81. Repeat the other eyes lower eyelid.
Enlarge picture to repeat the other lower eyelid.
TIP
I always do the bottom eyelids first then move onto the upper eyelids.
I always do the bottom eyelids first then move onto the upper eyelids.
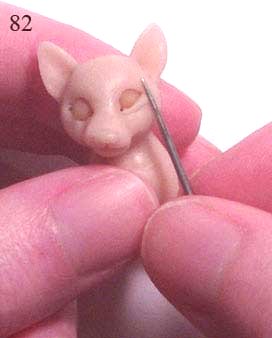
 82. Move on to the upper eye lids and repeat the same lower eyelid steps.
Enlarge picture to repeat the other lower eyelid.
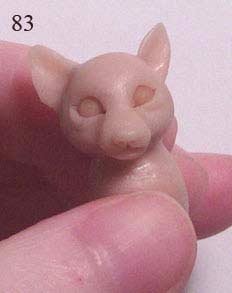
 83. Roll a small log of clay to create the brow on the dog. Place the log at an angle to create the expression on the dog.
Enlarge picture showing how to create the brow.
 84. Cut off all excess clay with your needle.
Enlarge picture showing where to cut off excess.
 85. Using your clay tool and your needle tool blend the brow so that there is a fatter part at the top and it thins down at the bottom. Use the needle tool around the fatter top part and the clay tool to gradually flatten down the rest of it.
Enlarge picture showing how to blend to face.
 86. Repeat the same steps for the other brow.
Enlarge picture showing repeated steps.
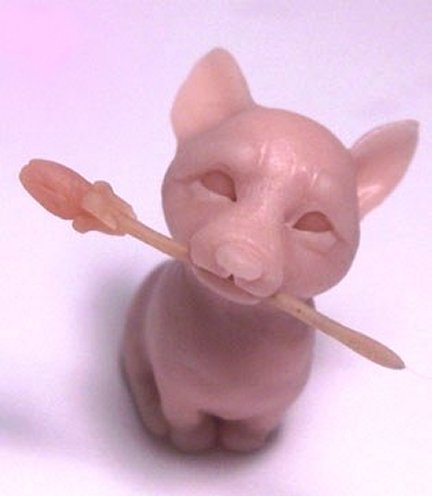
 86. Completed polymer clay sculpted corgi dog
Enlarge picture showing completed dog.
MEET THE ARTISAN
 Aleah is a self-taught artist and lives in Salt Lake City, UT. She says that she has been messing around with all kinds of different mediums for as long as she can remember. She loves creating mixed medium three-dimensional pieces. Aleah only creates original works, never using molds, nor has she ever made molds of her original pieces.
Aleah explains, "I guess I have a wild imagination. A Blue Jay will fly past me and I'll imagine a faery on it's back. I'll imagine music while on a walk on lazy days in the Avenues. Of course there is a ghost in the attic of the house next to my apartment, viewable from my kitchen window. Any over-grown yard is a house under attack; and no doubt there are some witches in these old homes. One day I may turn out to be one of them. Some of my other interests include writing, stop motion animation, and independent film. Hopefully some day I'll get some movies made!
--There is a world where smoke is a ghost-like demon, trees run, animals think and feel as we do. Insects and faeries are Allies. Dragons can be as small as a coin or as big as a castle. Mr. Grim reaper is a familiar face. Death is just a portal to another place, and life is as real as a dream. It is my world--"
Aleah is a valued member and Moderater of the CDHM Forums. Visit the Galleries today.
Aleah is a self-taught artist and lives in Salt Lake City, UT. She says that she has been messing around with all kinds of different mediums for as long as she can remember. She loves creating mixed medium three-dimensional pieces. Aleah only creates original works, never using molds, nor has she ever made molds of her original pieces.
Aleah explains, "I guess I have a wild imagination. A Blue Jay will fly past me and I'll imagine a faery on it's back. I'll imagine music while on a walk on lazy days in the Avenues. Of course there is a ghost in the attic of the house next to my apartment, viewable from my kitchen window. Any over-grown yard is a house under attack; and no doubt there are some witches in these old homes. One day I may turn out to be one of them. Some of my other interests include writing, stop motion animation, and independent film. Hopefully some day I'll get some movies made!
--There is a world where smoke is a ghost-like demon, trees run, animals think and feel as we do. Insects and faeries are Allies. Dragons can be as small as a coin or as big as a castle. Mr. Grim reaper is a familiar face. Death is just a portal to another place, and life is as real as a dream. It is my world--"
Aleah is a valued member and Moderater of the CDHM Forums. Visit the Galleries today.
© 2007-2012 Aleah Klay
Reproduced with permission from Aleah Klay. All photographs and text appearing in this tutorial are the exclusive property of Aleah Klay. Permission is explicitly denied for any republication of text or photographs in this article without the prior express written consent of the author.