


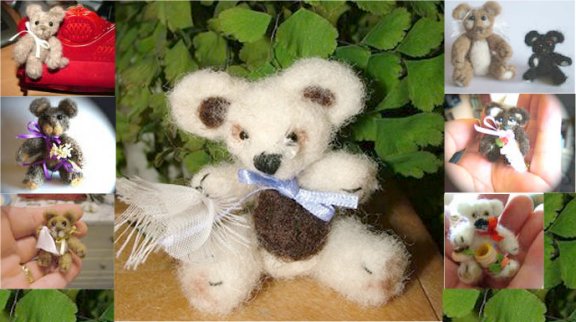
Learn To Needle Felt
a Miniature
Cry Baby Bear with
Artist Sarah-Jane Waller
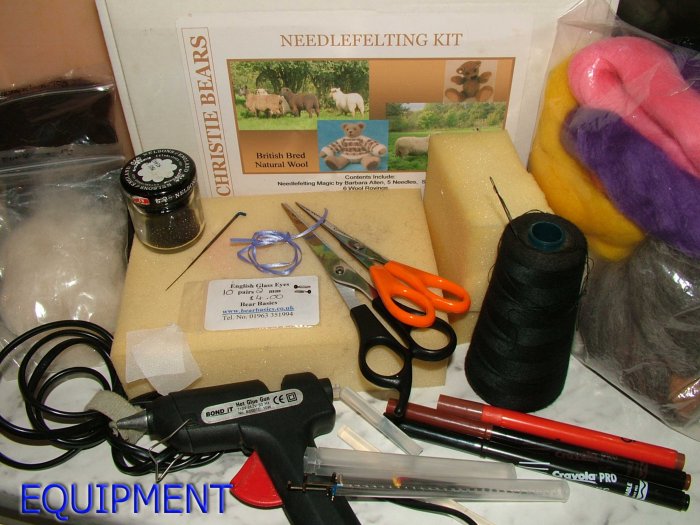
Materials Needed:
- One Basic Needle Felting Kit
- Large Foam Pad
- Special needle felting pads can be purchased, however many needle
felters use polystyrene blocks, upholstery foam or compressed foam - One Cream/White Coloured Felting Wool
- One Brown Coloured Felting Wool
- Felting Needle (Recommend 38 Blue)
- Chopping Board Or Hard Plastic Tray
- Pair Glass Bear Eyes, Wired Eyes, or Black Seed Beads
- Cotton
- Regular Sewing Needle
- Pair of Scissors
- Brown Felt Tip Pen
- Pin Ribbon (2mm Width)
- Piece Of Cotton, Silk or Organza
- Glue Gun
- Glue Stick
- Miniature Basket
Please allow to load before continuing.
 Close-up images of materials needed
Enlarge picture of basic supply requirements
From The Instructor
The term felting is used to describe the matting and entangling of loose fibers, meshing them together to create a firm form. This tutorial is a basic form of felting. It should take around an hour to an hour and a half, depending on your skill level to complete a bear this size.
A couple of warnings - The needle is very sharp - so please take care while working with it. Don't rush! Take your time. The process of holding and using a felting needle is very different to using a sewing needle. You will need to punch the needle all the way through the fibers and pull back up to mesh the wool. This is why you need the foam padding to work upon while punching the fibers.
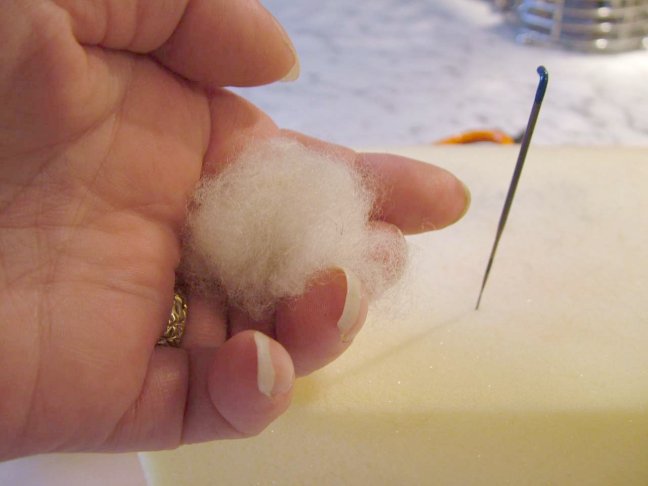
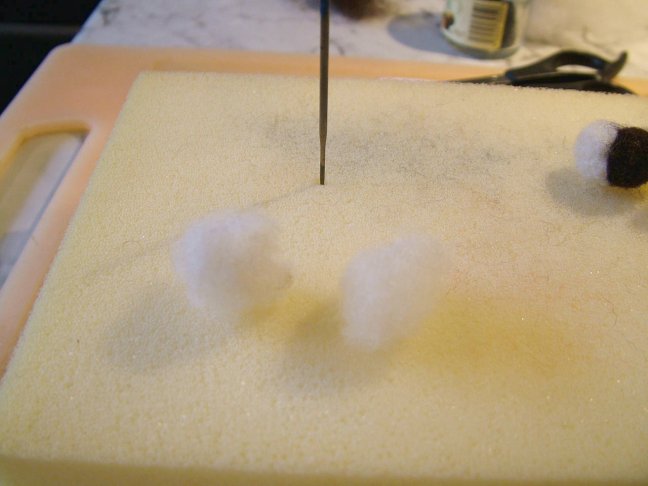
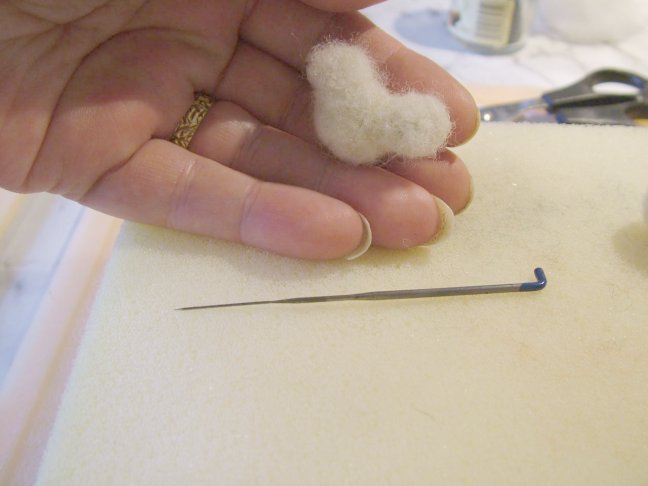
 1. Prepare your work surface, take out your block or plastic tray, your foam pad, barbed needle and a hand full of white/cream wool.
Enlarge picture showing how to begin
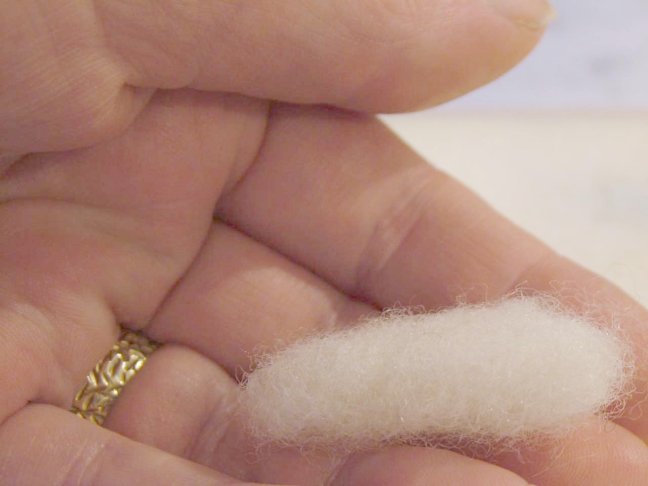
 2. Roll the cream/white wool into a ball. Squeeze the wool into a tight ball, about 2" round before you begin punching.
Enlarge picture showing size of wool to begin with
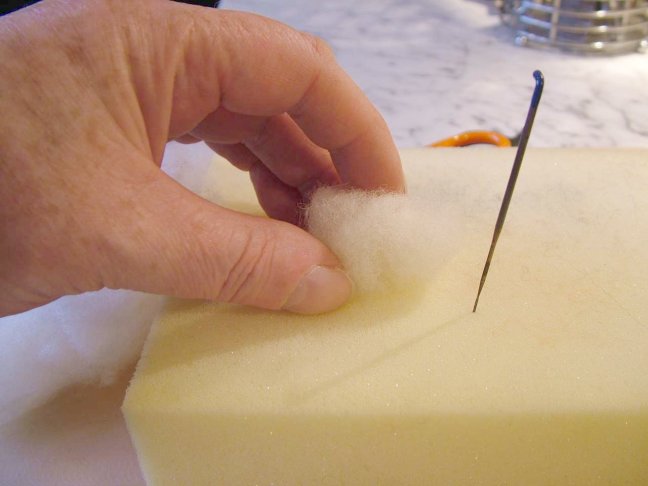
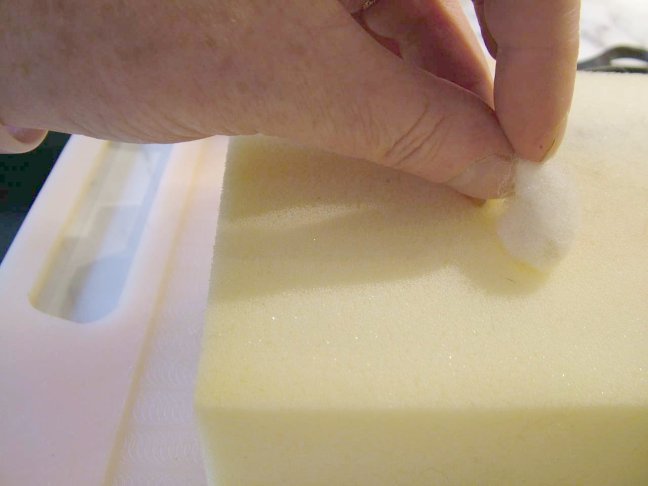
 3. Place the ball of wool on the foam.
Enlarge picture showing placement of wool on foam
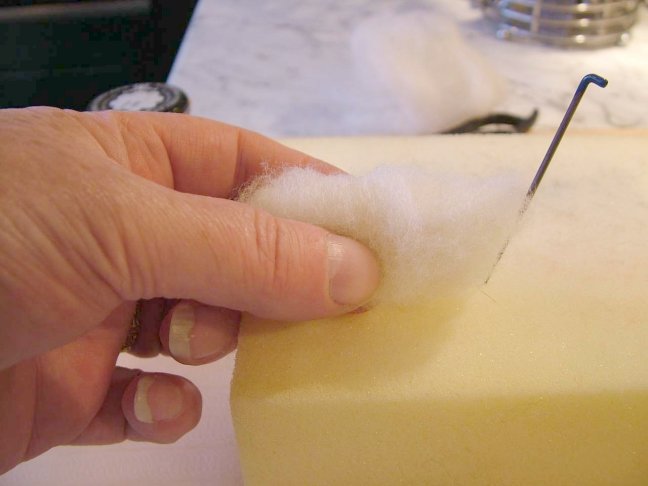
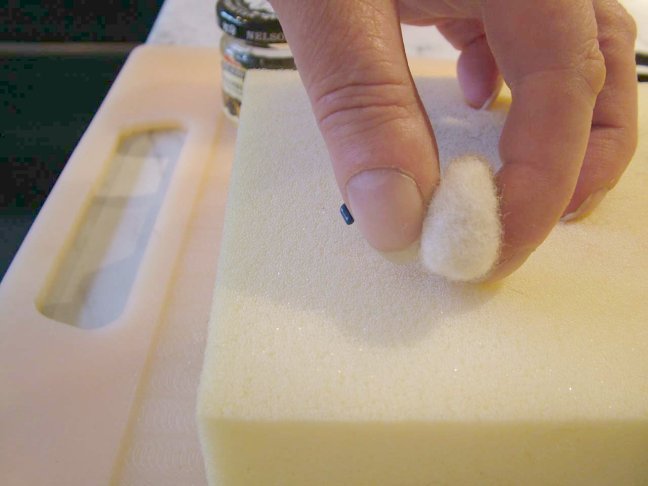
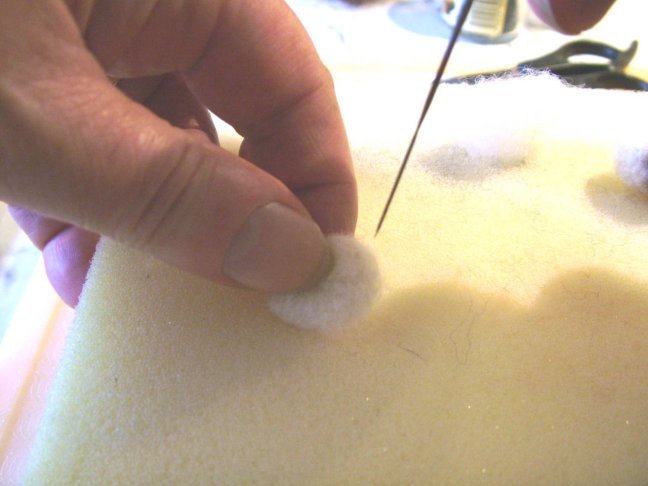
 4. Take your felting needle and start punching at the ball of wool. Begin punching the needle through the layers of fibers.
Enlarge picture showing steps to begin punching
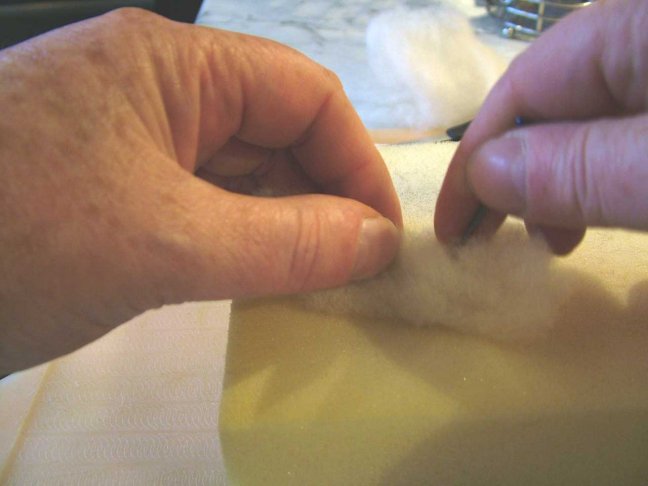
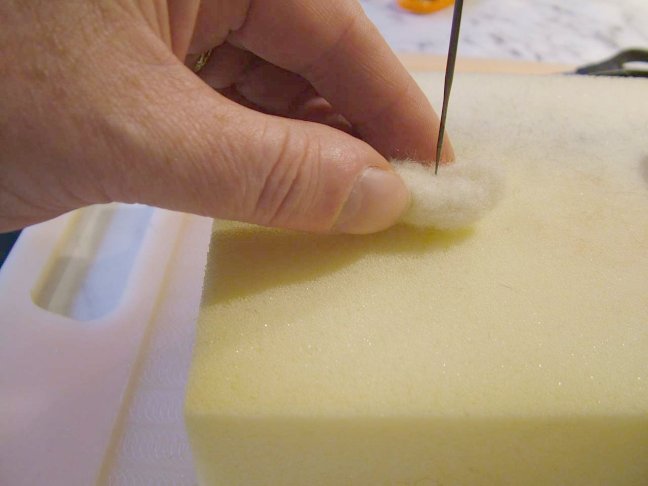
 5. Work on a small area at a time, keep punching and turning to form a solid ball. Holding the needle in one hand, the ball of wool on the foam pad with the other hand. Remember to continue to turn the wool, otherwise you will find it goes flat.
Enlarge picture showing punching technique
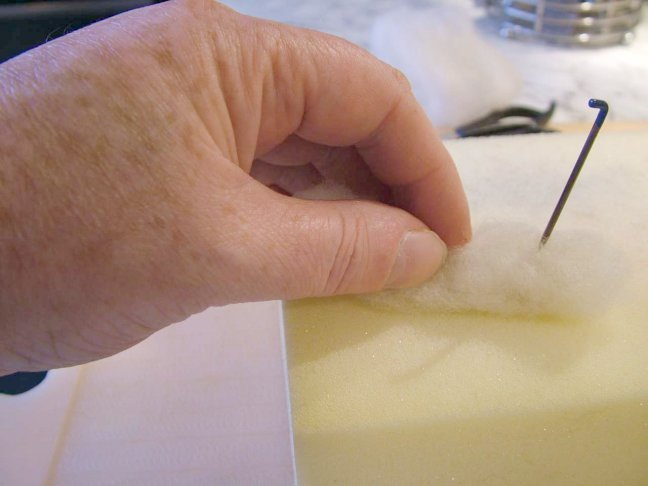
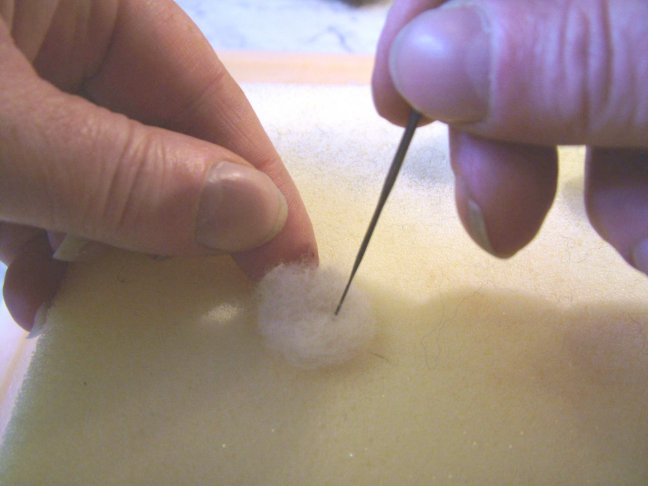
 6. Repeatedly work over the whole area until the layers are completely meshed together.
Enlarge picture showing the wool meshing
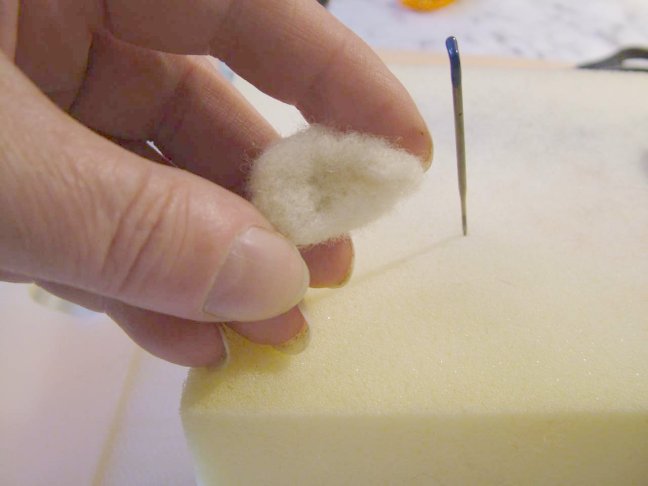
 7. As you continue punching, you will see a tight ball forming.
Enlarge picture showing the ball forming
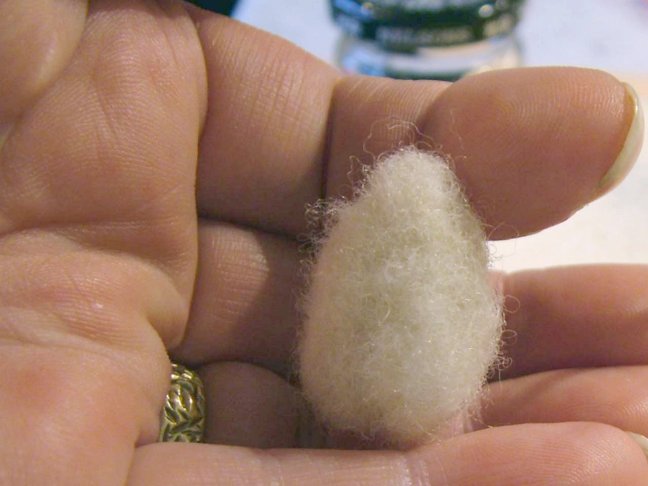
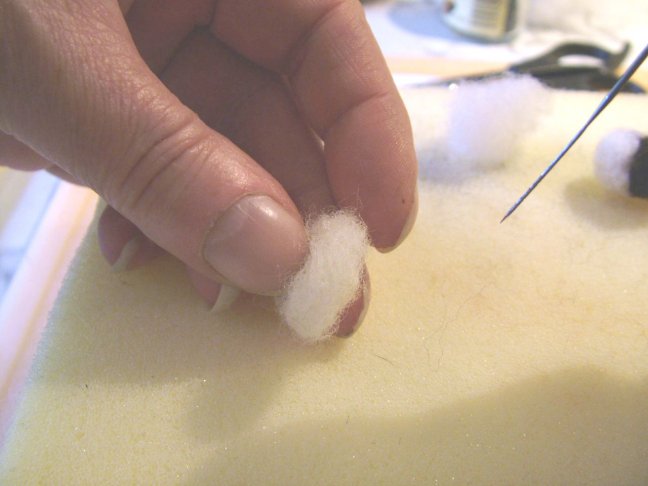
 8. The ball forming after punching and turning the wool.
Enlarge picture showing formed ball
 9. As you punch at the wool, it folds and entangles the loose wool fibers, meshing them together to create a firm ball.
Enlarge picture showing the meshing of the fibers
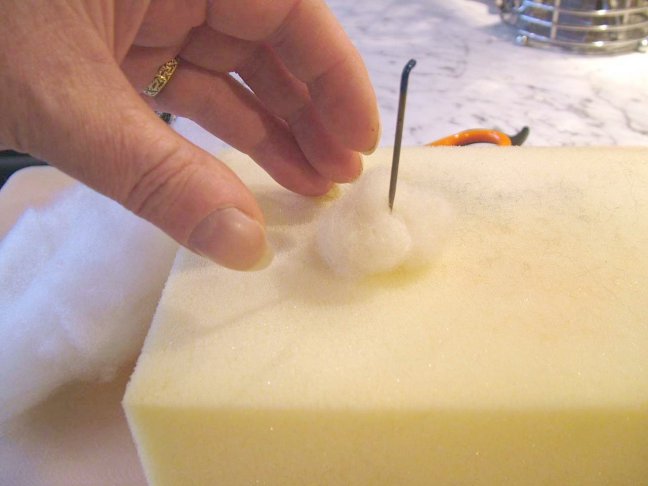
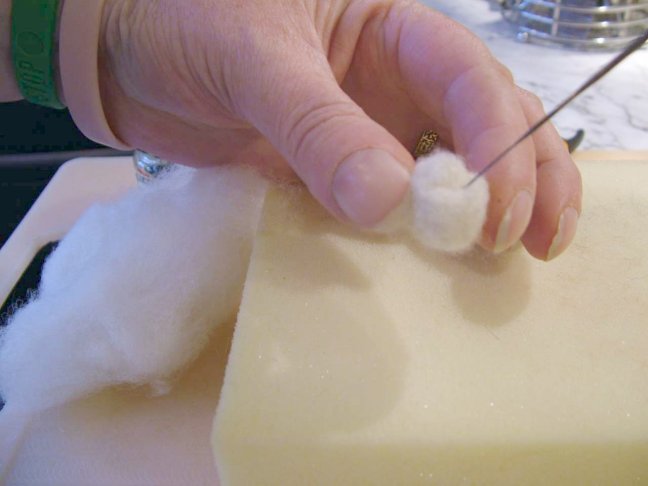
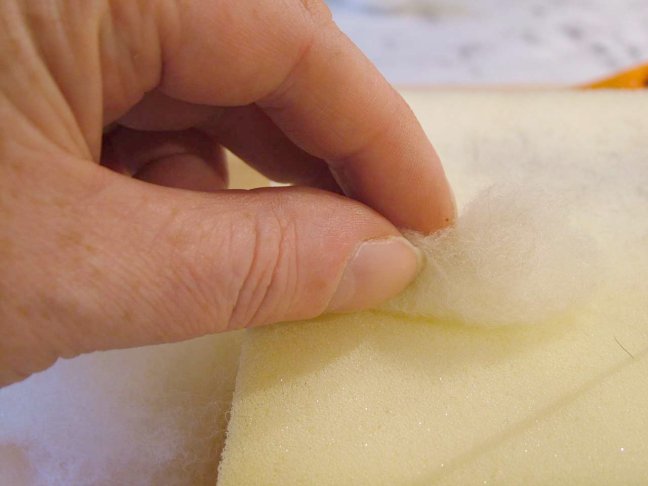
 10. When you have a tight ball, about one (1) inch in diameter, you will need to begin shaping the nose. Take a small amount of wool and form a ball on top of the original ball. This will be the nose.
Enlarge picture showing when to start the nose
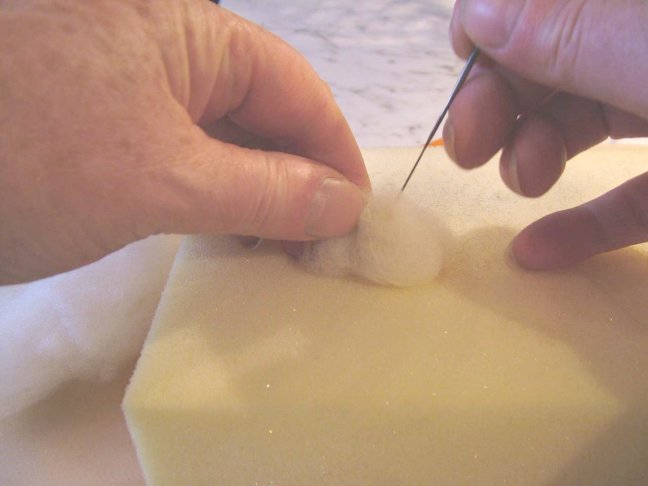
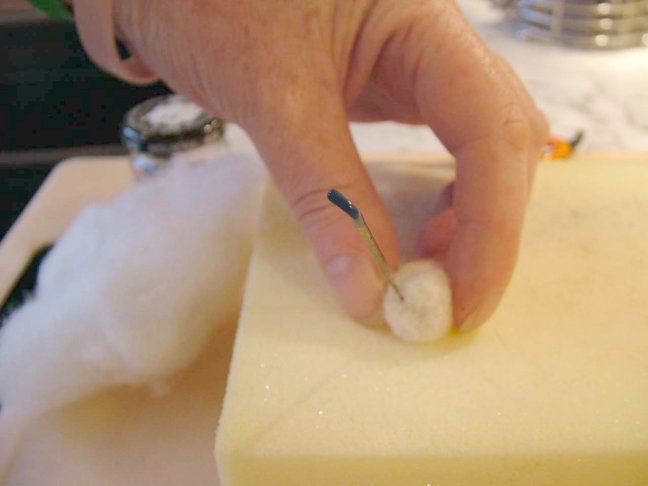
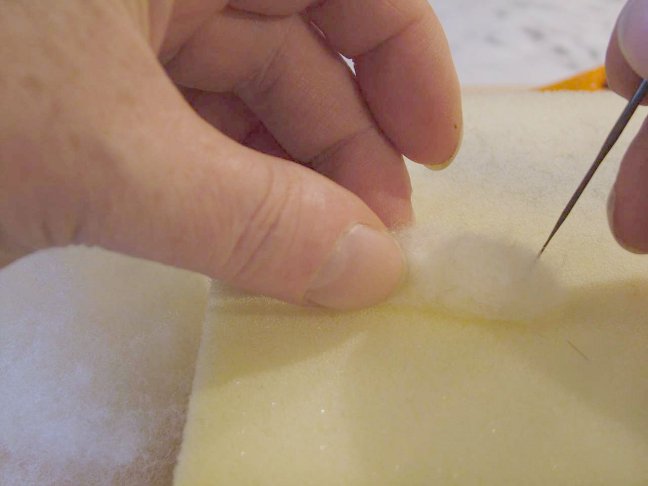
 11. Hold the back of the ball and begin punching at the small ball of wool.
Enlarge picture to showing how to hold the ball to form the nose
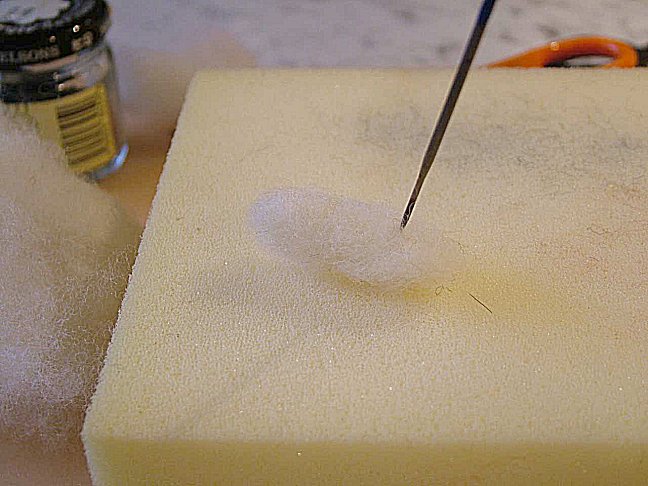
 12. A different view on how to continue punching.
Enlarge picture showing a different view of forming the nose
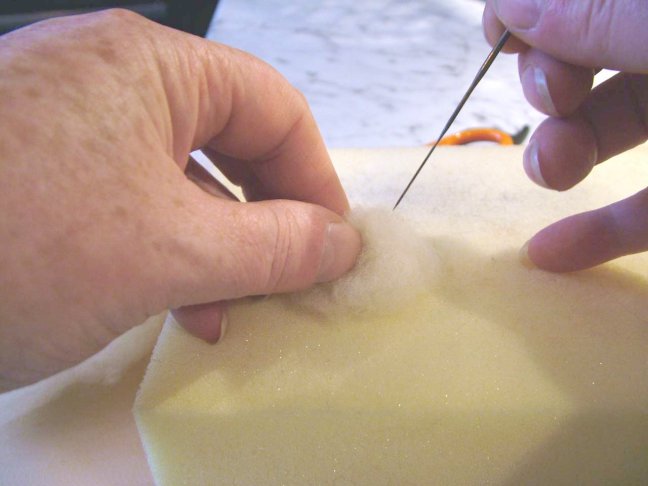
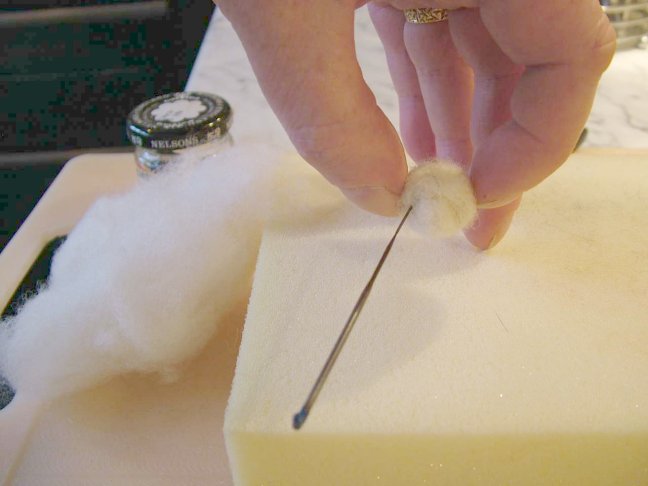
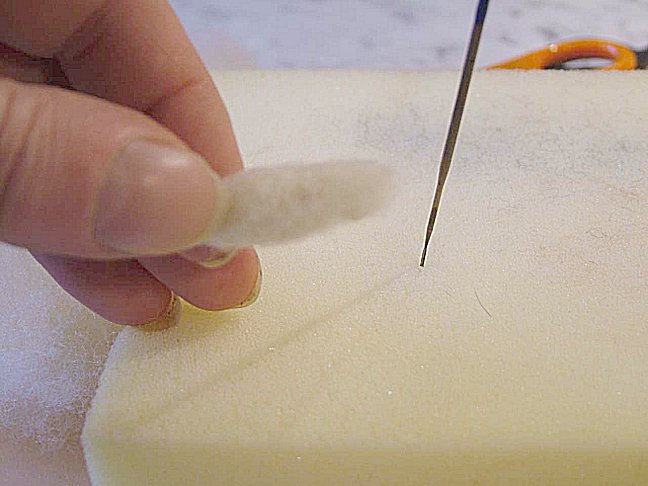
 13. Keep punching the small wool ball into the larger ball, until you have a arc shape.
Enlarge picture showing the small arc forming
 14. Another angle of the arc shape forming.
Enlarge picture showing the another image of the small arc forming
 15. The bump on the end of the nose completed
Enlarge picture showing the the small bump on the end of the nose
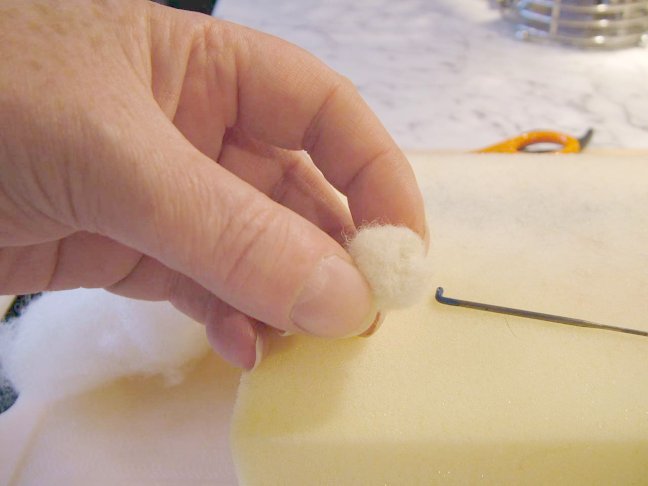
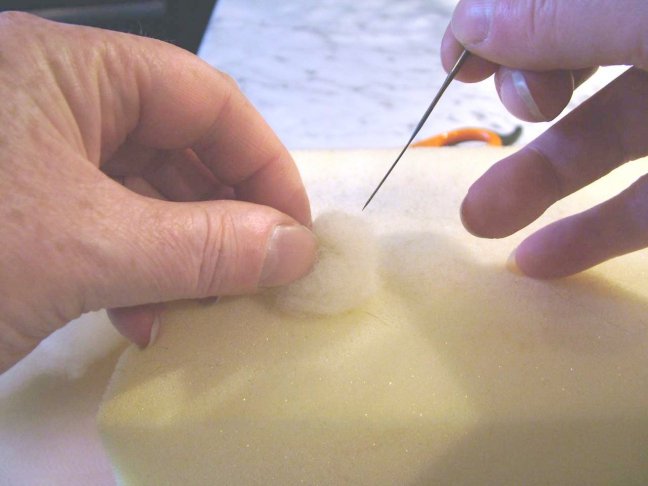
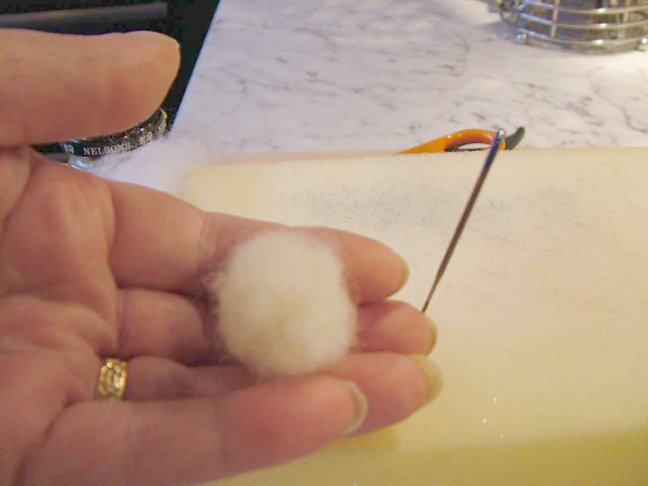
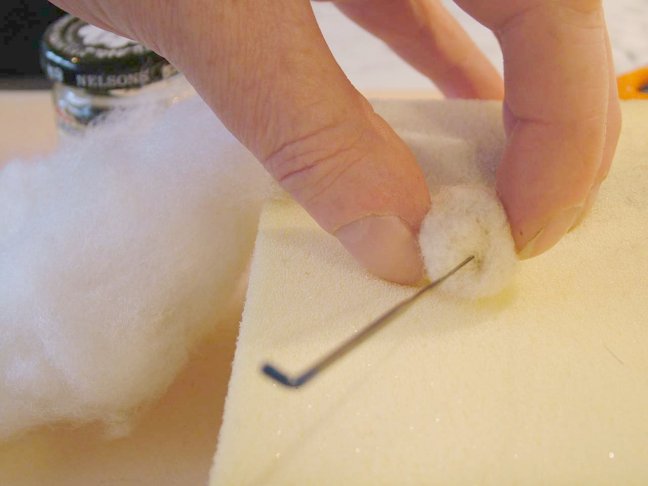
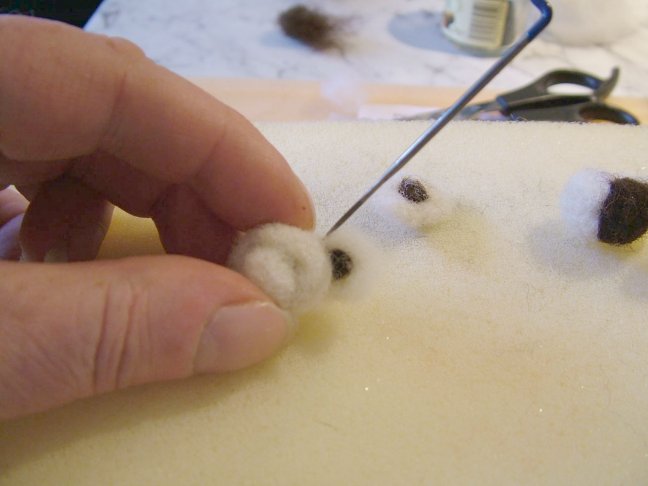
 16. Next you will punch the eye indentations where you will place the glass eyes. Do this by punching several times into the same place on the ball of wool to compress the wool into indentations.
Enlarge picture to showing how to create the eye indentations
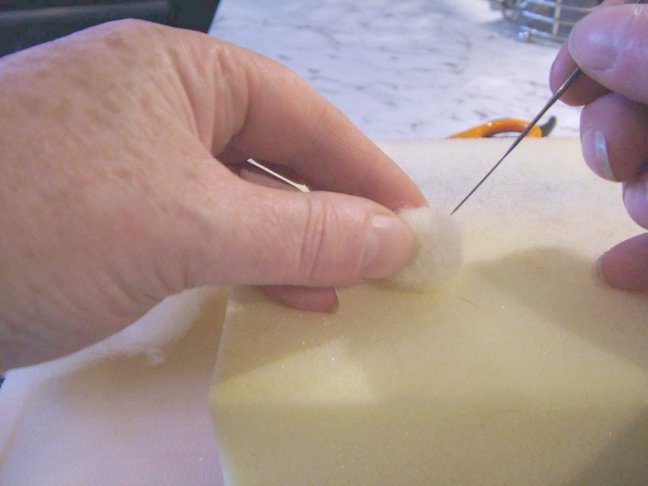
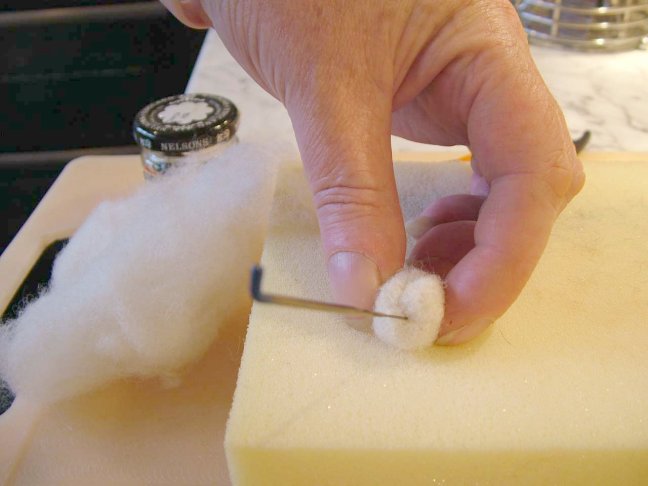
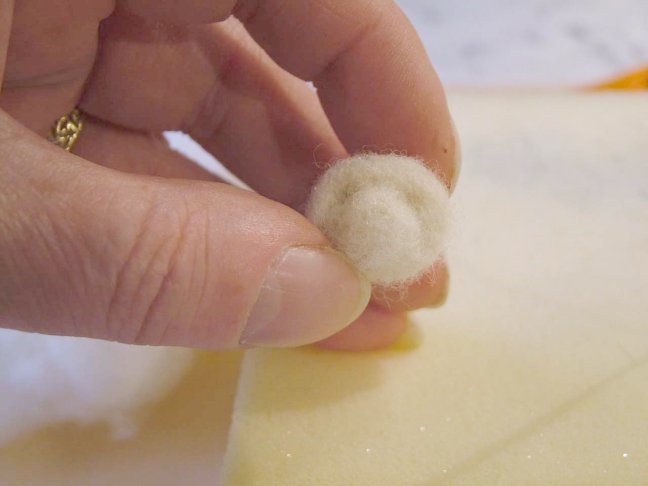
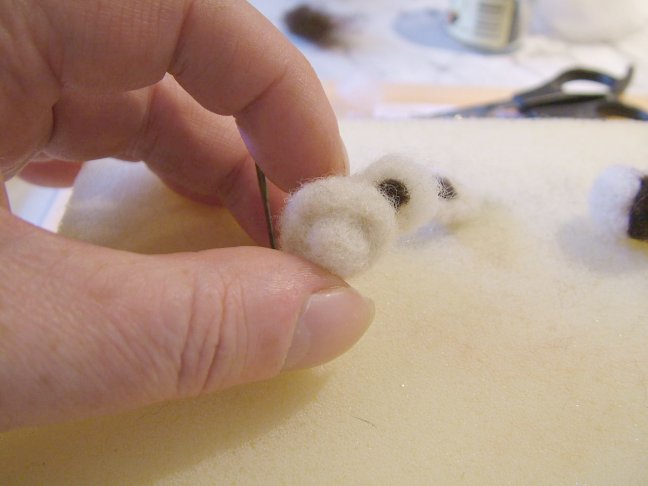
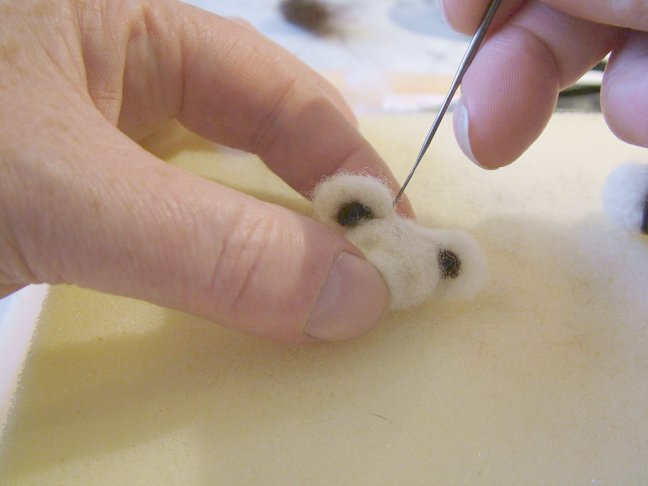
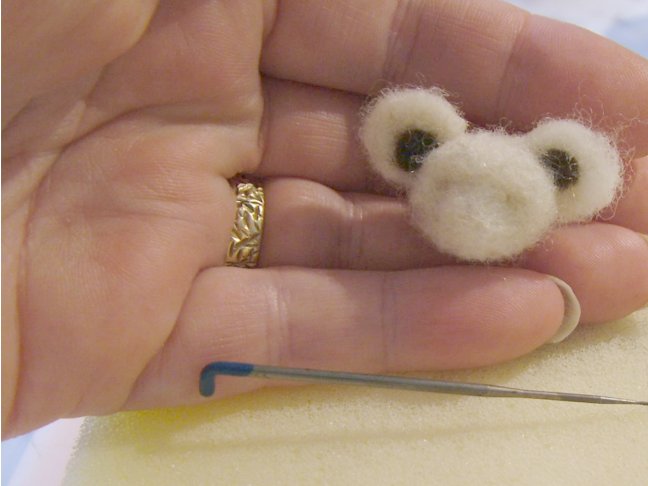
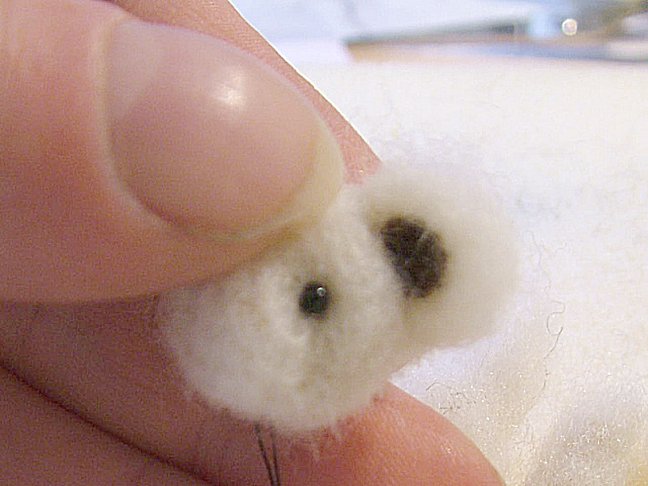
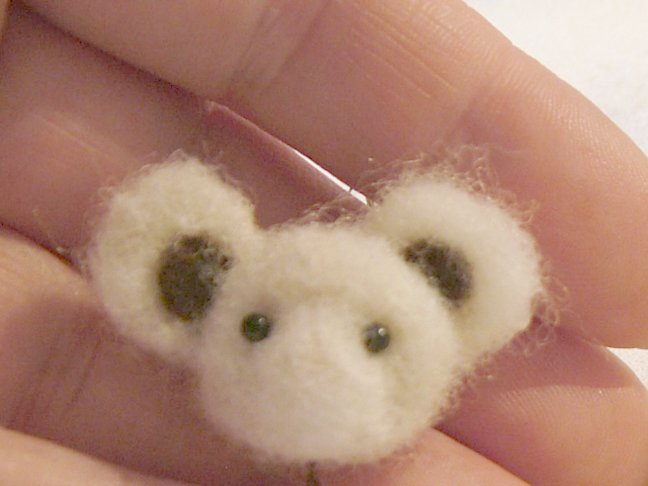
 17. When you are finished punching the eye area, you should be able to see eye indentations on either side of the nose.
Enlarge picture showing frontal view of the finished eye sockets
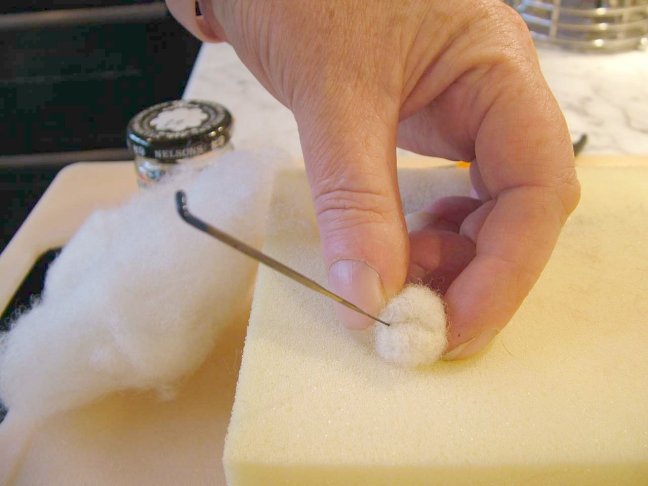
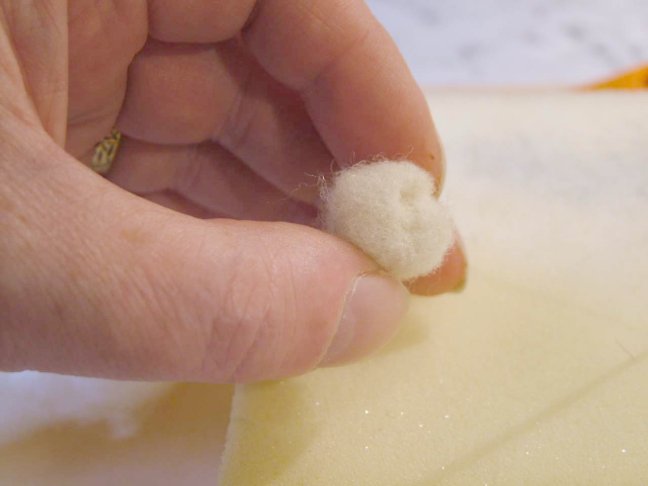
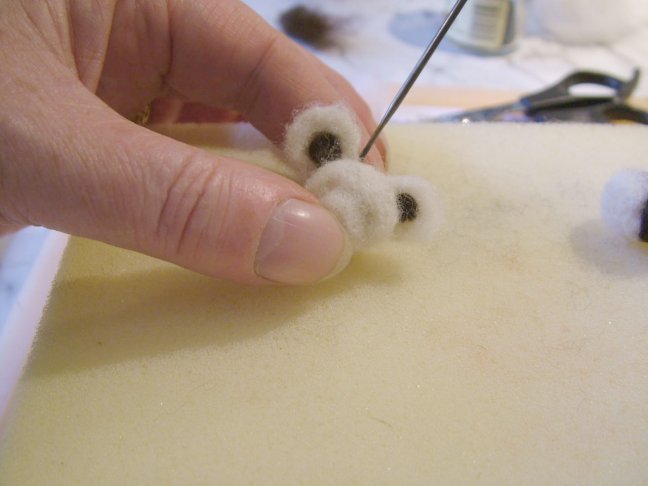
 18. Another view of the eye indentations on either side of the nose.
Enlarge picture showing frontal view of the finished eye sockets
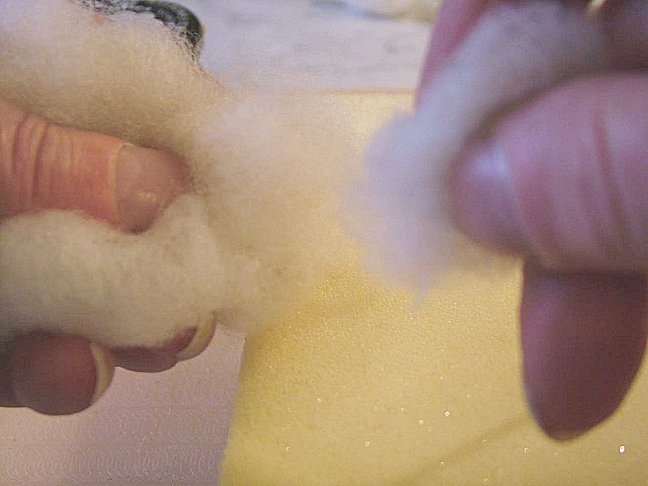
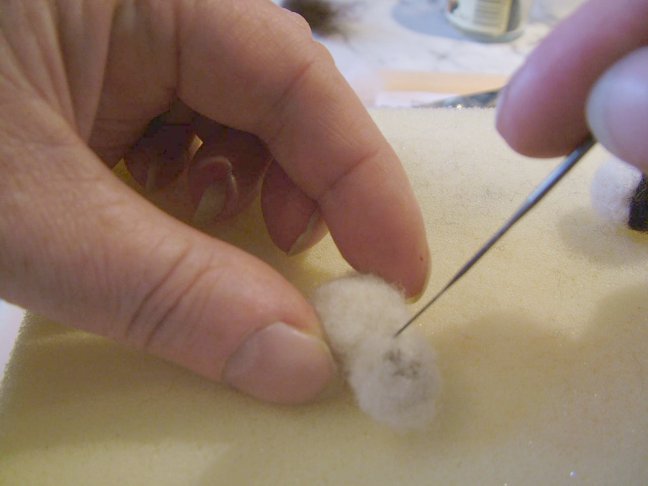
 19. Next comes the legs. Take a small amount of wool.
Enlarge picture showing wool to make legs
 20. Working length ways begin punching, then turn, punch, and continue. You are working to create a sausage shaped piece.
Enlarge picture showing how to create the legs
 21. Keep turning and punching along the sausage shape.
Enlarge picture showing how the legs are beginning to form
 22. The final oblong punched piece
Enlarge picture showing the oblong piece that will be the legs
 23. Check for firmness of the fibers, you want to make sure its feels solid
Enlarge picture showing the finished piece for the legs
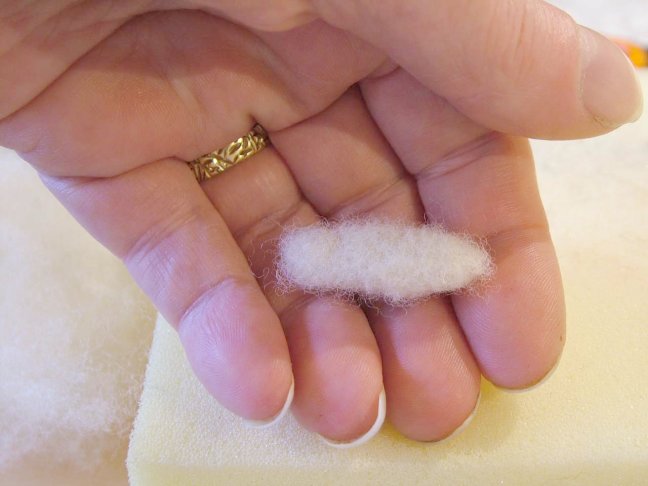
 24. Your finished shape should be around 2" long x ½" wide. Set aside for now.
Enlarge picture showing size of the finished piece
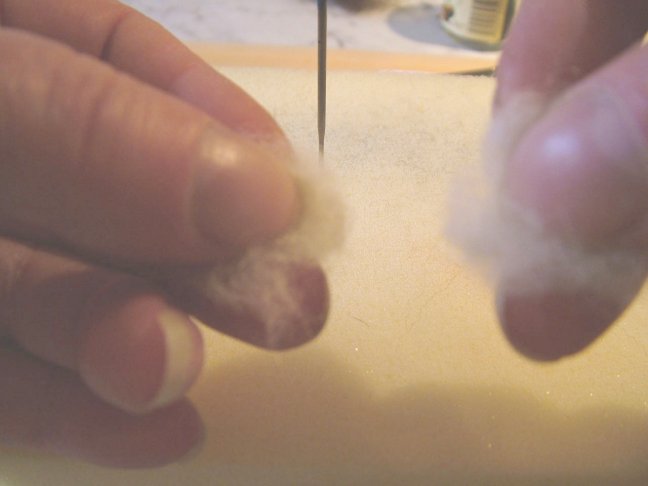
 25. Now take a bit of wool again. This time you will be repeating basically the same steps as before for the leg piece but with a little less fibers. This oblong piece will be for the arms.
Enlarge picture showing how to create the arm piece
 26. Working length ways, begin punching, then turn, punch, and continue. You are working to create another oblong shaped piece as instructed previously.
Enlarge picture showing the punching technique
 27. Continue punching and turning, working from the left to the right to create the oblong shape.
Enlarge picture showing the oblong piece starting to form
 28. Your finished shape should be approximately 1½" long x ½" wide.
Enlarge picture showing size of the finished piece
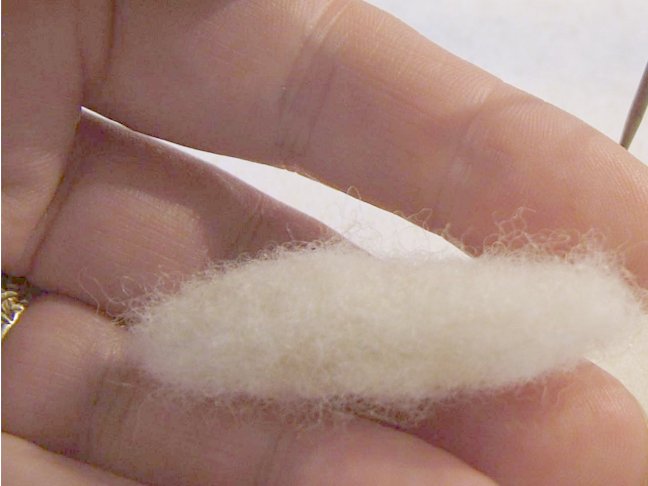
 29. Completed oblong piece that will be the arms.
Enlarge picture showing the oblong piece
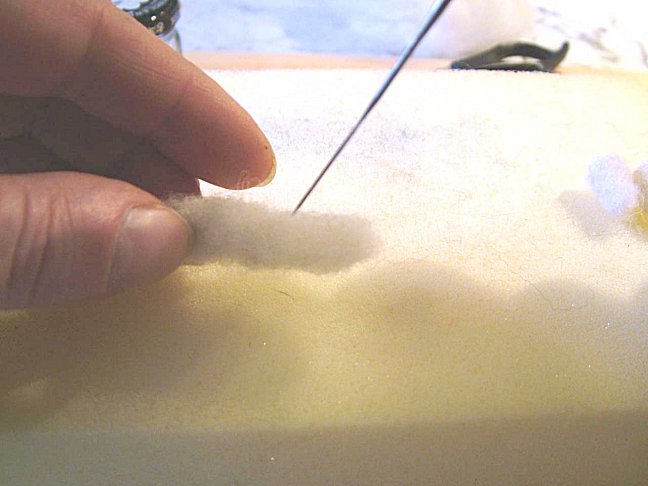
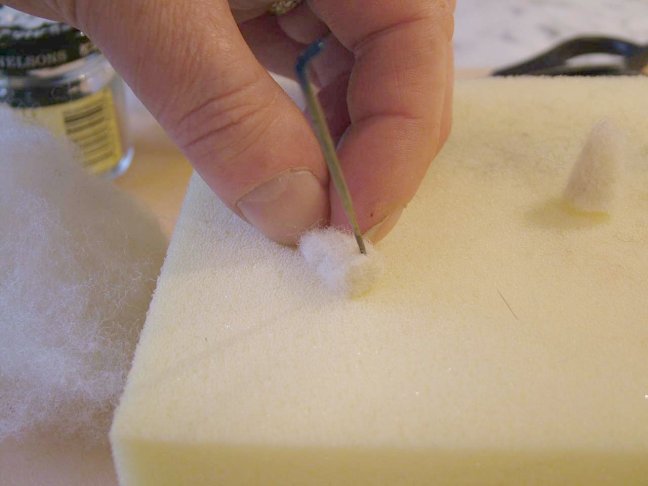
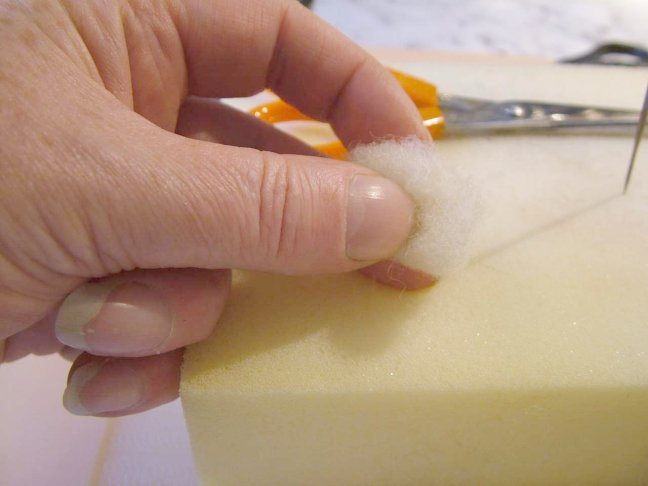
 30. Take this second oblong piece; this is the shorter of the two oblong pieces you just made. Take your scissors and cut this piece exactly in half.
Enlarge picture showing where to cut the shorter oblong piece
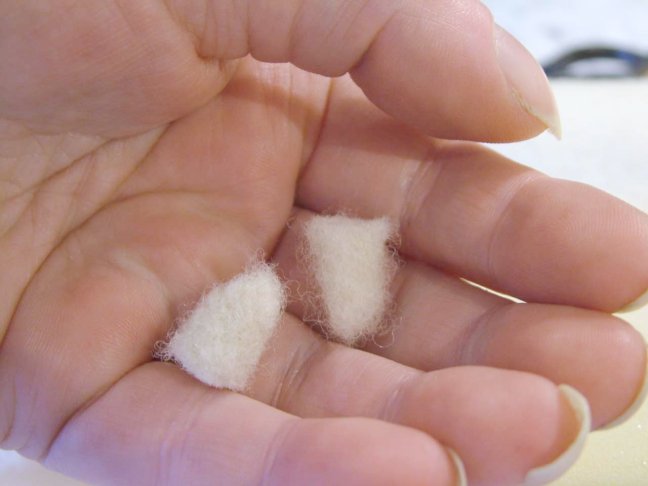
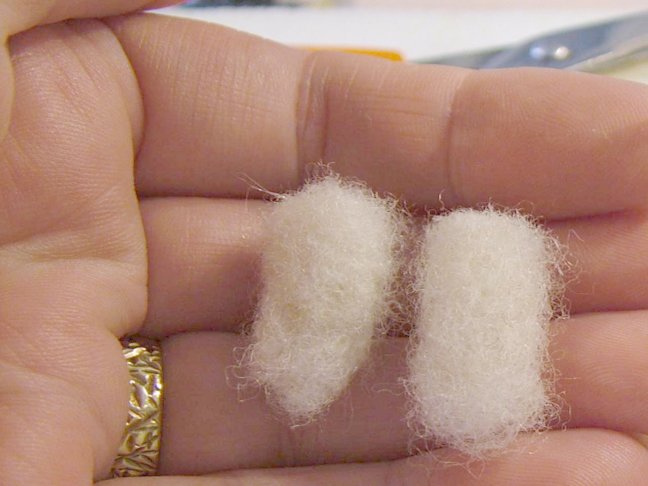
 31. You should now have two separate pieces that will make the arms.
Enlarge picture showing two separate pieces
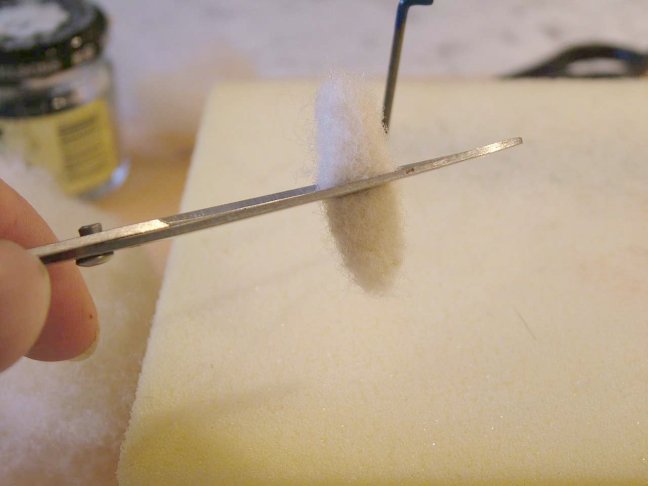
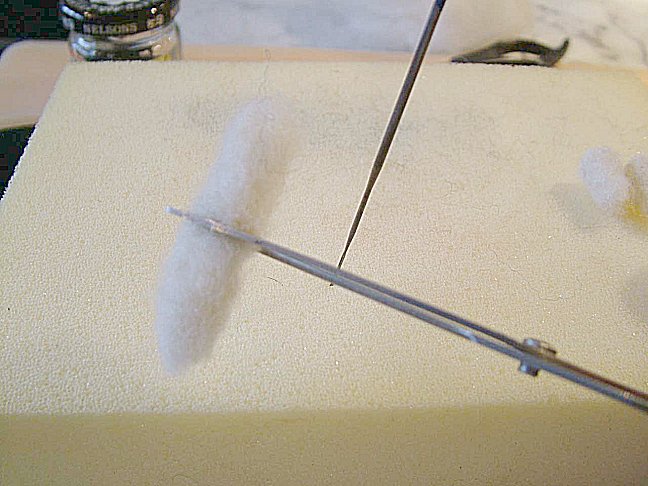
 32. Take your needle and carefully punch the ends to seal the cut area.
Enlarge picture showing where to seal the ends
 33. Now retrieve the longer oblong piece.
Enlarge picture showing the first oblong piece
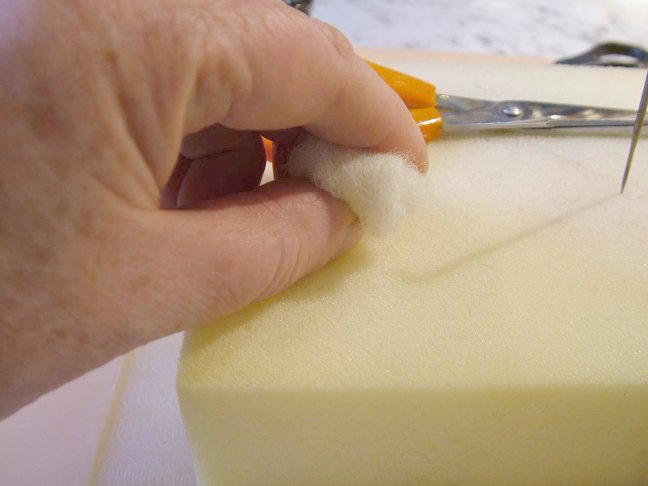
 34. Take this first oblong piece that you set aside; this is the longer of the two pieces you just made. Take your scissors and cut this piece exactly in half.
Enlarge picture showing where to cut the longer oblong piece
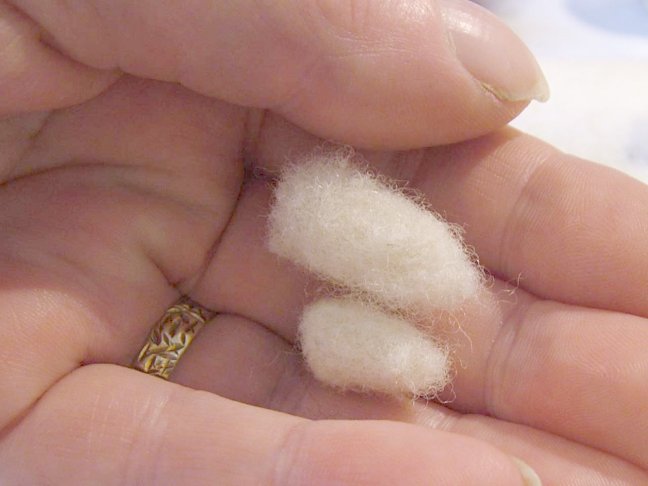
 35. You should now have two separate pieces that will make the legs.
Enlarge picture showing two leg pieces
 36. You should now have two arms and two legs.
Enlarge picture showing two leg pieces and two arm pieces
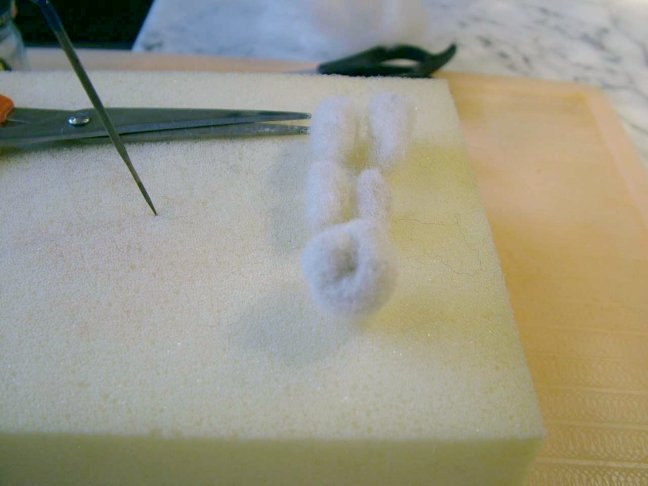
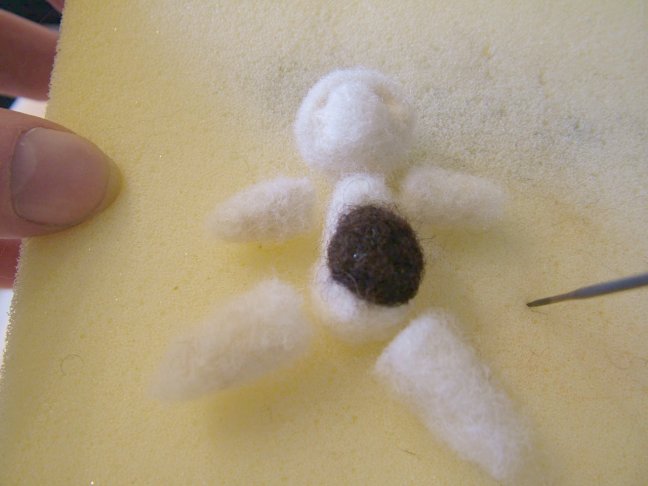
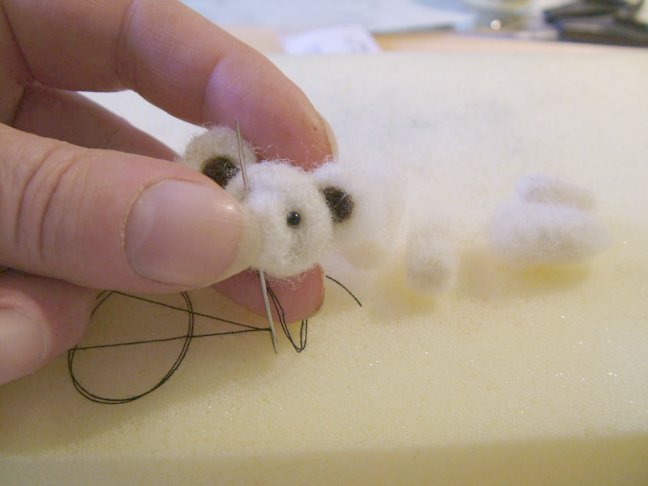
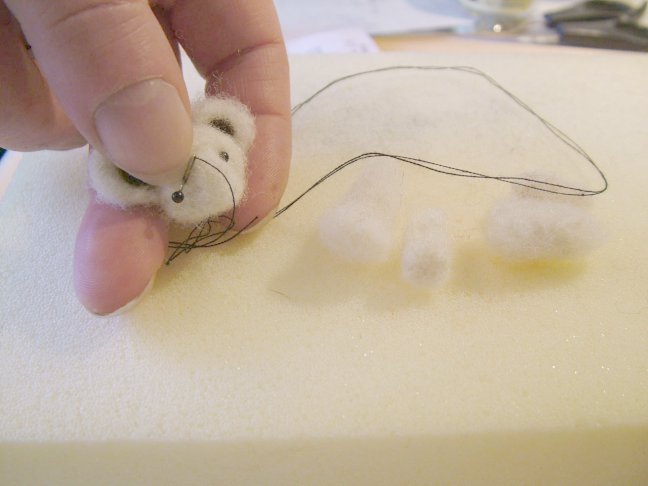
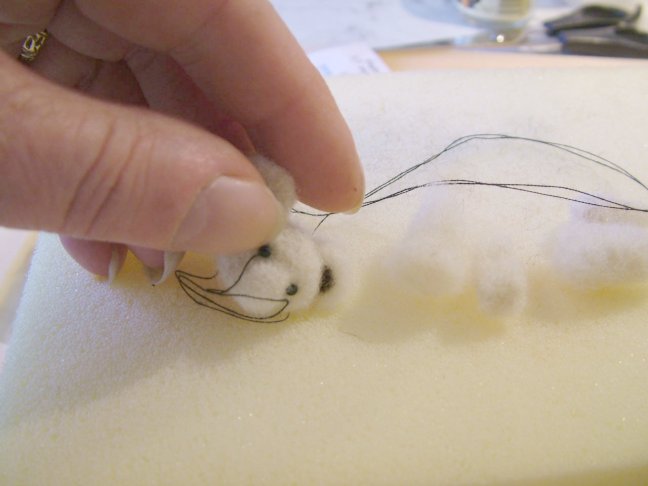
 37. Now you have needle felted five pieces. A head, two arm pieces, and two leg pieces.
Enlarge picture showing the five pieces you have created
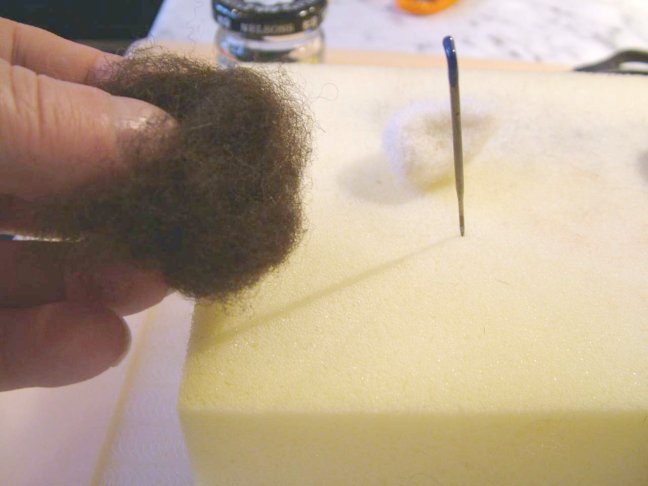
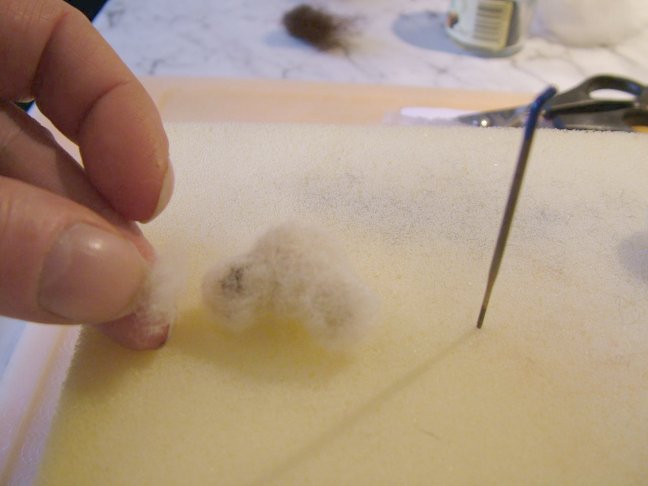
 38. Next comes the body of the bear. Take a good handful of wool fibers.
Enlarge picture showing wool needed for the body
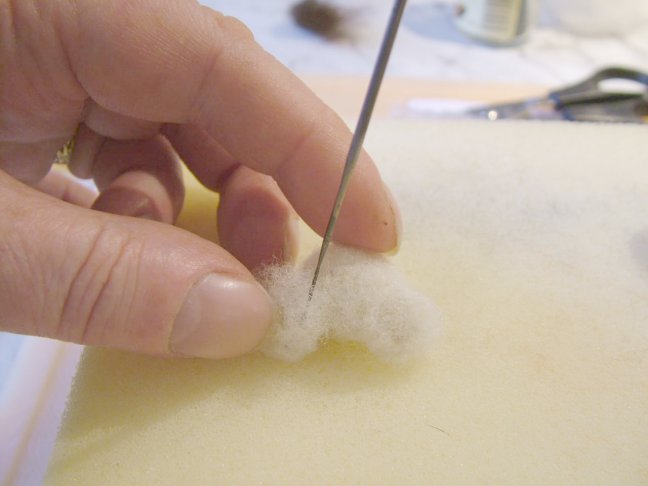
 39. Roll the wool fiber into a ball.
Enlarge picture showing wool rolled up
 40. When you ball the wool in your hand, you need to have roughly a 1" wad of wool that is firm to the touch.
Enlarge picture showing amount of wool to start with
 41. To form the body, you want to have a teardrop sort of ball. Thinner at one end and fatter at the other. Begin punching and turning.
Enlarge picture showing shape you want to achieve
 42. When you have completed the needle punching, this is the basic shape you want to have.
Enlarge picture showing tear drop shape
 43. Here is another view of the body of the bear
Enlarge picture showing another view of the body
 44. Next you will need to concave the belly so that you add the brown shape to the middle of the belly. To shape teddy's belly, punch in the middle as shown.
Enlarge picture showing where to make the concave
 45. You will see an indentation begin to form on one side. it resembles the inside of a boat
Enlarge picture showing indentation
 46. His back is still nice and rounded.
Enlarge picture showing the backside
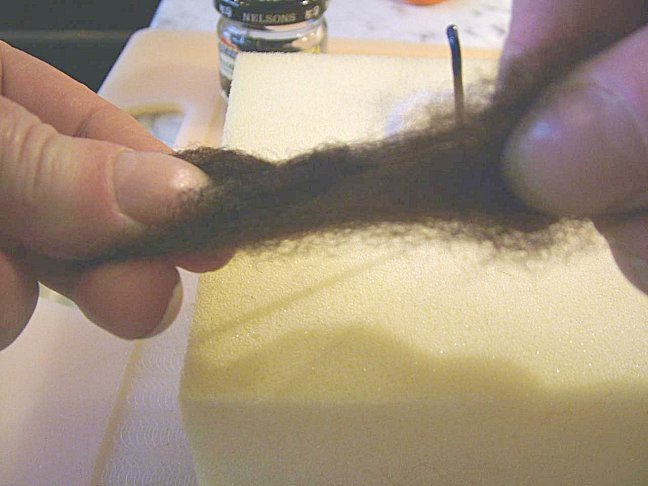
 47. After the indentation is the way you want, take a handful of brown fiber wool.
Enlarge picture showing the brown wool
 48. When the wool is rolled in your hand you will need roughly ½" in size.
Enlarge picture showing how to estimate the amount of wool needed
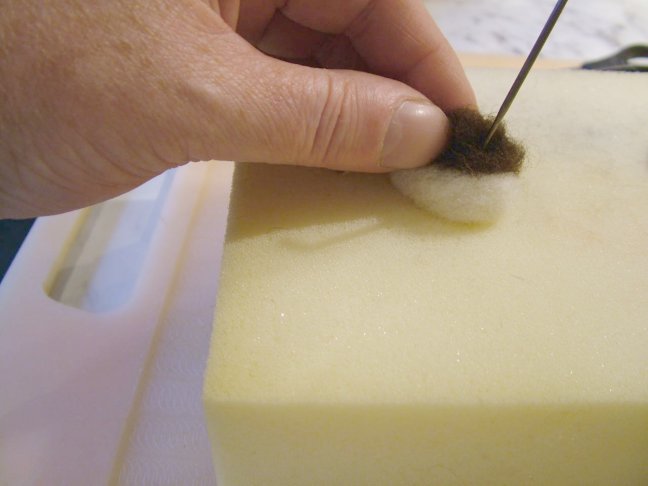
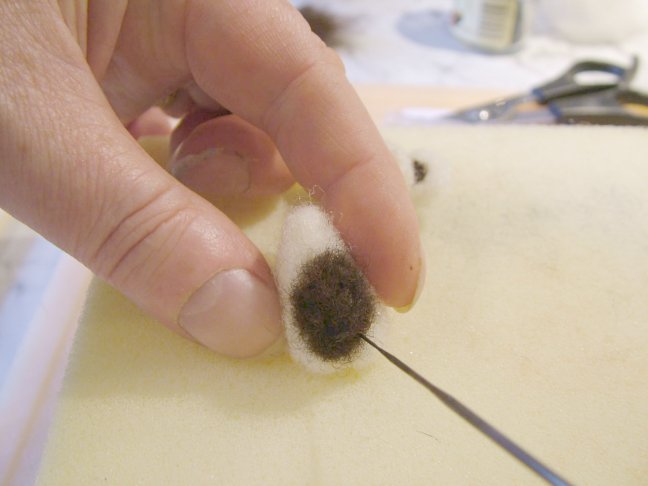
 49. Place the brown wool in the stomach cavity you just created. Gently punch at it, but not going through the body.
Enlarge picture showing where to begin punching the brown wool
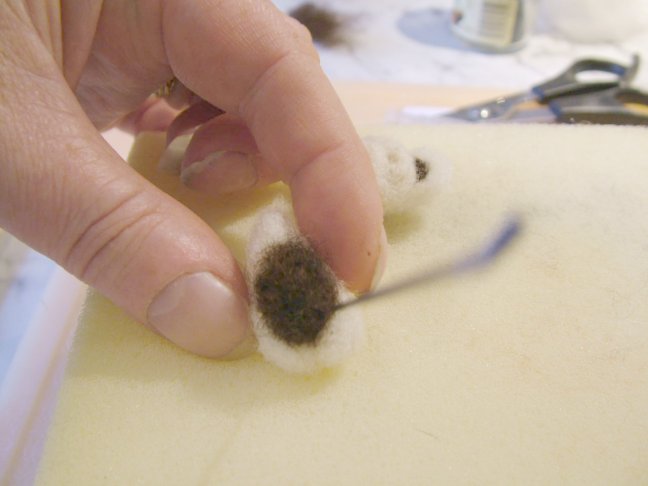
 50. Make sure that the brown wool doesn't flatten too much, it needs to be round looking when completed.
Enlarge picture showing punching
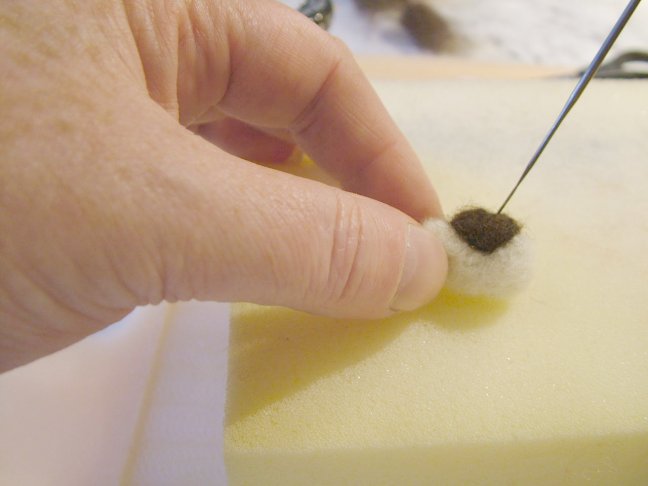
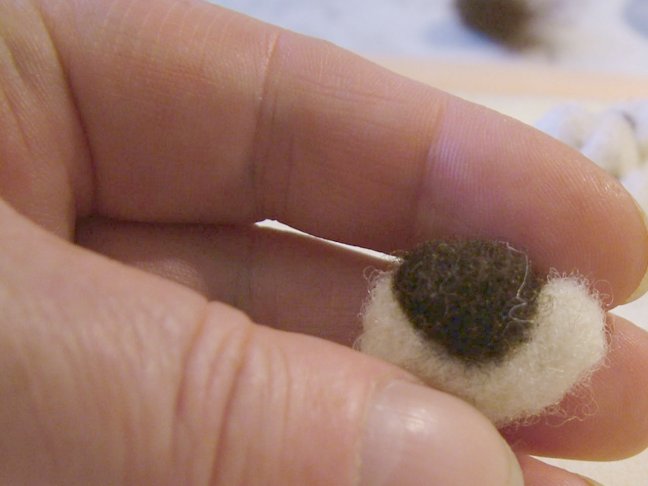
 51. Gently go all around the area.
Enlarge picture showing last punching around the area
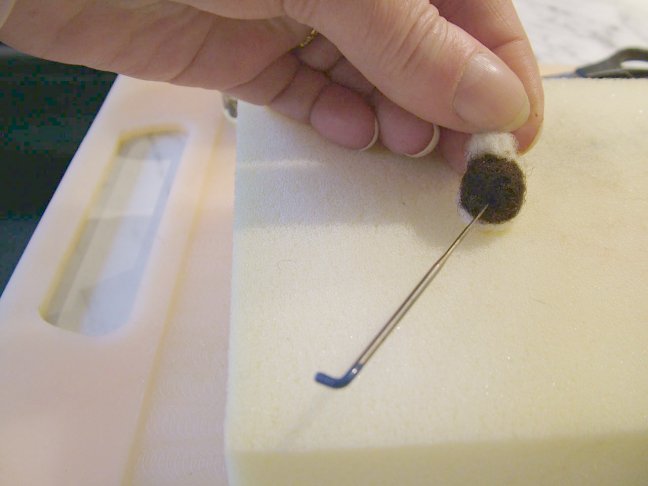
 52. Now you have complete the body. Now you have made six pieces.
Enlarge picture showing the six pieces you have formed
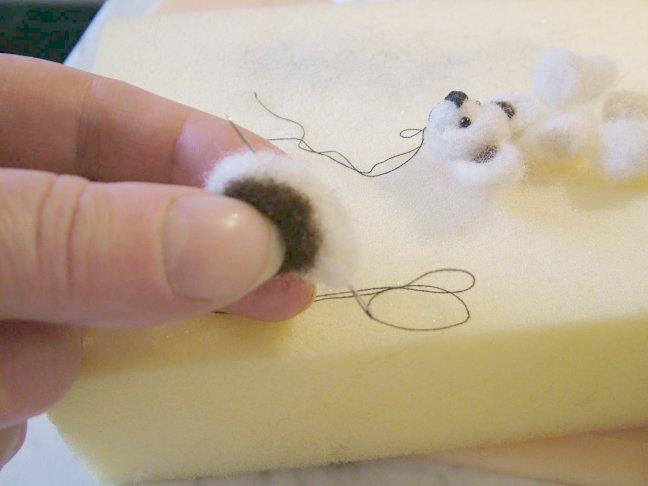
 53. Now we are going to make the ears. Take a small amount of equal parts of the white/cream wool for each ear.
Enlarge picture showing wool needed to create the ears
 54. Form two balls of wool.
Enlarge picture showing balls of wool for the ears
 55. Before you begin punching, note that this time you will need to punch at the back, turn, punch, turn, punch, at the front, then turn again. This will create a flatter piece.
Enlarge picture showing punching method for the ears
 56. Continue punching and turning.
Enlarge picture showing the ear pieces
 57. You will have a rough edge of the piece you are holding.
Enlarge picture showing rough edge
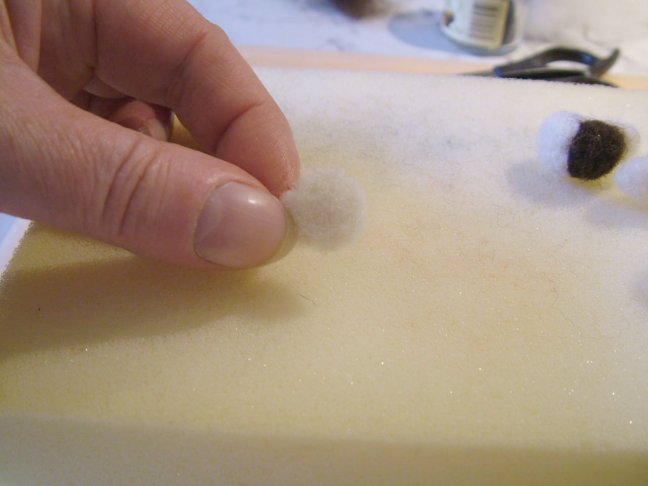
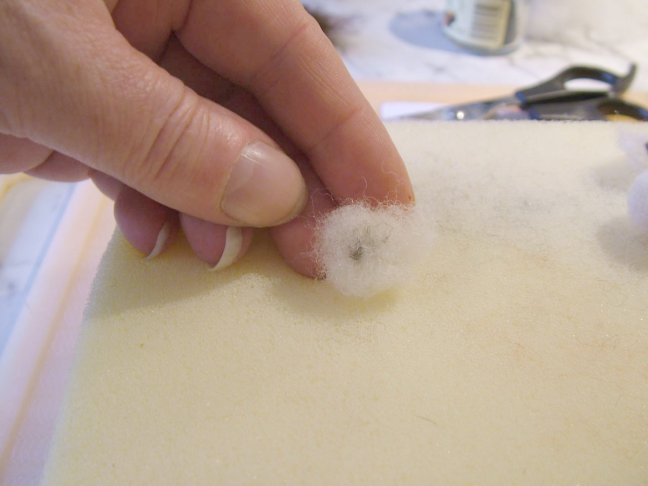
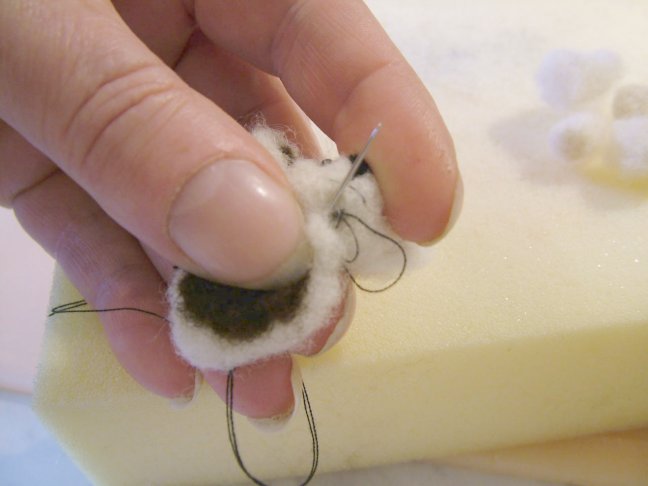
 58. Now you need to punch on the inside of the ear. This is to create a small indent in the middle.
Enlarge picture showing how to create the indent
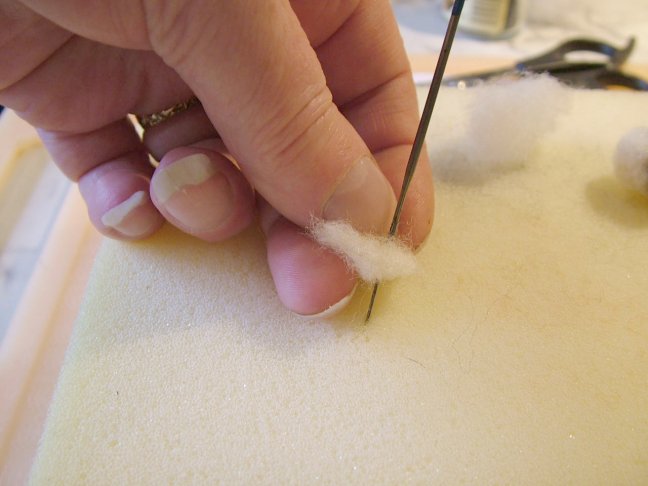
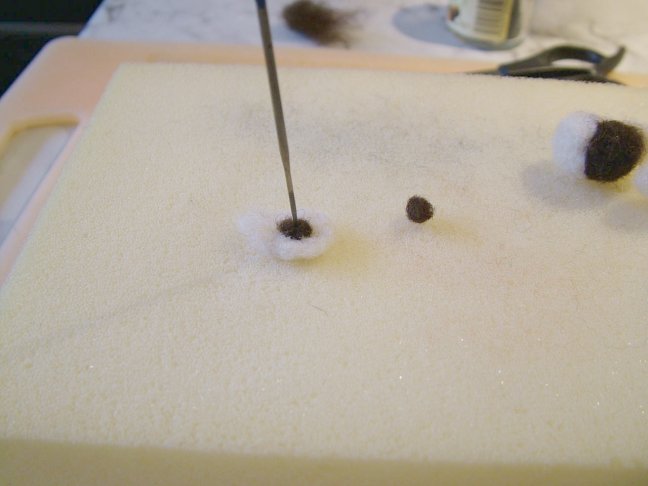
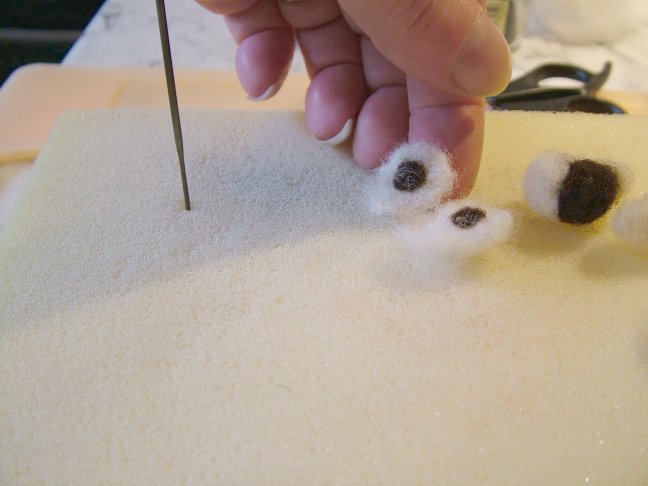
 59. Take a small piece of equal amounts of brown wool and split into two separate pieces.
Enlarge picture showing the brown wool
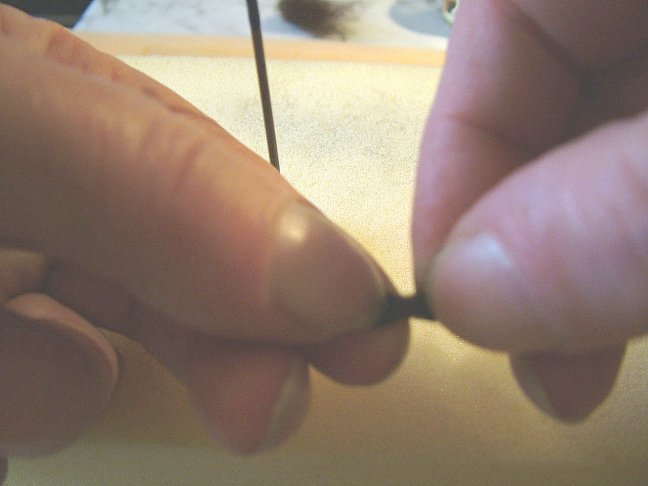
 60. You will need to punch two separate but equal sized round balls. Set aside.
Enlarge picture showing how to create two round balls for the ears
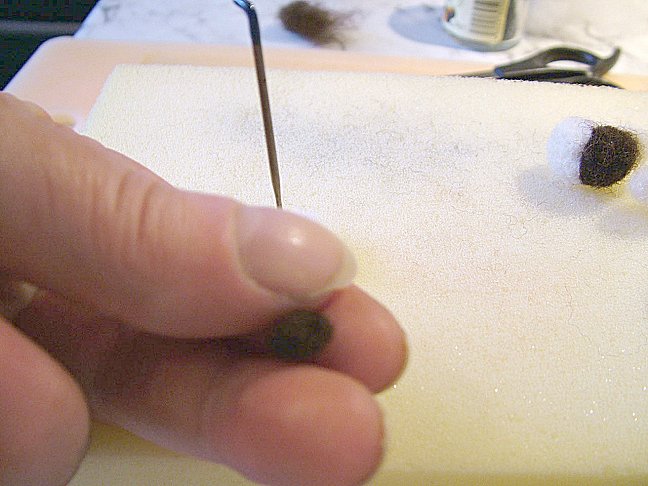
 61. Return to the white/cream ear piece that you were working on, continue to shape the ear.
Enlarge picture of the original cream/white ears
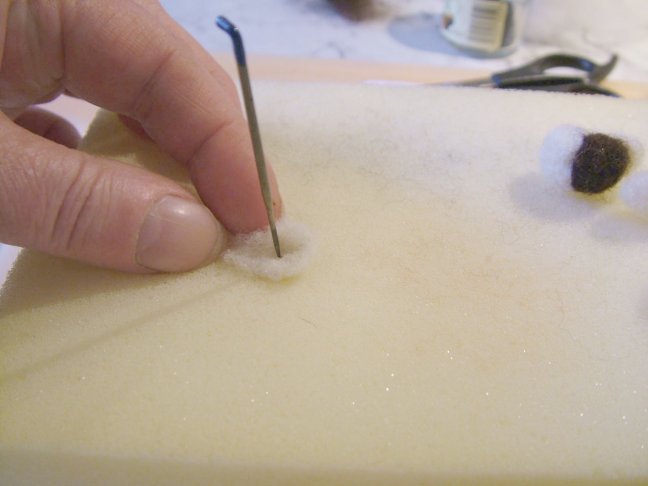
 62. Continuing shaping until you have a tear drop shaped ear. Once finished forming the ears, set aside.
Enlarge picture showing how you need to continue shaping the ears
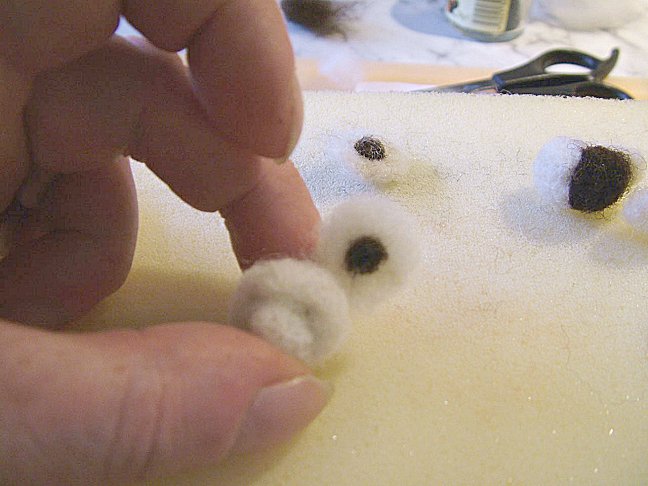
 63. Now retrieve the two pieces of brown wool you previously created and place it in the indent of the cream/white ear.
Enlarge picture showing where to put the brown punch wool into the ear piece
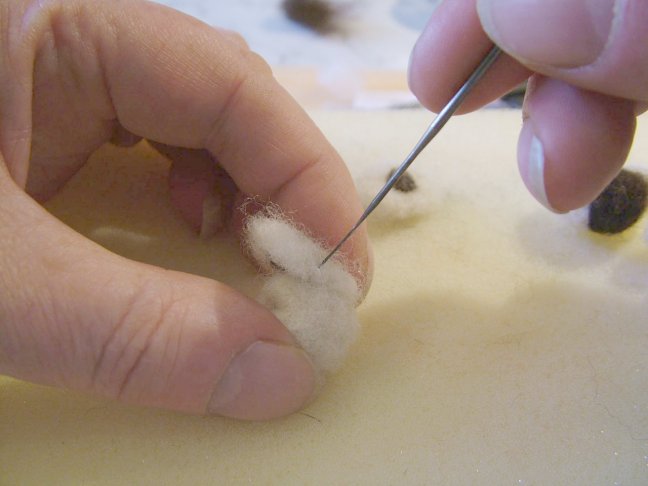
 64. Punch the brown ball into the indent area of the ear piece, making the brown wool as flat as possible.
Enlarge picture showing where to punch the brown wool into the ear
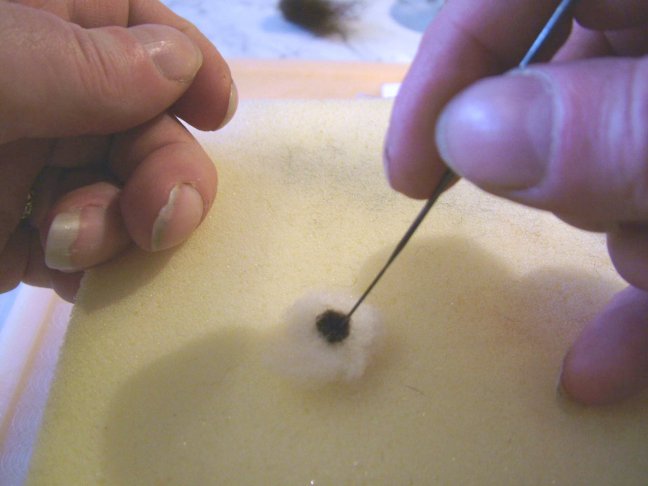
 65. After punching the brown wool into the ear piece your ear should look like the image in the front.
Enlarge picture showing final ear piece
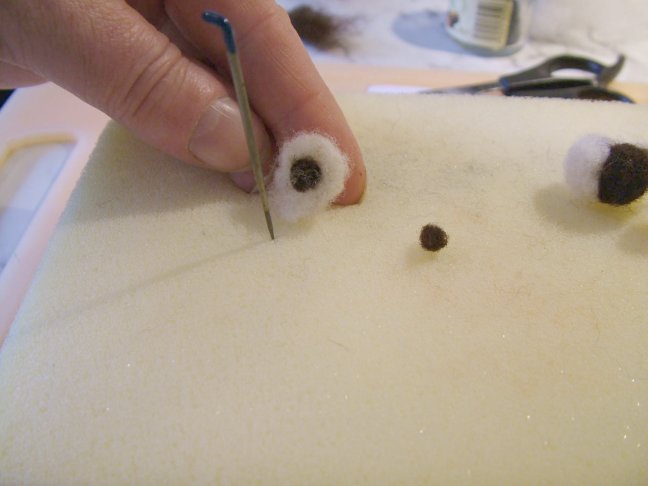
 66. If you flip over the ear you may find that the back of the ear piece is showing the brown wool. Don't worry about the brown showing through at this stage, when the ears are attached to the head, you will be able to fix this.
Enlarge picture showing the brown wool showing
 67. Now you have two completed ears. Set aside.
Enlarge picture showing completed ears
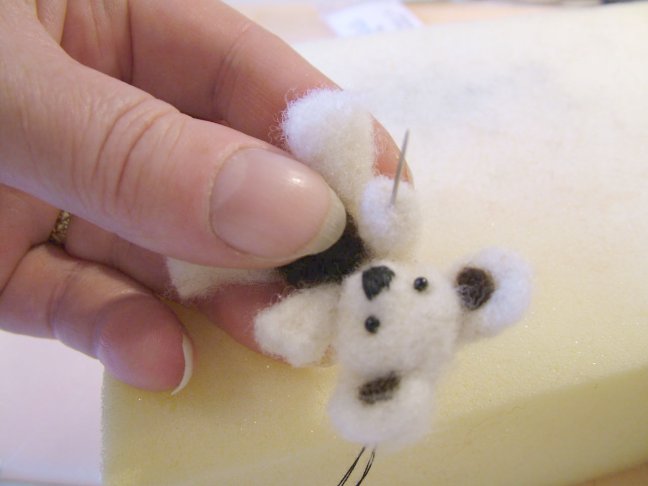
 68. Take the head and place one ear on the side of the head. Move the ear around until you are satisfied with a position.
Enlarge picture showing where to place the ear
TIP
For people who have not needle felted before, please place the head on the foam and hold the ear atop the head first. Then punch through the ear into the head, fixing the ear to the head with the needle.
For people who have not needle felted before, please place the head on the foam and hold the ear atop the head first. Then punch through the ear into the head, fixing the ear to the head with the needle.
 69. Begin punching the ear onto the head.
Enlarge picture showing how to attach the ear to the head
 70. Continue punching the ear onto the head, working all the way around.
Enlarge picture showing where to punch the ear onto the ear
 71. Keep punching until the ear is firmly attached on the head.
Enlarge picture showing how to firmly attach ear
 72. Now place the other ear exactly opposite the placement of the first ear. Keep your fingers out the way of the needle and begin punching.
Enlarge picture showing the attachment of the second ear
 73. Work the back of the ear, punching firmly.
Enlarge picture showing the punching routine on the back
 74. Work the front of the ear. Keep repeating until you have both ears firmly attached to the head.
Enlarge picture showing the punching routine on the front
 75. Ears firmly attached.
Enlarge picture showing ears attached
TIP
If the back of the ears are solid white/cream, then you can skip Steps 76-78 and go directly to Step 79
If the back of the ears are solid white/cream, then you can skip Steps 76-78 and go directly to Step 79
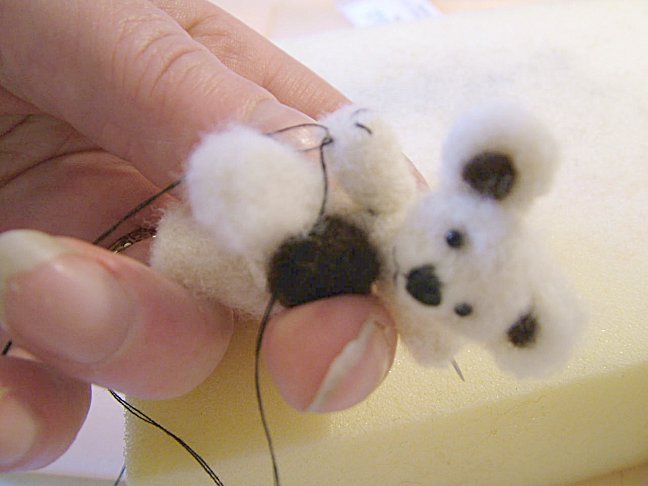
 76. Place the head on the foam and take a tiny bit of cream/white wool and place it over the brown exposed wool.
Enlarge picture showing how to cover the exposed brown wool
 77. Gently punch at it until the brown color is covered by the cream color.
Enlarge picture showing how to cover the brown wool by punching
 78. This image will show you how the brown fibers can be covered up by the cream color after carefully punching a bit of wool.
Enlarge picture showing covered ear
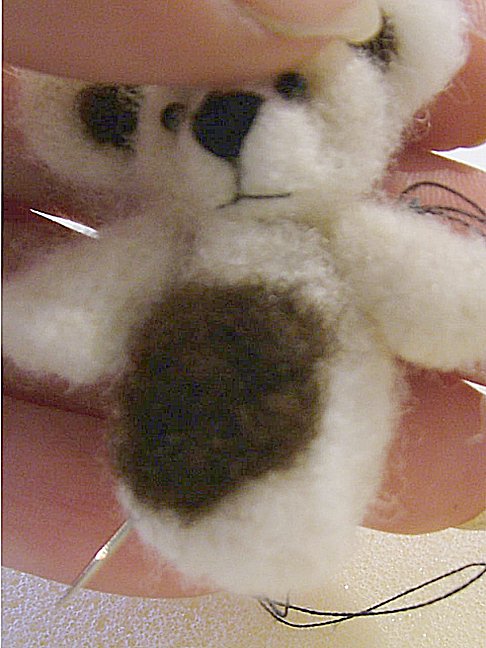
 79. Now we need to return to the body of the bear. Tidy up the belly, gently punching any rough edges.
Enlarge picture showing how to clear any rough spots on the body
 80. Make sure that the belly portion of the body is nice and round.
Enlarge picture showing how to round belly
 81. The brown wool should be in a circular, plump area, like a belly.
Enlarge picture showing completed belly
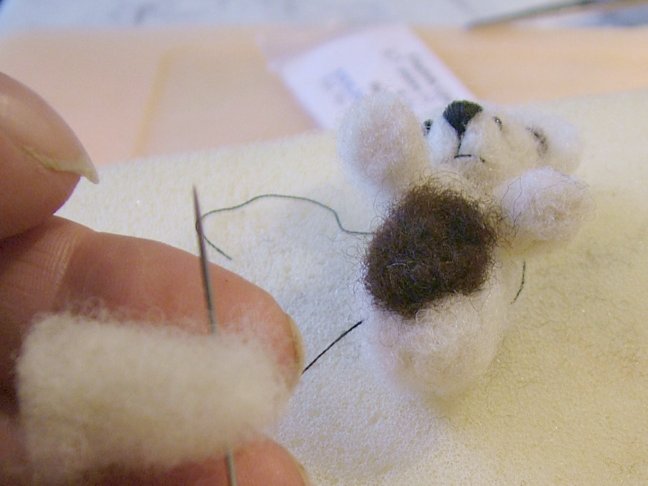
 82. Thread your regular sewing needle with cotton thread, (I use a double thread). You need a nice long length, you do not want to have to re-thread. You will begin sewing to embed the glass eyes.
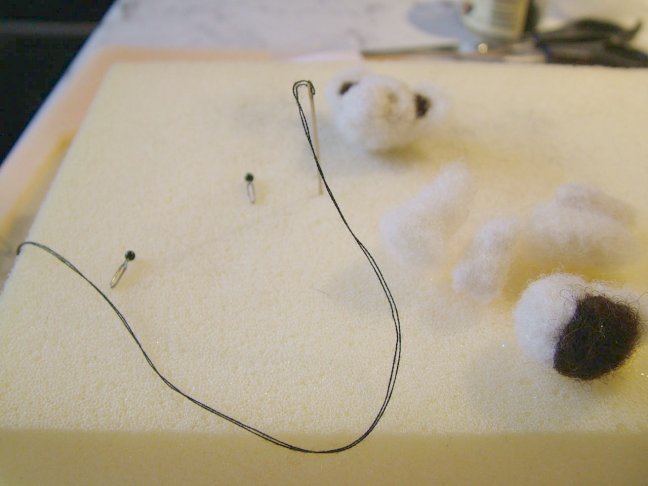
Enlarge picture showing the threaded sewing needle
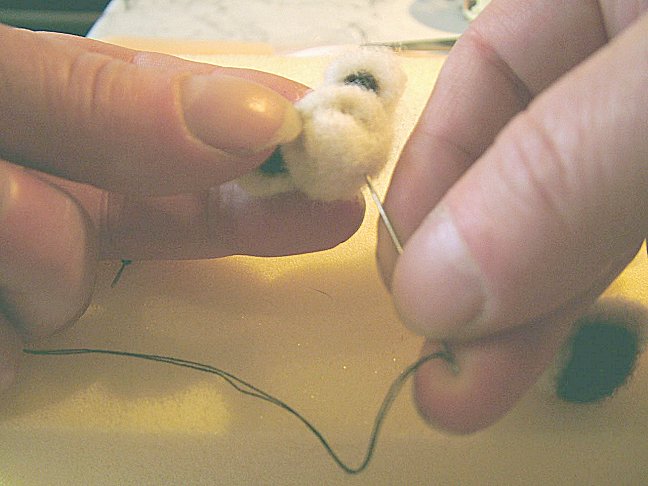
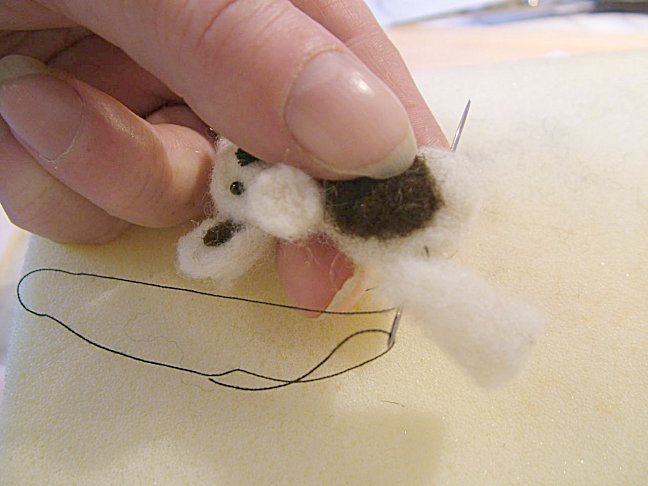
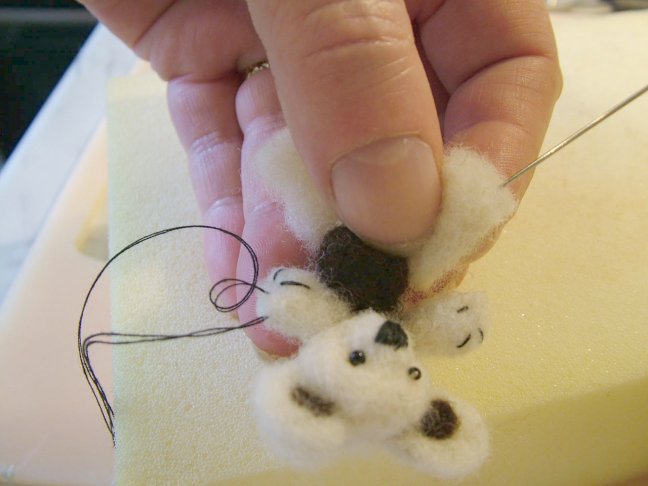
 83. Take your needle up through the base of the head.
Enlarge picture showing where to insert the needle
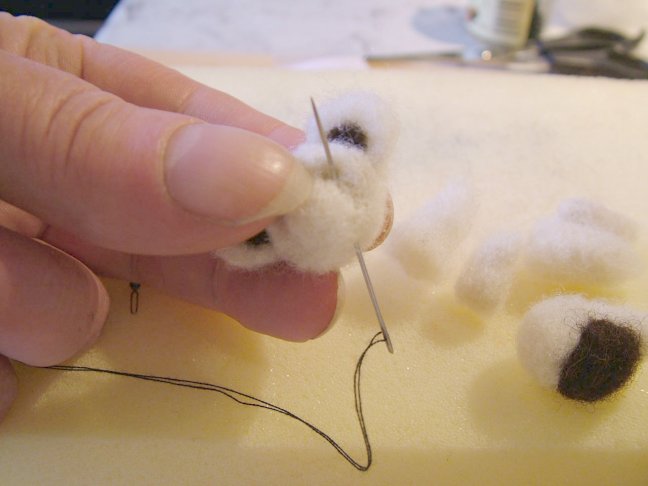
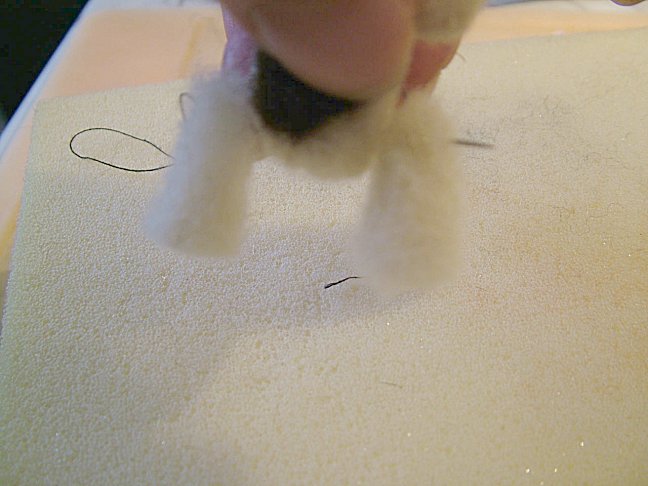
 84. Then pull out through the eye socket.
Enlarge picture showing where to pull the needle out
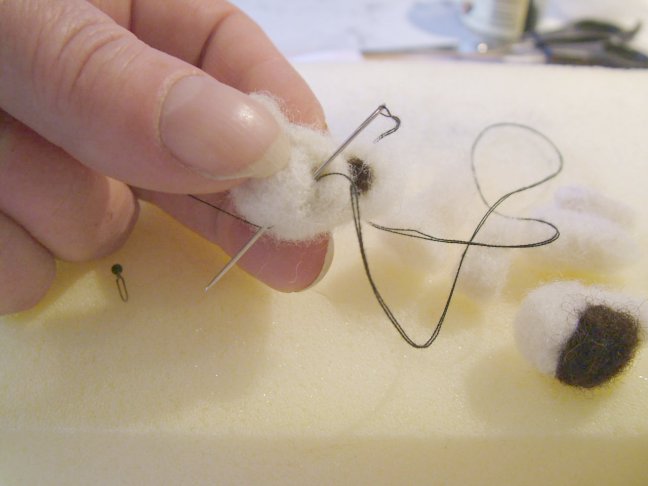
 85. Take the needle and insert in the basic same area, then reverse of what you just did. This stitch is to secure the thread.
Enlarge picture showing the reverse stitch
 86. Retrieve one glass eye. Place the glass eye on your needle, as shown.
Enlarge picture showing how to prepare the glass eye
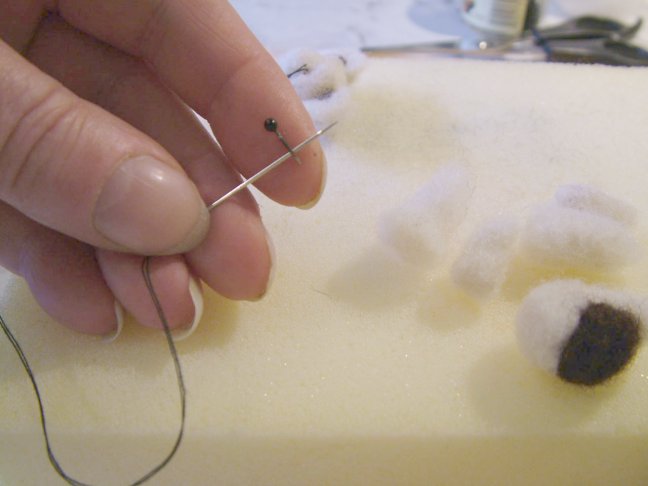
 87. Thread it through to the bears eye socket.
Enlarge picture showing how to thread the eye
TIP
At no time cut the thread!! Leave it as a whole piece. If your thread tangles, knot it off and re-thread your needle and start again. Don't attempt to pull the thread out because you will pull your felting apart.
At no time cut the thread!! Leave it as a whole piece. If your thread tangles, knot it off and re-thread your needle and start again. Don't attempt to pull the thread out because you will pull your felting apart.
 88. Take your needle through the head.
Enlarge picture showing where to pull the needle
 89. Then out through the bottom of the neck; gently push the eye unto the socket area, wiggling will ease the wire into the socket.
Enlarge picture showing the glass eye going into the socket
 90. Take the needle back through to the neck.
Enlarge picture showing the needle being pulled through the neck
 91. As you pull the needle, push the eye into the socket, tugging the thread as you go.
Enlarge picture showing how to secure the eye
 92. Take your needle up through the neck directly to the other eye.
Enlarge picture showing where to insert the needle
 93. Hook your next glass eye onto the needle and pull through the socket.
Enlarge picture showing how to hook the second glass eye
 94. Keep your thread tight as you pull the needle. Then come back out the neck. Again, wiggle the eye a bit, while pulling the thread back down.
Enlarge picture showing how to pull the needle
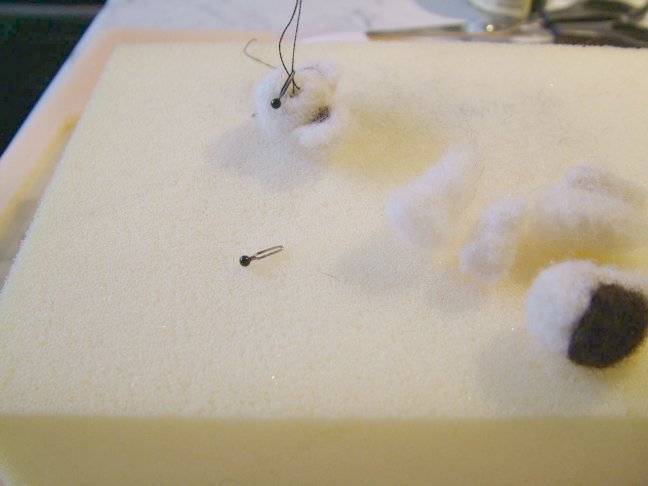
 95. Now you have two glass eyes embedded and sewn in.
Enlarge picture showing completed eyes
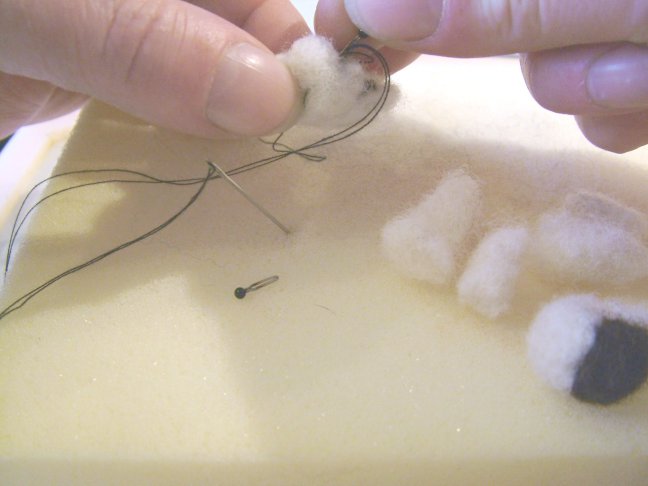
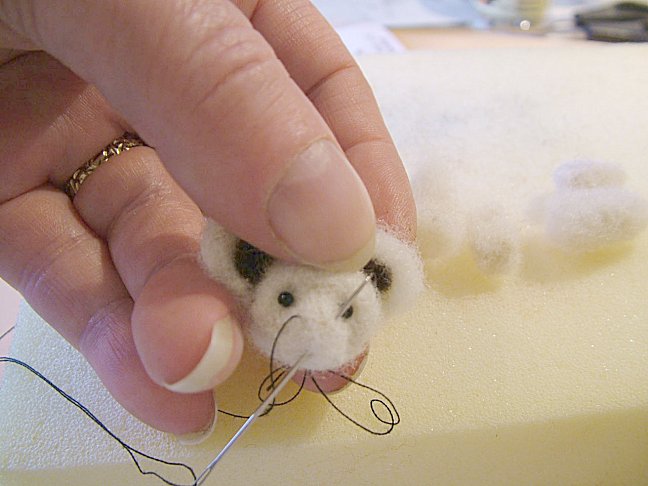
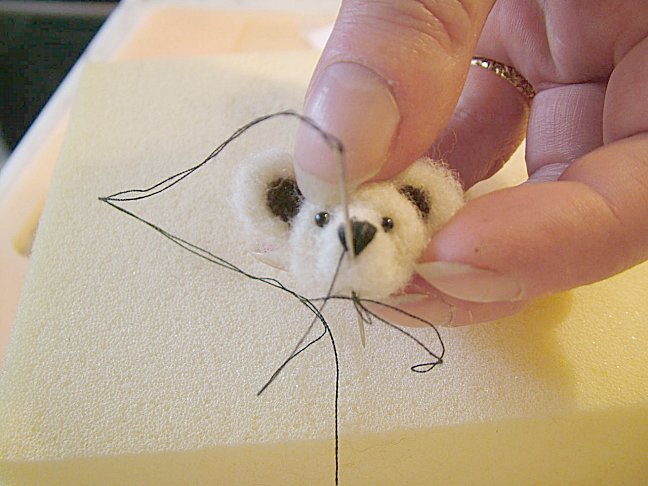
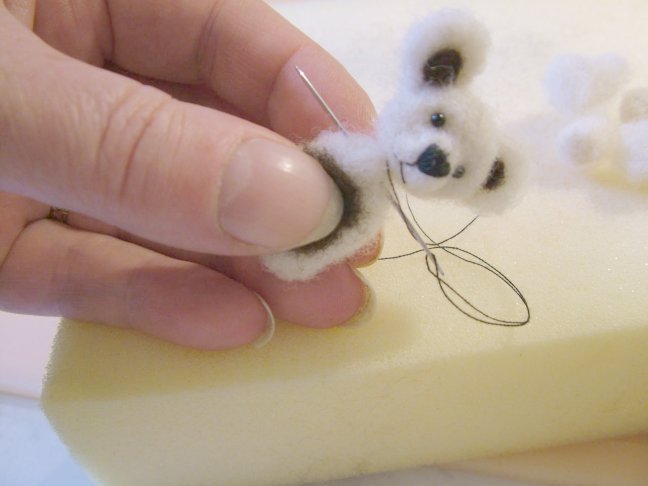
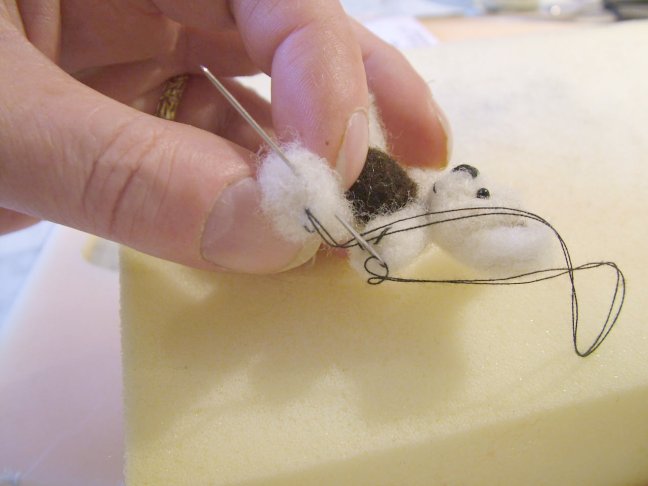
 96. Next you need to make the nose. Take your needle up through the neck to the nose top.
Enlarge picture showing how to begin the nose
 97. Take the needle back down, then up the other side, as shown in the image. You are creating a "V" shape.
Enlarge picture showing the "V" shape of the nose
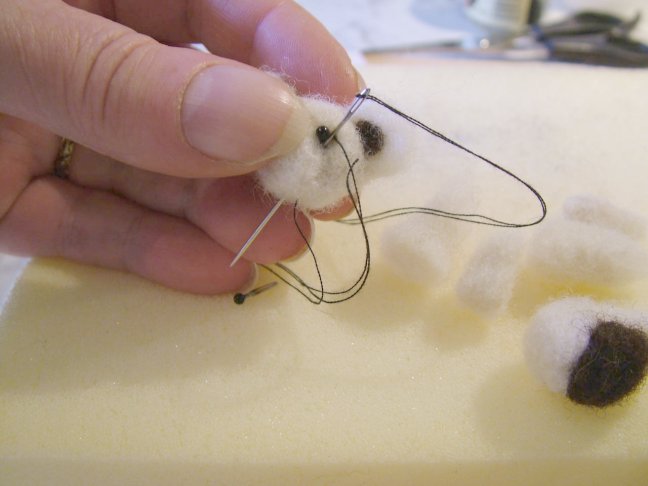
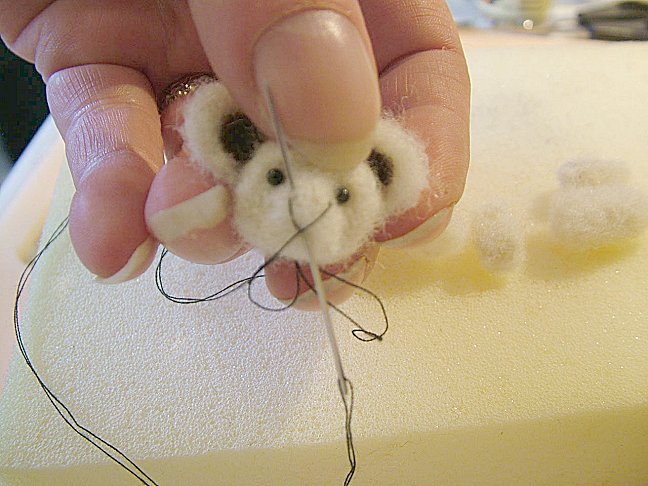
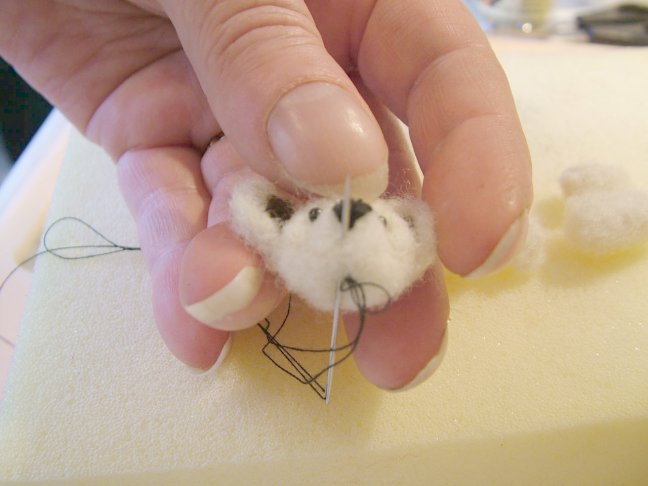
 98. Now begin filling in the nose area with long stitches.
Enlarge picture showing long stitches
 99. Continue filling in.
Enlarge picture showing the stitches that fill in the nose area
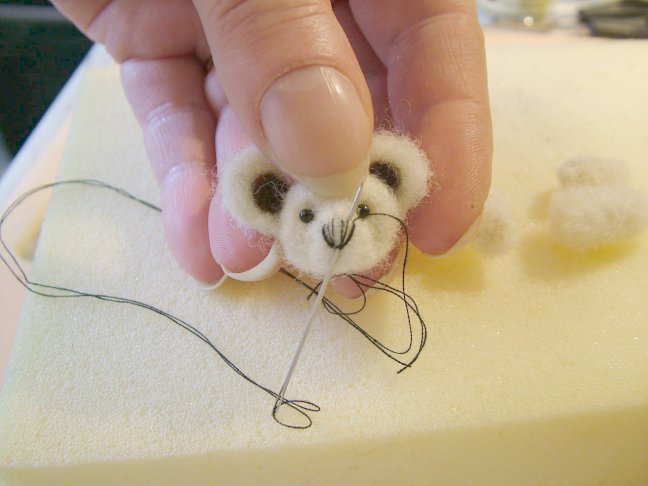
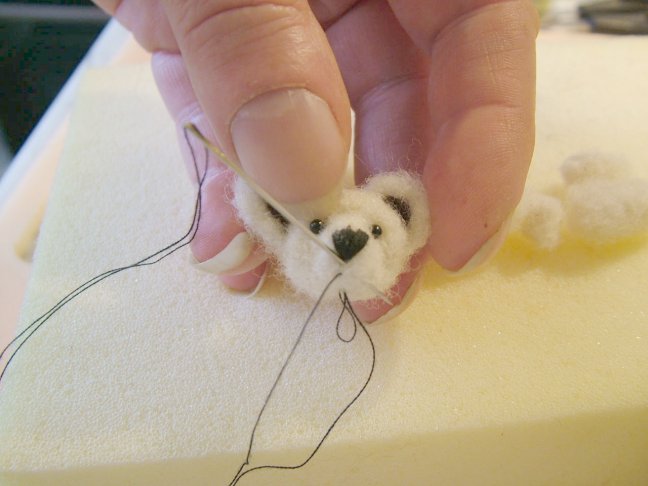
 100. You need to create the facial philtrum right below the nose. Take the need from the bottom of the nose to the tip of the bottom of the nose.
Enlarge picture showing how to create the philtrum
 101. Now take the needle down and out at the neck base then back up to the bottom tip of the nose.
Enlarge picture showing where to extract the needle
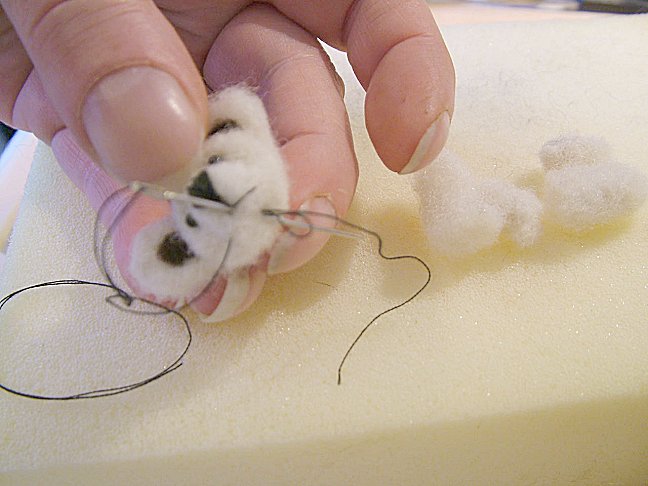
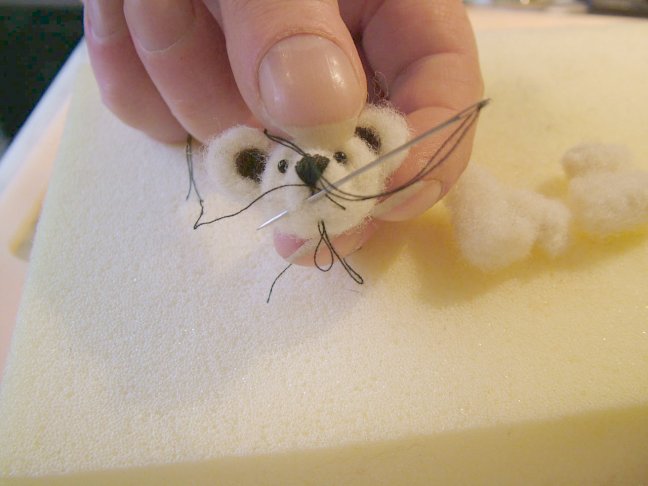
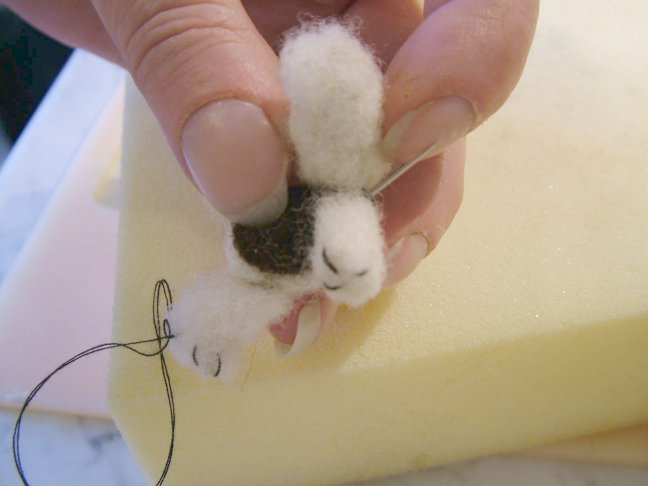
 102. Next comes the mouth. Take the needle that you have at the base of the head, and pull the needle through the face, right below the tip of the nose. Pull the needle out, then overlay the thread on top of the area where the mouth would be. This makes one side of the mouth.
Enlarge picture showing where to begin creating the mouth
 103. Again pull the needle out the base of the head.
Enlarge picture showing where to pull the needle
 104. Insert the needle inside the head to the tip of the nose again. Insert to make the left side of the mouth. Keep the thread taunt.
Enlarge picture showing how to create the mouth feature on the opposite side
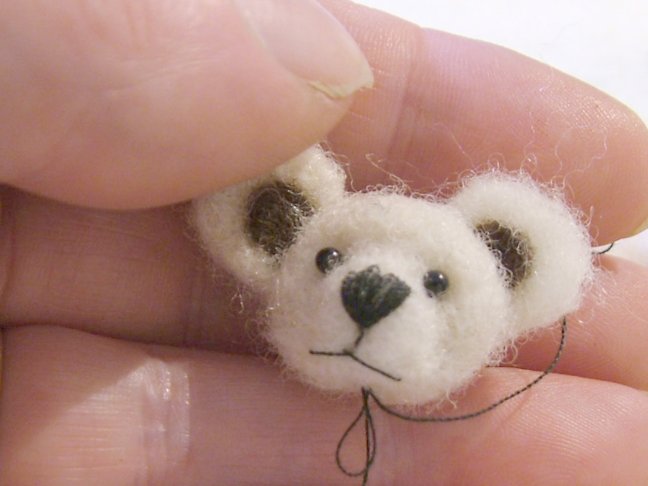
 105. Mouth is complete. Do not cut the thread.
Enlarge picture showing the completed mouth
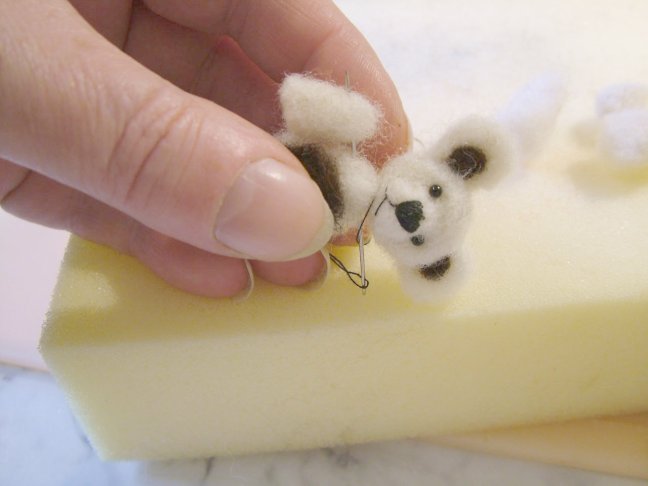
 106. Next you will be attaching the body to the head. Insert your needle at the narrow end of the body. Take your needle down through the body's narrow end. Pull taunt.
Enlarge picture showing how to attach the body
 107. Back up through to the top of the body and through the head, stitch through a couple of times
Enlarge picture showing how to secure the body to the head
 108. Continue securing the head to the body with a couple of stitches. Now pull the needle out through the area where you want the first arm to attach.
Enlarge picture showing how to attach the first arm
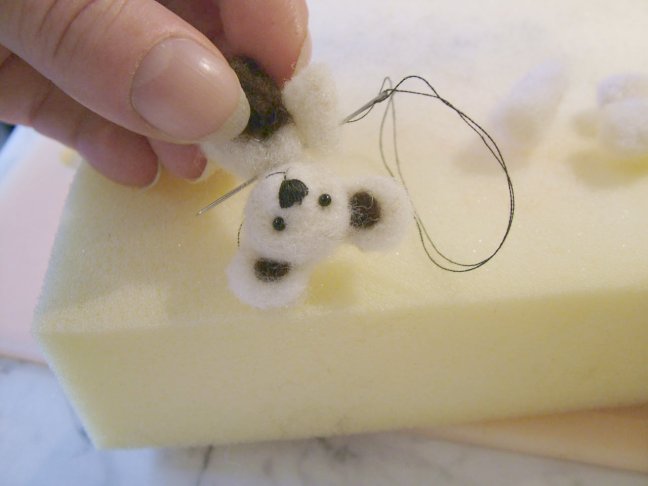
 109. Once you have pulled the thread out the body in the arm area, attach one of the short arm pieces to the needle. Secure the arm with a couple of stitches.
Enlarge picture showing the attachment of one arm
 110. Once the arm is secured, pull the needle inside the body, directly across to the other side.
Enlarge picture showing preparing to attach the second arm
 111. Attach the arm on the opposite side. Pull firmly and secure.
Enlarge picture showing the attachment of the second arm on the needle
TIP
If you happen to run out thread, snip it off in a hidden place and re-thread your needle and pick up where you left off.
If you happen to run out thread, snip it off in a hidden place and re-thread your needle and pick up where you left off.
 112. Now the head and arms are attached to the body.
Enlarge picture showing head and arms attached to body
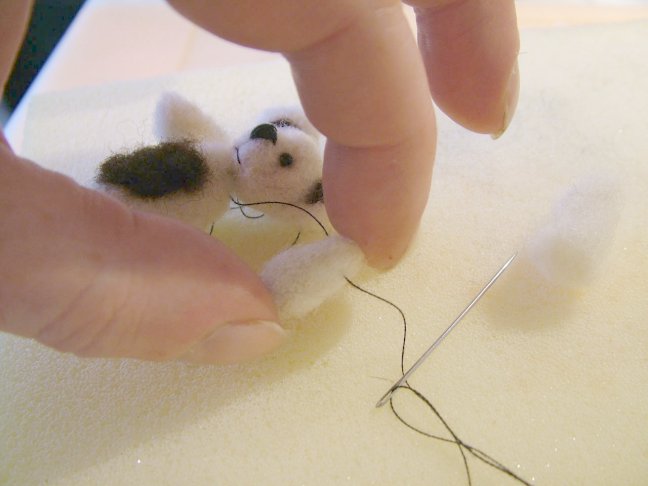
 113. Next you will be attaching the legs. Take the needle down through the body from your last stitch of the arms.
Enlarge picture showing first step to attach one leg
 114. Take one leg and run the needle through the leg. Secure with a couple of stitches, then pull taut and run the needle to the opposite to attach the second leg.
Enlarge picture showing how to attach the first leg
 115. Take the second leg, place it on the needle and stitch back through the body. Then again through to the other leg, then again to secure the stitch. After that insert the needle through the body again, and come out at the neck area.
Enlarge picture showing how to secure the legs
 116. Do a couple of tightening stitches at the neck area. Then pass the needle back down through the arm and come out at the paw tip.
Enlarge picture showing how to prepare to make the claw stitches
 117. Make three claw stitches, as shown, on this arm. On the last stitch, pass the needle back up the arm - through the body and out the other arm and repeat the last step on the next arm.
Enlarge picture showing the stitches to use to make claws
 118. Make the three claw stitches. Next, take the needle through the arm - through the body and out through the leg.
Enlarge picture showing the other paw stitches
 119. Now you are in the first leg. Make three claws. Once finished making the claw stitches on this foot, take the needle through the leg - body and out to the other leg.
Enlarge picture showing leg claw stitches
 120. Repeat the last step in this leg. When the final claw is completed - pass the needle back through the leg - up through the body and out at the neck - do a couple of finishing stitches. Cut thread tight to the body.
Enlarge picture showing other leg claw stitches
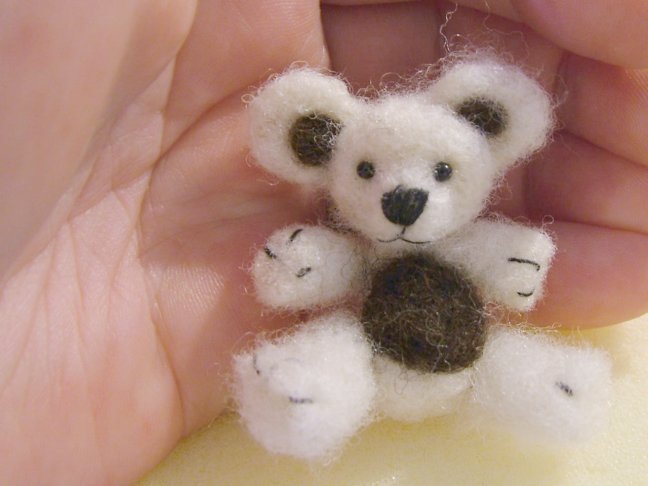
 121. Congratulations! You have made a needle felted miniature Teddy Bear.
Enlarge picture showing completed teddy bear
EMBELLISHMENTS
The next steps show you how to make embellishments for the bear. If you do not wish to do this, then you have completed the tutorial.
The next steps show you how to make embellishments for the bear. If you do not wish to do this, then you have completed the tutorial.
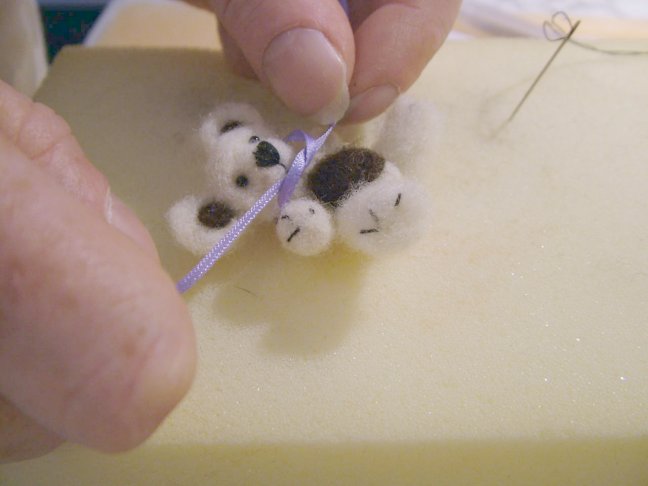
 122. Take a piece of ribbon and tie a small bow.
Enlarge picture showing how to make a bow
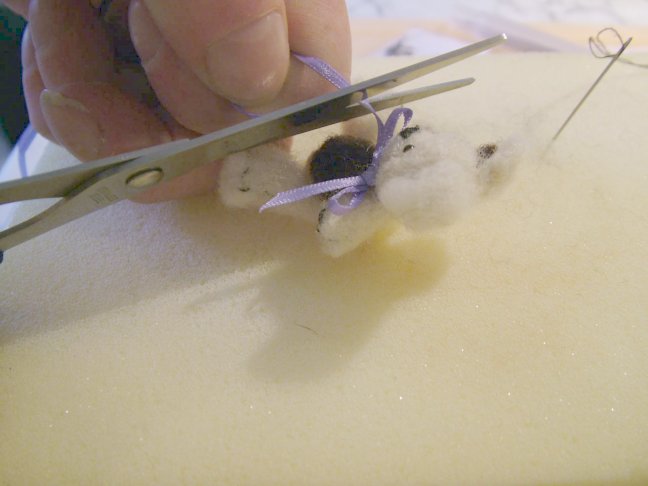
 123. Trim back the ends of the ribbon.
Enlarge picture showing where to trim the ends
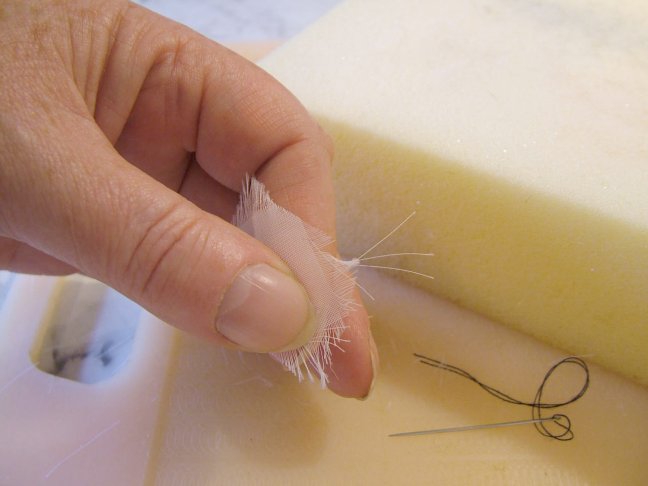
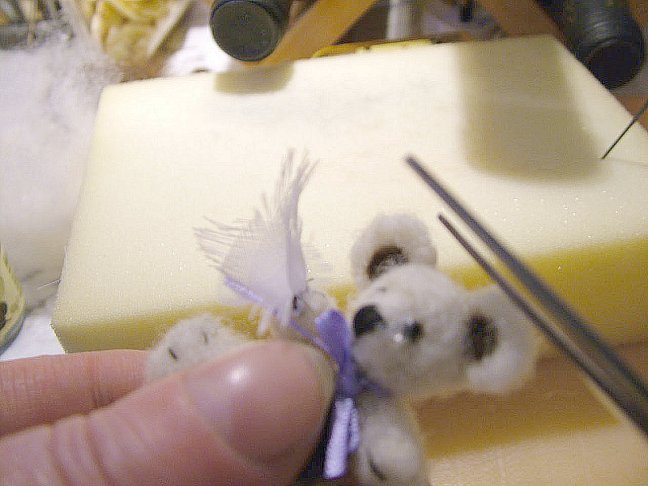
 124. Take a tiny piece of organza, silk, or cotton, about 1" square. Fray the edges with a needle.
Enlarge picture showing how to make a hanky for the bear
 125. Fold the material up to resemble a hanky.
Enlarge picture showing how to fold the material
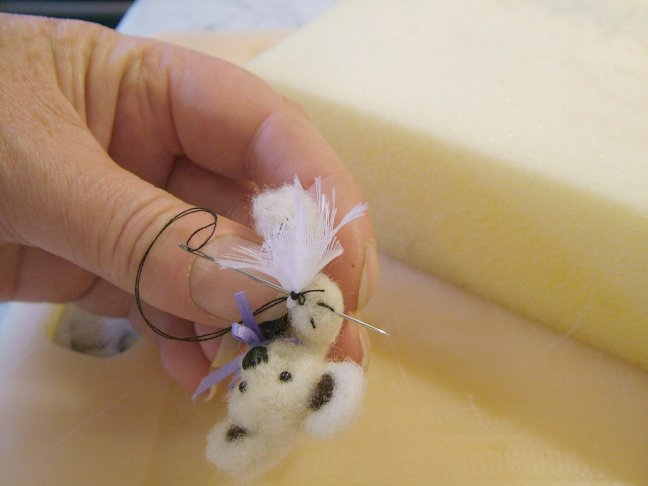
 126. Once you are happy with the folded material, stitch the hanky piece to one of the paws.
Enlarge picture showing where to sew the hanky to the bear
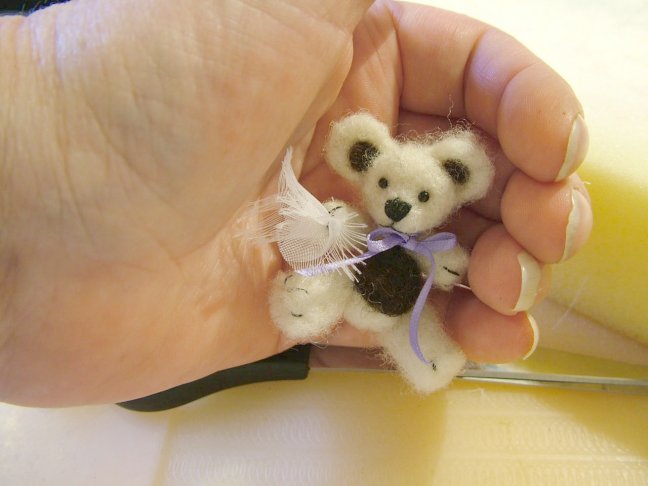
 127. Completed embellishment.
Enlarge picture showing completed hanky embellishment
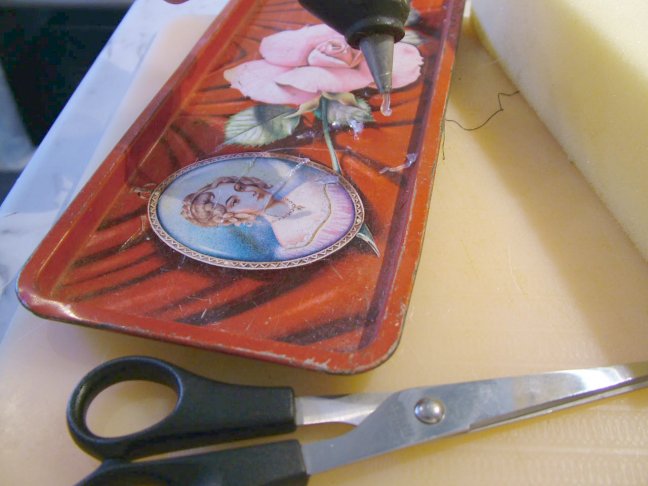
 128. This embellishment is to add a tear to the bear's face. Heat up your glue gun. Heat till the glue is running quite freely.
Enlarge picture showing step need to make tears
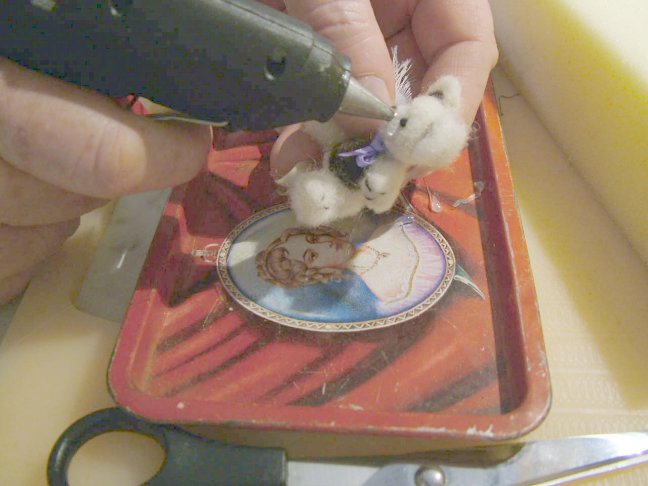
 129. Using your glue gun, carefully squeeze a drop of glue under one or both eyes of the bear. Remove the gun quickly! Note, you may have glue strands that you will need to trim off. If you do not have a glue gun, using a clear glass bead in the corner of each eye instead with a touch of glue will work also.
Enlarge picture showing tears added
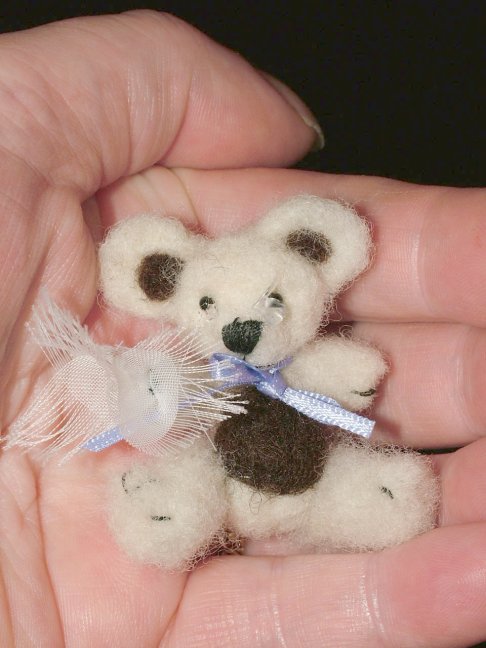
 130. Your "cry baby" teddy bear is completed!
Enlarge picture showing completed cry baby bear
 131. To finish off, trim off some of the loose fibers, not all of them, as you want your bear a bit fuzzy.
Enlarge picture showing how to trim off lose fibers
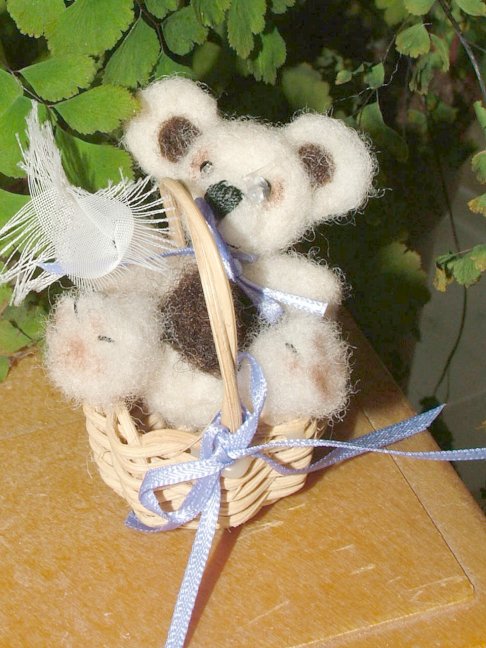
 132. Finished Cry Baby Bear in a little basket.
Enlarge picture showing completed bear and embellishments
TIP
As you gain experience with needle felting, you can experiment with adding pads to the paws as you did with the ears. You can add additional detail to the head, shape and sizes. Also, you can add a muzzle to the face, a hand-made nose, wings and/or hair. It is all in fun to investigate the possibilities and the added features you can create.
As you gain experience with needle felting, you can experiment with adding pads to the paws as you did with the ears. You can add additional detail to the head, shape and sizes. Also, you can add a muzzle to the face, a hand-made nose, wings and/or hair. It is all in fun to investigate the possibilities and the added features you can create.
ABOUT THE ARTIST
 Sarah-Jane Waller sculpts the classic 1:12 scale to the traditional 1:9 scale Animals & Dogs. She is a published Illustrator/artist by trade residing in the UK. Sarah-Jane says that for her she gains incredible enjoyment from creating miniature pieces for others. She adores nature, so many of her pieces are nature inspired. She is the creator of the American Miniaturist mascot dog, "Henry". Sarah-Jane's miniature dogs have been enjoyed by 1:12 scale collectors, along with dog collectors of any scale the world over.
Sarah-Jane is a published writer, having created a childrens book entitled "Tinsley Visits Earth" for ages 5-9. You can purchase this book by emailing her directly at sarahjaneartist at btinternet dot com.
Sarah-Jane is a Global Administrator of the CDHM Forums. Visit the Galleries today.
Sarah-Jane Waller sculpts the classic 1:12 scale to the traditional 1:9 scale Animals & Dogs. She is a published Illustrator/artist by trade residing in the UK. Sarah-Jane says that for her she gains incredible enjoyment from creating miniature pieces for others. She adores nature, so many of her pieces are nature inspired. She is the creator of the American Miniaturist mascot dog, "Henry". Sarah-Jane's miniature dogs have been enjoyed by 1:12 scale collectors, along with dog collectors of any scale the world over.
Sarah-Jane is a published writer, having created a childrens book entitled "Tinsley Visits Earth" for ages 5-9. You can purchase this book by emailing her directly at sarahjaneartist at btinternet dot com.
Sarah-Jane is a Global Administrator of the CDHM Forums. Visit the Galleries today.
© 2007-2012 Sarah-Jane Waller
Reproduced with permission from Sarah-Jane Waller. All photographs and text appearing in this tutorial are the exclusive property of Sarah-Jane Waller. Permission is explicitly denied for any republication of text or photographs in this article without the prior express written consent of the author.