


Making Petunias
with IGMA Fellow
Era Anderson Pearce
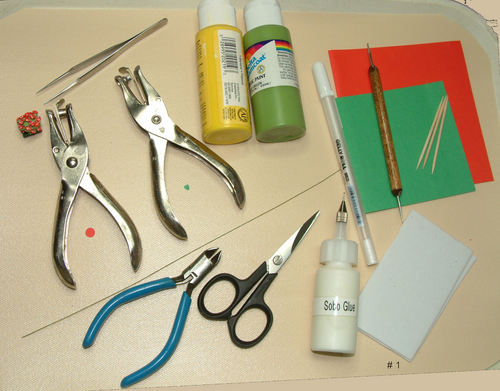
Materials Needed
- Standard 1/4" Hole Punch
- Small Heart Punch
- Red Paper
- Green Paper
- Yellow Acrylic Craft Paint
- Green Acrylic Craft Paint
- White Gel Pen
- Thin Floral Wire (Preferably paper covered but cloth covered will do)
- Wire Cutters
- White Glue: Sobo Glue or Quick Dry Tacky Glue
- Scissors
- Stylus Or Embossing Tool
- Toothpicks
- Tweezers
- Craft Foam
- Soil Of Choice (I use "used" coffee grounds that have been microwaved on low power for at least 30 minutes. These end up being mixed with white glue, thus they will not mold).
- Small Container Of Water
- Container Of Choice For Your Petunias
 Close-up images of materials needed
Enlarge picture of basic supply requirements
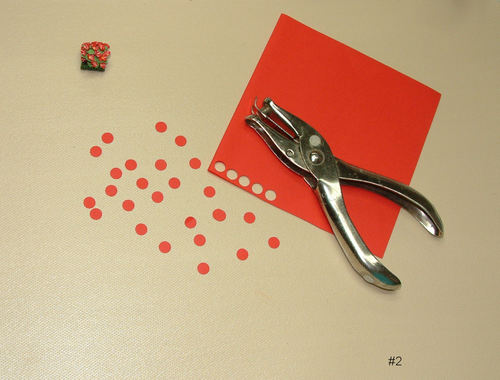
 1. Punch approximately 75 circles from red paper for a small potted petunia.
Enlarge picture showing punched circles
TIP
The actual number of circles you may need will depend on the size plant you want to make and the type of container you choose. You will need more circles for large or hanging plants.
The actual number of circles you may need will depend on the size plant you want to make and the type of container you choose. You will need more circles for large or hanging plants.
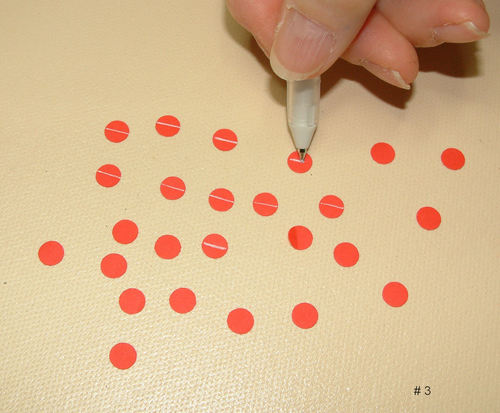
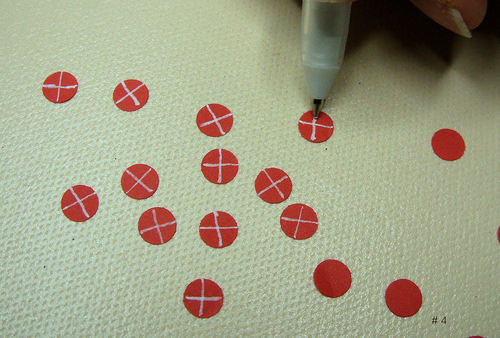
 2. With the white gel pen, draw a line through the center of the red circles.
Enlarge picture showing where to draw glue line
 3. Draw a second white line 90 degrees to the first line. It does not matter if your lines are not perfect. When your bloom is finished any little defects will not be noticeable!
Enlarge picture showing where to draw glue line
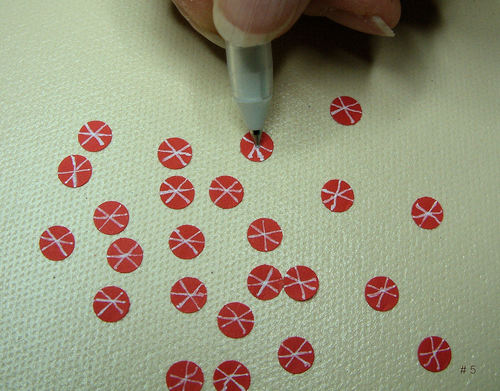
 4. Draw a third line to split the circles into six wedge shaped slices.
Enlarge picture showing where to draw a third glue line
 5. Draw a fourth line which will result in eight slices. At this point your circle should look like a pizza divided into eight equal pieces! Allow the gel pen lines dry thoroughly.
Enlarge picture showing where to draw the fourth glue line
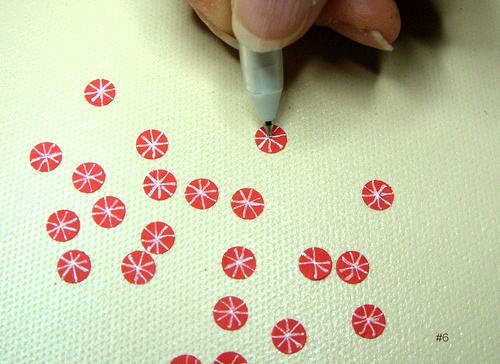
 6. With a toothpick and yellow craft paint (or Green craft paint, if that is your preference) paint a prominent dot in the center of your red circle where the lines all meet - Allow the paint to dry thoroughly!
Enlarge picture showing where to add the yellow center
TIP
I have used many different colors of paper and different color pens. There are many striking combinations so just experiment. The only thing you have to be careful about is that the PEN MUST BE PERMANENT INK! Since you dampen the petals, water based markers of any kind will run!
I have used many different colors of paper and different color pens. There are many striking combinations so just experiment. The only thing you have to be careful about is that the PEN MUST BE PERMANENT INK! Since you dampen the petals, water based markers of any kind will run!
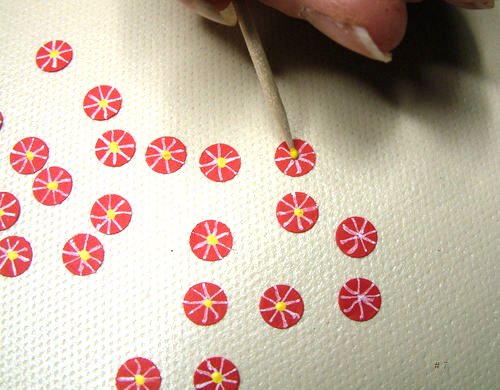
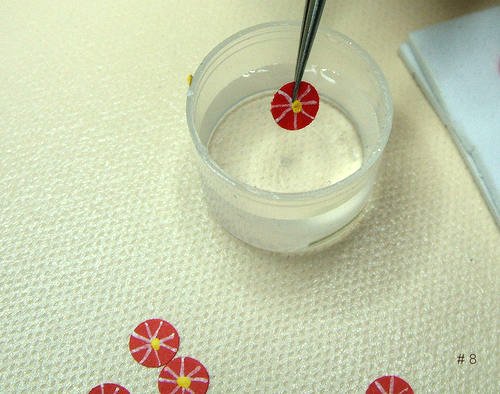
 7. Do not panic at this step - the white pen lines and yellow paint will not run if they have been allowed to dry thoroughly! Now, that said, pick up a red circle with the tweezers, dip it into the small container of water and as you remove it from the water drag the circle against the edge of the container (to remove excess water), flip it over and drag the other side.
Enlarge picture showing how to wet one red circle
 8. Lay the circle on your craft foam and continue dipping and dragging until you have about five circles laid out in a line. If you are using thin craft foam, make it two layers thick, one over the other.
Enlarge picture showing how to lay them on craft foam
TIP
I use craft foam for the petunias as it holds the bloom in shape as it dries which gives you deep, crisp centers leading to an accurately shaped bloom.
I use craft foam for the petunias as it holds the bloom in shape as it dries which gives you deep, crisp centers leading to an accurately shaped bloom.
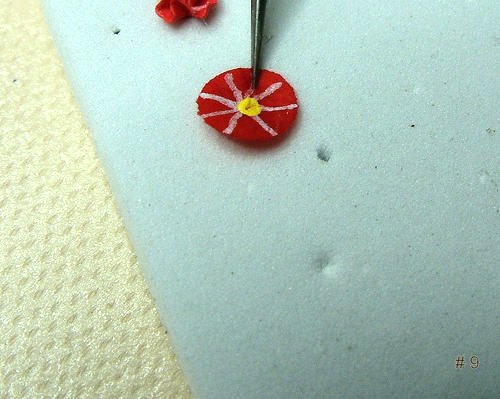
 9. Place the ball of your stylus on the yellow center and push straight down, pushing the red circle into the foam, hold for a few seconds.
Enlarge picture showing where to push the circle
 10. Using your fingernail or side of a toothpick gently hold the edge of the red circle down and very gently remove the stylus.
Enlarge picture showing how to remove stylus
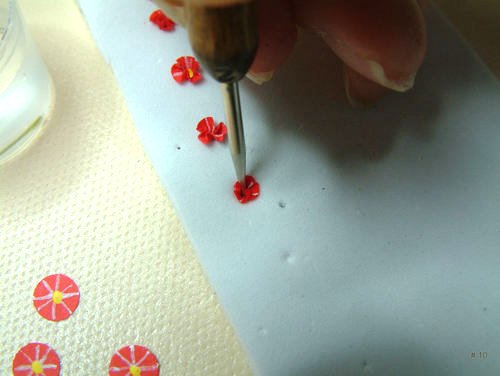
 11. Continue wetting and forming five circles at a time until all circles are pressed into the foam.
 Important
Leave all circles in the foam until they are completely dry before you try to remove them!
Enlarge picture showing the placement of the fern
TIP
The time for them to dry is dependent on the humidity in your area. You can tell by taking your tweezer and try (GENTLY) to remove one from the foam. If it is dry it will pop out easily, if still damp the edge you are holding will tend to stretch rather than pop out. Naturally the first ones you put in will dry first, then so on down the order you put them in the foam, so if trying them out for dryness, pick one of the first.
The time for them to dry is dependent on the humidity in your area. You can tell by taking your tweezer and try (GENTLY) to remove one from the foam. If it is dry it will pop out easily, if still damp the edge you are holding will tend to stretch rather than pop out. Naturally the first ones you put in will dry first, then so on down the order you put them in the foam, so if trying them out for dryness, pick one of the first.
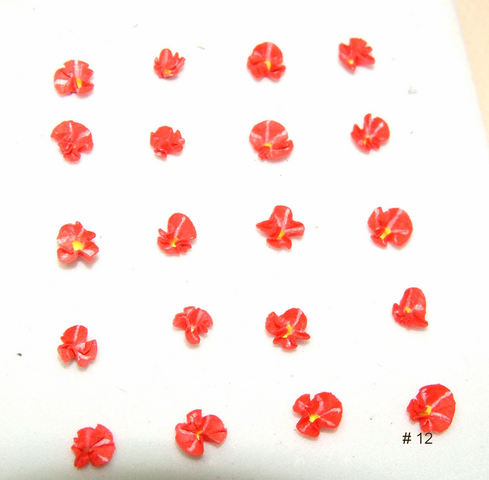
 12. When dry, the circles have graduated to the "bloom" status. Gently remove each bloom from the foam. The outer edges will be nice and ruffly and if the centers are too tight for the yellow to be seen, just nudge them open a tad with a toothpick.
At this point you may cut your floral wire into 1 1/2" pieces.
Enlarge picture showing how to remove each bloom
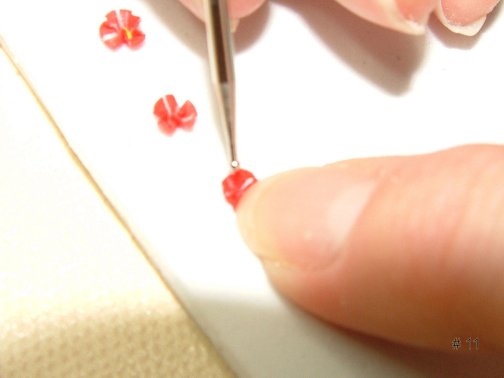
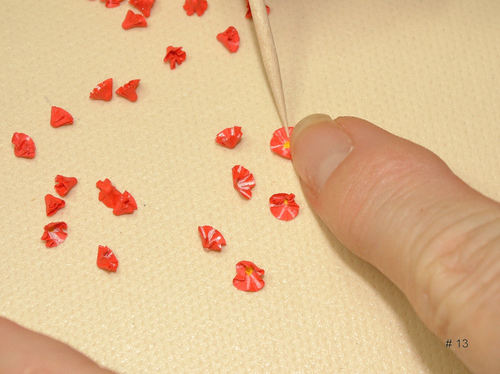
TIP
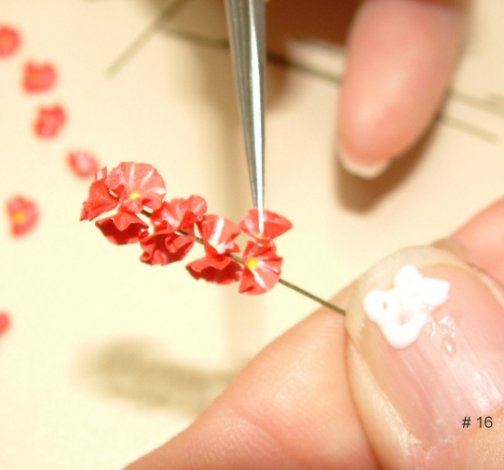
You will notice in this picture that I appear to have white glue on my left thumbnail. This is because I do have white glue on my left thumbnail! This is my favorite way to glue petals, leaves, blooms, what have you! By placing the glue on my left thumbnail (do the math if you are left handed), I can hold the wire in my left hand and pick up the petal, bloom, leaf, etc. with the tweezers in my right hand, making it possible to dip it in the glue, and immediately place it on the wire.
You will notice in this picture that I appear to have white glue on my left thumbnail. This is because I do have white glue on my left thumbnail! This is my favorite way to glue petals, leaves, blooms, what have you! By placing the glue on my left thumbnail (do the math if you are left handed), I can hold the wire in my left hand and pick up the petal, bloom, leaf, etc. with the tweezers in my right hand, making it possible to dip it in the glue, and immediately place it on the wire.
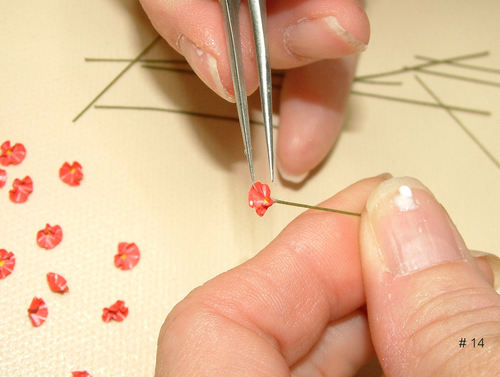
 13. Start by picking up a red bloom and gluing it to the end of a piece of wire. Your wire has just graduated to the "stem" status.
Enlarge picture on how to add the stem
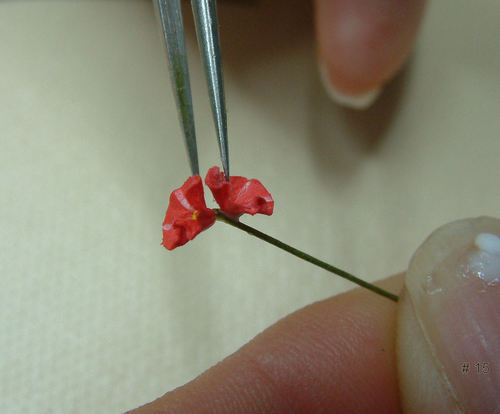
 14. Pick up a second red bloom and glue it behind the first, off to the side a little and facing upward a little. Leave a little space to insert leaves.
Enlarge picture showing where to attach second bloom
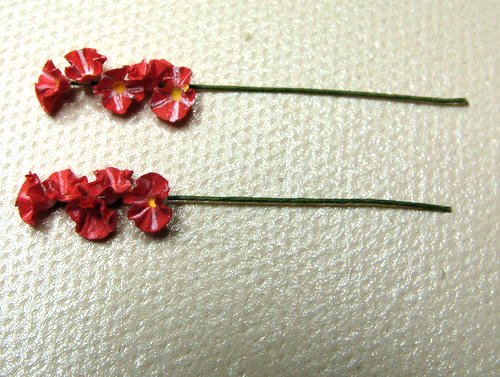
 15. Continue gluing blooms, alternating sides on the "top" or "upper" part of the stem, leaving the "bottom" or "lower" side of the stem bare (this is so the stem, when full of blooms, can curve under or lie flat. Remember to leave room to insert leaves.
NOTE
The number of blooms you need to glue on a stem will depend on the size plant you want and the type container you choose to use. For the small potted plant I made for this demonstration I glued on about 4 or 5 blooms per stem. For larger, hanging or landscaping plants you will need to continue gluing blooms further down the stem.
Enlarge picture showing how to build up the blooms on the stem
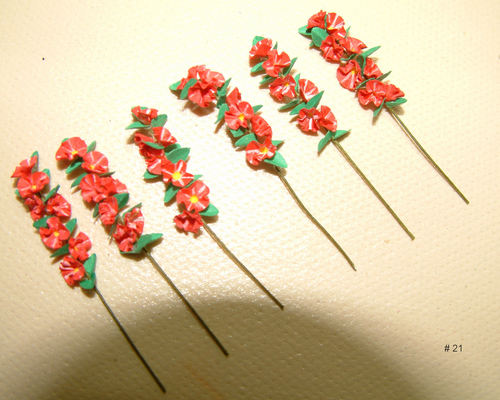
 16. When you have finished gluing on the red blooms the stem should be able to lay down nicely.
Enlarge picture showing the blooms on stem
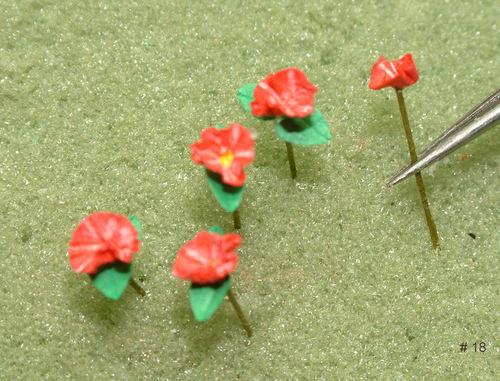
 17. Using some shorter pieces of wire for single stems, glue a single bloom to the end of each wire and place two leaves under the bloom. Make approximately 12 to 15 of these and save them for later. These will ultimately be used as "fill in" blooming stems to give height to the middle of the plant if need be, or to fill vacant spots or holes should they occur.
Enlarge picture showing how to make single bloom stems
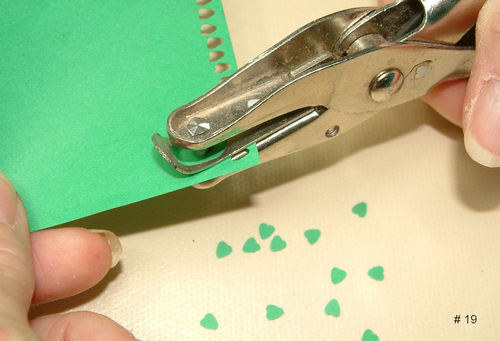
 18. Punch approximately 75 small hearts from the green paper. Once again, the number you need will be determined by previously mentioned criteria.
Enlarge picture showing the heart shaped hole punch for leaves
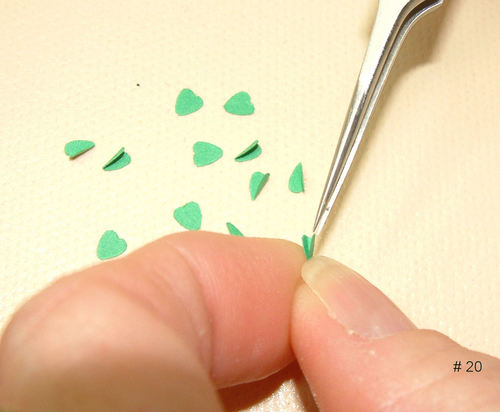
 19. Fold each heart in half and press the fold. When spread a little you will have a nice crease in your leaf. All leaves are to be glued on with the "V" shaped portion to the stem and the "point" facing outward. I like to glue a leaf under the first bloom, sticking out a little to give a "finished" look to the stem of blooms.
Enlarge picture showing how to fold the heart shapes
 20. Continue dipping the "V" shaped portion of your leaves into the glue and inserting them between the red blooms in a manner that is pleasing to you.
Enlarge picture showing where to place the leaves
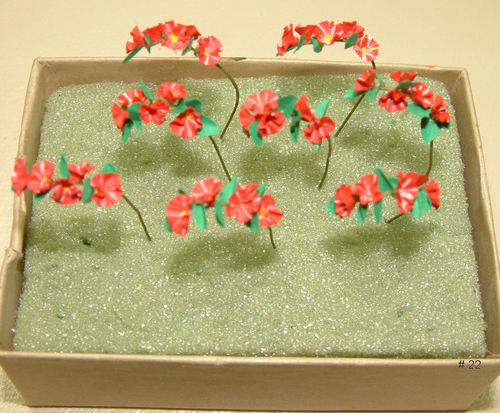
 21. Work with your stems a little to sort of "pre-curve" them a little, and then add them to your pot of soil one stem a time, clipping the wires to an appropriate length as you go.
Place your potting soil in your container, add your stems one at a time, clipping the stems to the appropriate length as you go. You may use any placement method you prefer, but for good balance I like to follow the same pattern as the original gel pen lines. Starting with two stems opposite each other, add two stems opposite those, then fill in the stems in the same pattern you drew the original gel lines, until you have added all of your stems in the pot in such a manner that you are pleased!
Enlarge picture showing shaping and placement of flowers
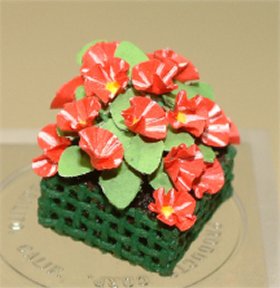
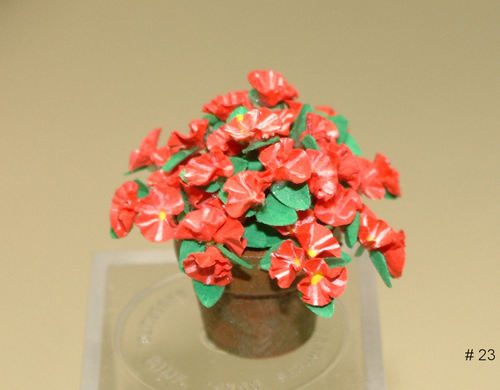
 22. Congratulations!
You have just given birth to a red and white Variegated Petunia. I have included the picture of the small potted Petunia I made for demonstration purposes of this tutorial, and a picture of a tiny group of Petunias in a starter basket made from needlepoint fabric. This is just one prototype. The possibilities are endless for varieties and colors of Petunias, as are the possibilities for their presentation. They can be used in many different ways, in pots and planters or window boxes, as a great addition to your dollhouse landscaping and they make wonderful hanging basket plants!
Enlarge picture showing completed flowers in container
MEET THE ARTIST
 Era along with husband, Robert, entered the world of dollhouse miniatures in 1977, and started the business of "Pearce Miniatures" in 1990. They are members of NAME, IGMA and CDHM. They work in 1", 1/2" and 1/4" scales and sell at fine miniature shows all across the nation.
Era earned her status of IGMA Fellow in the category of plants and creates a wide variety of miniature plants and flowers, as well as completed gardens and greenhouses. Era's work can be found in homes and museums throughout the world, and her work has appeared in all three major miniature magazines.
Although being involved in creating and selling miniatures from the 1970's on, miniature plants and flowers became her passion in 1999 when she sold the full size greenhouse she owned and operated. Each plant or flower Era makes is extensively researched and each prototype or piece she creates is of her own original design. Era's specialties include custom crafted Oriental Wisteria sinensis and Wisteria floribunda vines in full bloom, exotic Orchids, tropical plants and tropical arrangements, Cactus / Sedum gardens, and delightful delicate water gardens. Era's flowers, leaves and plants are completely hand painted and shaded to create the ultimate in realistic detail, with the realism extending to naturally damaged leaves or petals.
Bob's specialty is bonsai crafted in the traditional Japanese style. Bob has created full size, live bonsai in the past and has studied with John Naka, a Japanese Bonsai Master. Each style of Bob's bonsai is researched and created following the formal rules set down by Japanese standards.
Era and Bob are valued members of the CDHM Forums. Visit the Galleries today.
© 2007-2012 Era Anderson Pearce
Reproduced with permission from Era Anderson Pearce. All photographs and text appearing in this tutorial are the exclusive property of Era Anderson Pearce. Permission is explicitly denied for any republication of text or photographs in this article without the prior express written consent of the author.