


Learn To Dye Your Own
Feathers & Thread
with IGMA Fellow
Kerri Pajutee
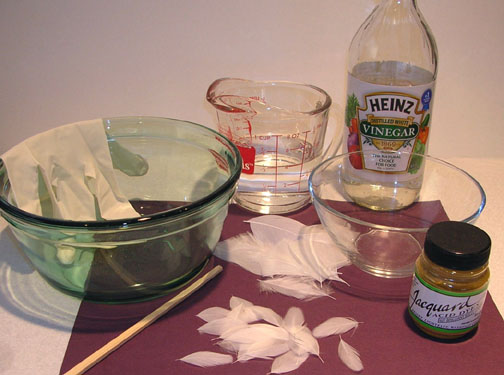
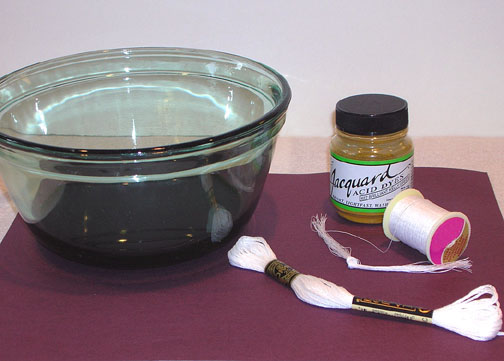
Materials Needed:
- Feathers (Hen Saddle, Turkey Flats or Other)
- Thread (Cotton or Silk)
- 2 Glass bowls
- (1 Bowl will be used for water & dye and should be microwave safe
and dedicated to crafting. You do not want to re-use this bowl for
food consumption after using it for dye) - 1/8 Teaspoon Jacquard Products� Acid Dye (for Silk, Wool, Feathers & Nylon)
- � Cup Warm Water (for Mixing with Dye)
- 1 Cup Cool Water (for rinse)
- 2 Tablespoons of White Vinegar (For Rinse)
- Wood Chopstick or Wood Skewer (or Tweezers)
- I use a wooden chopstick for this project, because I have a bunch of
them leftover from takeout food and the feathers stick to
the wood better than metal. If you do not have a chopstick
or wood skewer - you could use tweezers. - Rubber Gloves
- Paper Towels
- Microwave Oven
 Close-up images of materials needed
Enlarge picture of basic supply requirements
 1. Turkey Flat feathers have a fine, straight rachis or spine and can be purchased at fly-tie shops or on the internet. You would not normally find these feathers at a craft store.
This photo shows a white turkey flat both before and after stripping away the lower part of the feather. Before dying, I will always strip away the "lower downy part".
1. Turkey Flat feathers have a fine, straight rachis or spine and can be purchased at fly-tie shops or on the internet. You would not normally find these feathers at a craft store.
This photo shows a white turkey flat both before and after stripping away the lower part of the feather. Before dying, I will always strip away the "lower downy part".
Enlarge picture showing the turkey flat feathers and how to strip the lower parts
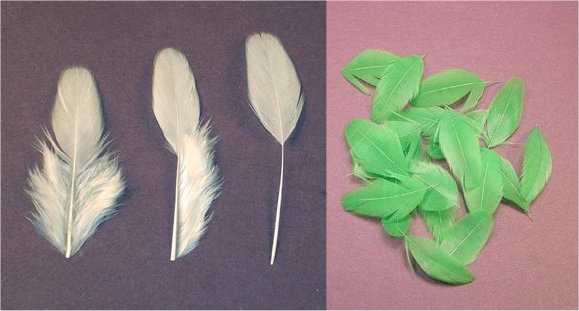
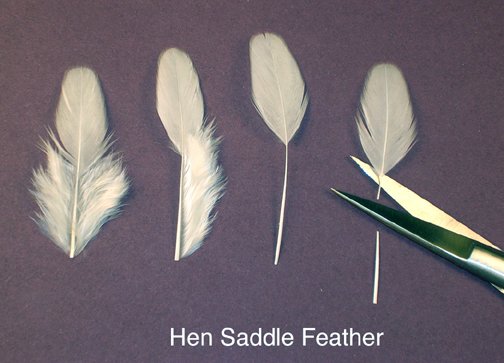
 2. Hen Saddle feathers are exceptionally good for making small miniature birds. These feathers have a hair-fine rachis or spine, and have a greater density of web and velvety texture. Hen saddle feathers are sold attached to a small section of chicken hide/skin and contains literally hundreds of feathers. You can find these feathers at most fly-tie shops or on the internet. You would not find hen saddle feathers at a craft store.
Enlarge picture showing Hen Saddle Feathers trimmed
TIP
This photo shows a white hen saddle feather before and after stripping away the lower part of the feather. It's a good idea to strip away the "downy" portion of the feather before you dye it.
NOTE: Most purchased feathers have been thoroughly washed in an inert detergent before they are packaged for retail. If however, you wish to wash your feathers, make sure you use a mild soap like Woolite� brand or similar. After washing them - thoroughly rinse and set them on a paper towel to "air dry". DO NOT dry your feathers in a dryer. Feathers have a natural oil and you do not want to "strip" the oils completely from the feather otherwise it will become brittle.
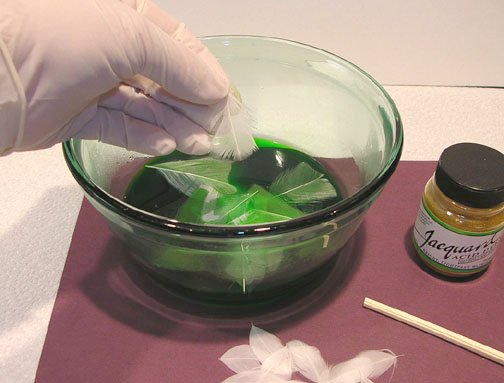
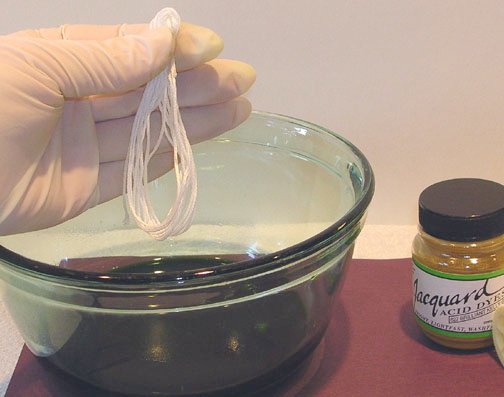
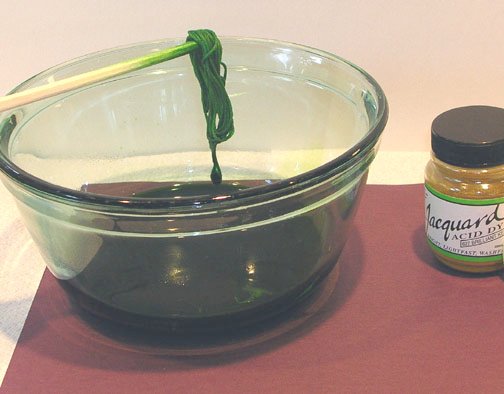
 3. Put on your rubber gloves - you do not want to get any of this dye on your hands. In a small bowl, mix � cup warm water with 1/8 teaspoon of Jacquard Acid Dye. Stir with your chopstick or wooden skewer until dye & water are mixed well. Take your feathers and drop them into the bowl of dye.
Enlarge picture showing how to mix the dye, then drop in feathers
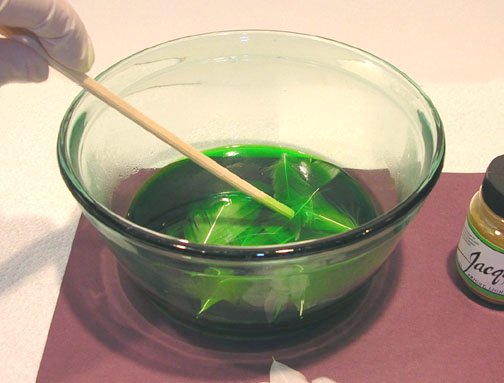
 4. Take your chopstick and push the feathers under the colored dye water. Some of your feathers may want to "float" because of the oils - just keep at it and make sure that they are all good and wet.
Enlarge picture showing the use of the chopstick and pushing soaking the feathers
 5. Next you want to place your bowl of dye and feathers into the microwave. Before you place into the microwave - cover the top of the bowl with a paper towel (this will catch any tiny dyed-water splatters from coating the inside of your microwave oven). Place the covered bowl into the microwave and bake for about 1� to 2 minutes.
Enlarge picture showing how to prepare to bake the feathers
 6. Use caution when boiling in the microwave - some ovens will boil faster than others, etc. When the 1� to 2 minutes is up - carefully remove bowl from microwave (the glass bowl may be extremely hot) and set on a flat, paper-toweled surface to cool.
Enlarge picture showing the removed baked feathers
 7. You can also dye some thread at the same time to match your feathers (if you are making miniature birds with feather & flock).
Enlarge picture showing how to dye thread also
 8. I suggest that you use a 100% cotton or silk thread for best results.
Enlarge picture showing cotton thread
 9. After you have dunked your thread into the dye-bowl, continue to follow the remaining steps (the same as for feathers).
Enlarge picture showing how to dunk thread into bowl
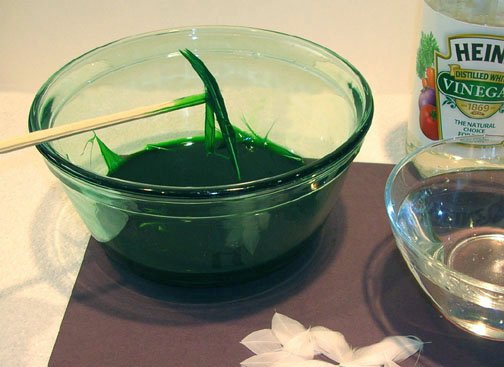
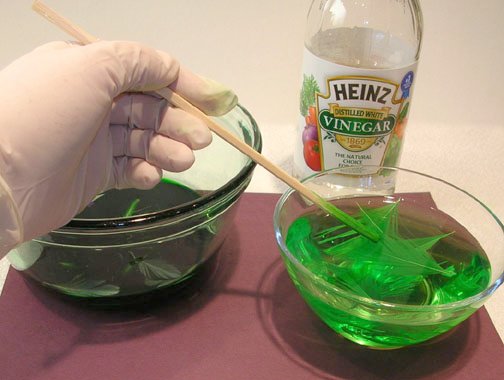
 10. Prepare your rinse bowl. Mix 1 cup of cool water with 2 tablespoons of white vinegar - stir. After your feathers or thread have cooled down, you can remove them from the dye and into the vinegar rinse water using your chopstick or wood skewer. Swizzle them around in the rinse water. You will see some of the color rinsing off into the water - that's o.k.
Enlarge picture showing the rinse bowl preparation
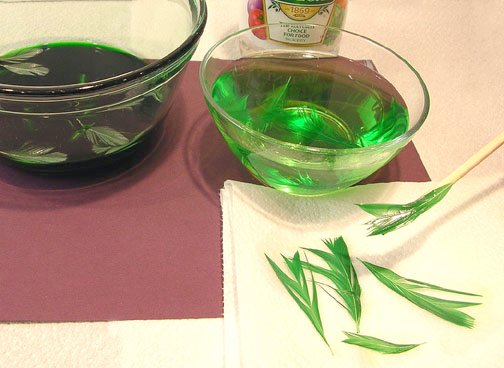
 11. Using your chopstick or wood skewer - fish your rinsed feathers or thread from the rinse water and unto a paper towel to drain. Let them air-dry naturally.
Enlarge picture showing how to rinse the feathers and removing
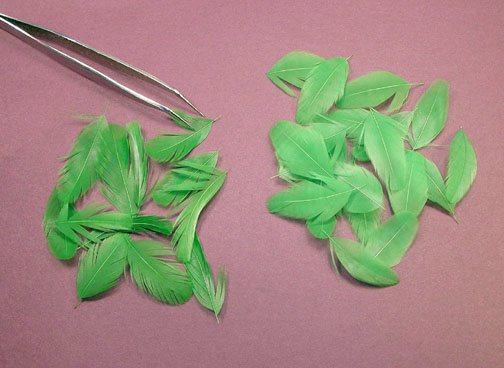
 12. After your feathers have air-dried, they might look a bit "ragged". Feathers can be smoothed back into shape by gently holding the spine in your hand and stroking the "vanes" with your thumb and fingers. The vanes should work back into shape and become smooth. Some feathers can be a bit stubborn, just keep smoothing them out.
The photo is of BEFORE and AFTER dyed feathers. As you can see the feathers on the left don't look as fluffy or smooth. The feathers on the right have been "smoothed" using my fingers.
Enlarge picture showing dried feathers
MEET THE ARTIST
 IGMA Fellow Kerri Pajutee is a self-taught artist, that finds sculpting animals a pleasurable and challenging hobby for over 30 years.
Each one of her animal sculpts are original, one-of-a-kind pieces and can be purchased at select miniature shows or by special order commission. In 2001, she achieved Artisan status for animal figures in the International Guild of Miniature Artisans IGMA. In 2004, she was honored with Fellow membership within the Guild.
Kerri says she balances her life and hobby with wonderful, supportive family and friends. As a result, she creates her miniature animals on a part-time basis. Kerri says that this arrangement keeps her sane and her sculptures fresh and enjoyable.
Kerri is a valued member and Moderator of the Animal board in the CDHM Forum and has a CDHM Gallery available, just click here.
IGMA Fellow Kerri Pajutee is a self-taught artist, that finds sculpting animals a pleasurable and challenging hobby for over 30 years.
Each one of her animal sculpts are original, one-of-a-kind pieces and can be purchased at select miniature shows or by special order commission. In 2001, she achieved Artisan status for animal figures in the International Guild of Miniature Artisans IGMA. In 2004, she was honored with Fellow membership within the Guild.
Kerri says she balances her life and hobby with wonderful, supportive family and friends. As a result, she creates her miniature animals on a part-time basis. Kerri says that this arrangement keeps her sane and her sculptures fresh and enjoyable.
Kerri is a valued member and Moderator of the Animal board in the CDHM Forum and has a CDHM Gallery available, just click here.
© 2008-2012 Kerri Pajutee
Reproduced with permission from Kerri Pajutee. All photographs and text appearing in this tutorial are the exclusive property of Kerri Pajutee. Permission is explicitly denied for any republication of text or photographs in this article without the prior express written consent of the author.