
Learn to sculpt
1:12 Dollhouse Bread
with IGMA Fellow
Betsy Niederer
Materials Needed:
- Premo© Polymer Clay
- Translucent
- White
- Cadmium Yellow (Or Equivalent Polymer Clay) - Artist Pastels
- Yellow Ochre
- Medium Brown
- Dark Brown - Sand Paper or Rough Rock
- Aluminum Foil
- Thin Paint Brush
- Cornstarch Or White Chalk
- Matte Varnish
- Ground Apricot Pits* Or Black Sand (Both Are Optional If You Cannot Find Them)
- *Ground Apricot Pits Can Be Found In The Soap Making Section Of Many Craft Stores - Baby Wipes
PREPARATION
Please wash your hands really well and dry them with a paper towel or if possible a light colored towel ~ you won't believe the amount of lint that you pick up from towels and it all shows up in white clay!
Please wash your hands really well and dry them with a paper towel or if possible a light colored towel ~ you won't believe the amount of lint that you pick up from towels and it all shows up in white clay!
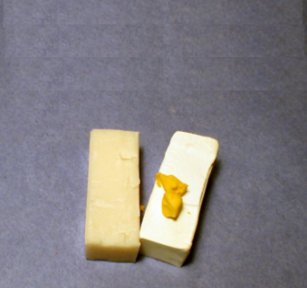
 1. This step illustrates the clay recipe - 1:1 white/translucent + tiny bit of yellow - use only about half of the amount of yellow that's pictured there...I sort of over-did it! If your bread mix clay comes out too yellow for your taste, just break off about half, and mix it up with more of the 1:1 white/translucent mix. That should fix the problem.
Enlarge picture showing clay recipe
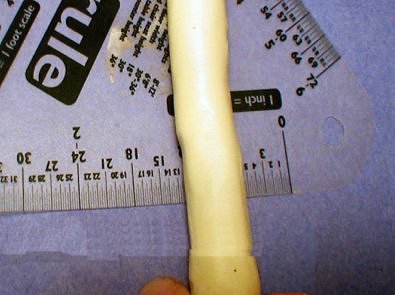
 2. Make sure the clay is warm and well mixed or roll it through your pasta machine if you have one. Make a log about ½ inch thick it doesnt have to be exact!
Enlarge picture showing how size of log
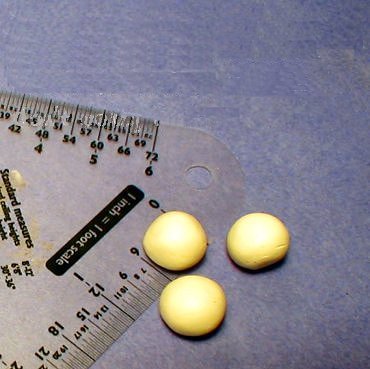
 3. Cut the log into chunks about 1/3 inch thick and form the chunks into balls the balls should be about ½ inch in diameter. Please dont worry if they are not exactly that size. This is one area where you don't have to worry so much about scale. Just make sure that they aren't huge.
You can make as many of the clay balls as you want. Keep some round, and then form some into long loaves. The long loaves can measure about 3/4" long and about 1/4" wide. If you want you can even lengthen them more to make baguettes.
Enlarge picture showing size of clay formed balls
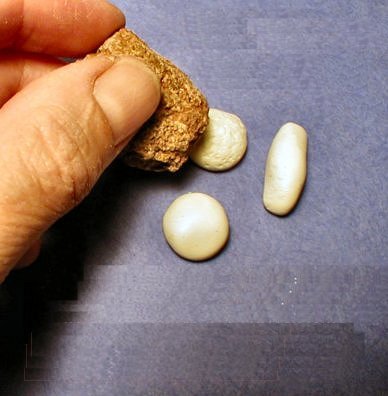
 4. After you've formed the balls into round and long loaves texture the tops with your sand paper. I specified a medium-grit because I didn't know what you had available near you. I tend to use 50-60 grit paper more often than the coarser types. In the picture I'm using a rock that I found in my back yard. Rocks work great too!
Enlarge picture showing how to texture the clay
TIP
Texturing your bread also covers up any fingerprints. If you'd like your bread to be smooth and you want to get rid of fingerprints, take some of your chalk or cornstarch and lightly buff the top of the loaf. It's abrasive enough to get rid of them.
Texturing your bread also covers up any fingerprints. If you'd like your bread to be smooth and you want to get rid of fingerprints, take some of your chalk or cornstarch and lightly buff the top of the loaf. It's abrasive enough to get rid of them.
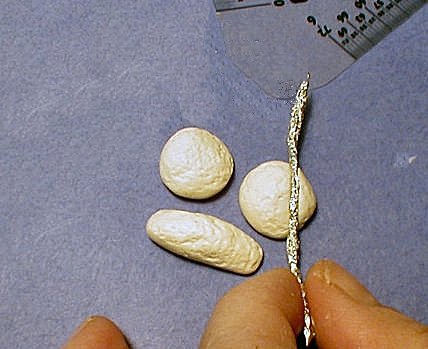
 5. Next get out the foil. Roll up a piece of foil into a long thin snake shape. Try to get it really crinkly for the best effect. Press it into the top of the breads to make cracks in the loaf. You can even rough up the cracks a bit with a pin.
Enlarge picture showing how to create cracks in the clay
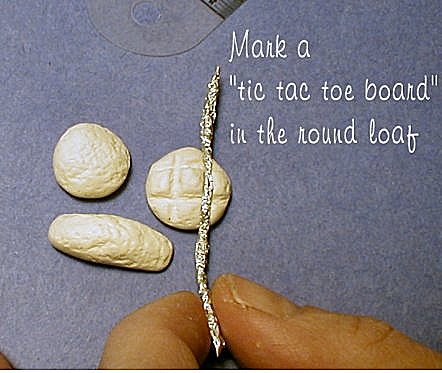
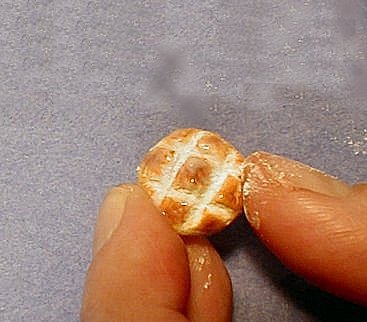
 6. To make the country bread make a tick tac toe board on the top of the round loaf. I usually make 2 or 3 diagonal cracks on the top of the long loaf.
Enlarge picture showing how to make country styled miniature bread using your foil
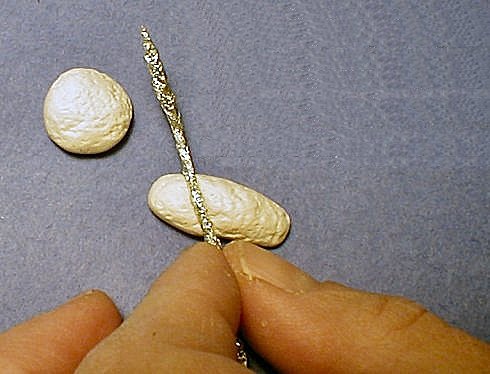
 7. To make the oblong bread appear cracked, mark the long loaf on a diagonal as shown, 2 or 3 markings or crack impressions will work nicely.
Enlarge picture showing how to create cracks in the french styled bread
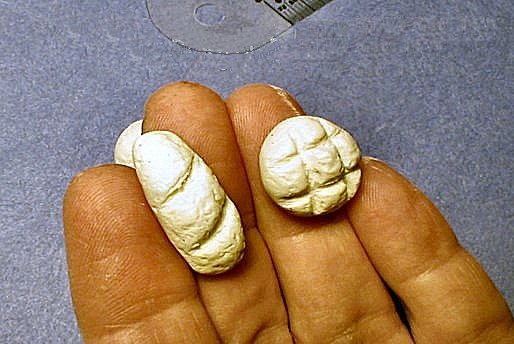
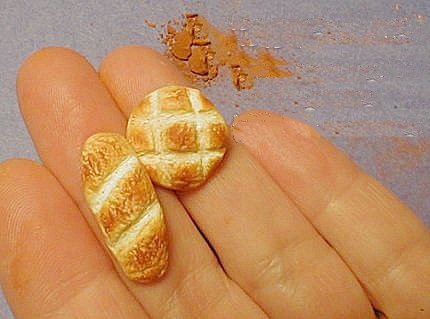
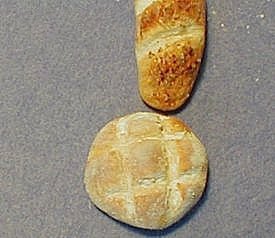
 8. Your loaves should look something like this. Don't worry if they aren't perfect, because most real bread isn't.
Enlarge picture showing how the bread appears at this stage
TIP
My favorite pastel brand is Schmincke. They are expensive, but since you are only using a small amount, a stick lasts a long time. You can get them at Dick Blick Art Materials for a discount. Rembrandt Chalks Budget Art Materials are good too. I like the more expensive pastels because they tend to be richer in color. Just make sure that the chalk pastels that you buy are soft - so you can powder them easily.
My favorite pastel brand is Schmincke. They are expensive, but since you are only using a small amount, a stick lasts a long time. You can get them at Dick Blick Art Materials for a discount. Rembrandt Chalks Budget Art Materials are good too. I like the more expensive pastels because they tend to be richer in color. Just make sure that the chalk pastels that you buy are soft - so you can powder them easily.
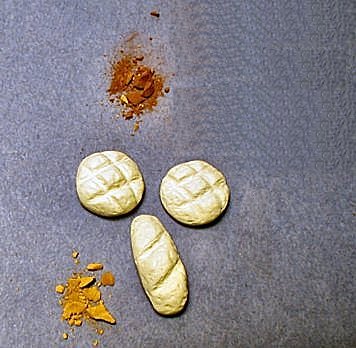
 9. Now you will color the bread before you bake it. The color bakes into the clay.
First, cut off a small piece of your chalk pastels - the yellow ochre, medium brown, and the dark brown - and grind them up into a powder. You can use some of your sand paper to do this, I use a craft stick, or I'll put them on a tile - cover them with a piece of paper, and step on them. Keep your crushed powders in separate piles, don't mix them
Enlarge picture showing how to prepare the chalk
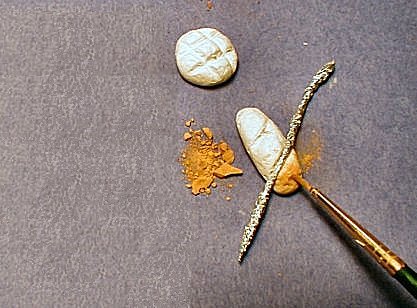
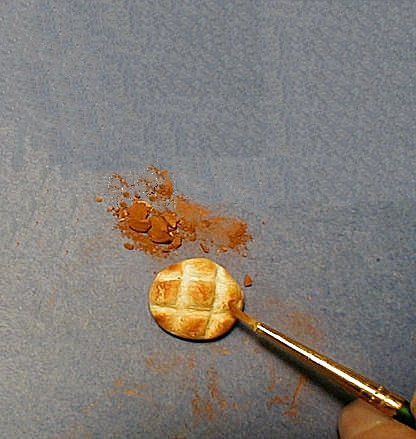
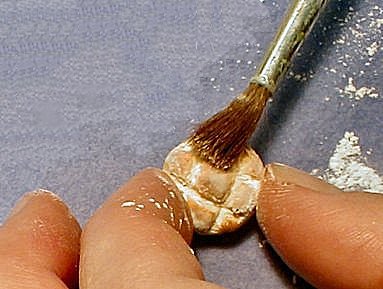
 10. We're going to start with a base color of yellow ochre. Cover the cracks in the bread with a clean piece of foil then using a soft brush gently apply yellow ochre all over the top of the breads. The foil keeps the cracks clean.
Enlarge picture showing where to use the ochre chalk
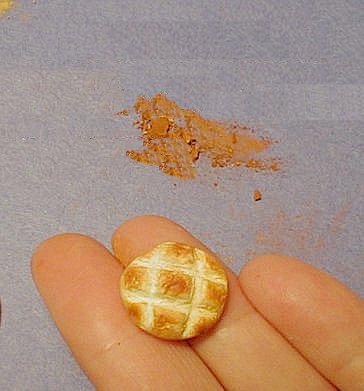
 11. This picture will show you what they are supposed to look like.
Apply the color all over the breads and try to keep the cracks clean. If you get some in the cracks, it's really not a big deal - just do your best.
Enlarge picture showing how the bread should look after the ochre chalk
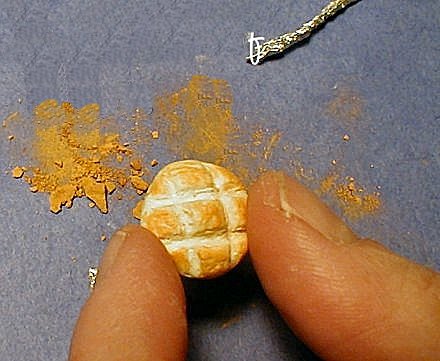
 12. Be bold when adding the base color. One of the things I've noticed with beginners is they tend to not put enough yellow on, so don't be afraid to make the clay a nice rich yellow.
Enlarge picture showing another piece of bread after the ochre chalk blush
 13. The second layer of color is where your bread starts to look baked.
Using a clean soft brush take some of the medium brown chalk and brush it lightly over the top of the loaf try to think about how a loaf would really brown in the oven what areas would be darker and what areas lighter. You'll want to be more sparing with the color this time. If you notice that your brown chalk is too 'brown', just dilute it a bit with some of the yellow chalk before applying it to your loaf. You'll want to concentrate more on the top of the loaf, and try to gently blend it down over the sides. Leave some yellow peeping out around the base of the bread.
Enlarge picture showing the second layer of color
TIP
You'll be coloring both loaves - even though just the round loaf is pictured. If you're worried about getting chalk into the cracks, remember to use your foil.
You'll be coloring both loaves - even though just the round loaf is pictured. If you're worried about getting chalk into the cracks, remember to use your foil.
 14. This picture isn't the greatest to show this since it came out lighter than I wanted it. So if you'd like to add some darker brown areas, like where the bread might have burnt a little in the oven; you can go back with a thin brush and touch up some of the areas with the darkest brown to give your loaf more depth and personality.
You'd want to do this on the top, near the edges of the cracks. Just picture a nice crusty rustic loaf, and take it from there. Dont over do it with the dark brown or it will look like my real loaves do, burnt!
Enlarge picture showing where to touch up the bread with darker chalks
 15. Ok, time to preheat your oven. You can bake your bread right on a tile, if you are using one, or on a piece of foil. If your oven is old you might want to invest in an oven thermometer to make sure it is at the correct temperature. Bake according to the package recommendations. I bake my loaves for about 30 minutes. I like to let them cool in the oven - In my opinion it helps the clay to strengthen.
Enlarge picture showing baking preparations
 16. Get out the varnish, cornstarch/chalk, and ground apricot pits or sand. This is one time when I break my own rule about not using 'food' items in clay. The ground apricot pits make nice nuts/seeds, and since they are on top of the bread and sealed in varnish I haven't had any problems with the clay itself breaking down. I would not mix them into the clay. Black sand makes wonderful poppy seeds, so if you're afraid to use the pits this is a nice substitute.
Enlarge picture showing how to accent the bread
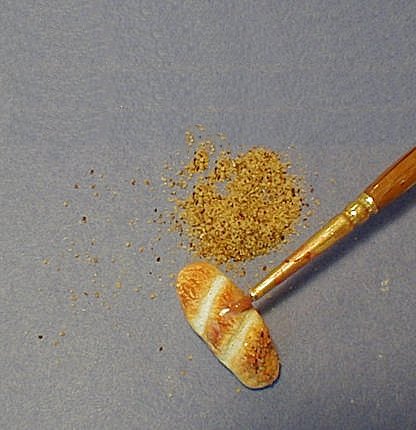
 17. Brush the round loaf with matte varnish, again avoiding the cracks. Then sprinkle with a light coating of ground apricot pits/sand let it dry. If you need to add a bit more thats fine, just keep them out of the cracks. When dry you can add a top coat of matte varnish to seal them.
Enlarge picture showing how to apply the varnish
TIP
I've also not had any problems with cornstarch. I know that some people prefer talc, but I don't like to work with it since it's a carcinogen (well, the plasticizers in clay aren't that great for you either, but they don't get airborn like talc can). If you are in an area where critters are a problem, white chalk works really well in place of the cornstarch.
I've also not had any problems with cornstarch. I know that some people prefer talc, but I don't like to work with it since it's a carcinogen (well, the plasticizers in clay aren't that great for you either, but they don't get airborn like talc can). If you are in an area where critters are a problem, white chalk works really well in place of the cornstarch.
 18. Pat the cornstarch/chalk over the varnish. Let it dry.
Enlarge picture showing where to apply the cornstarch
 19. Using a soft brush, lightly dust off any excess powder. The cornstarch/chalk simulates flour.
Enlarge picture showing results after removing excess powder
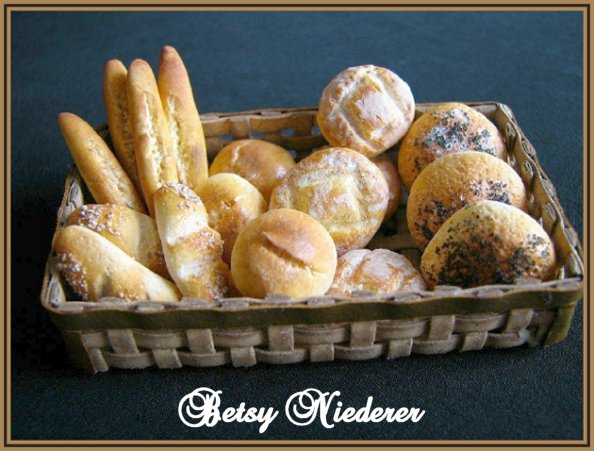
 20. Viola! You have made dollhouse miniature bread!
Enlarge picture showing your completed breads
MEET THE ARTIST
 Betsy Niederer has been making miniatures for five years, after discovering that she could make miniature food for her children's Barbie© kitchen. She is an IGMA member since 2003, an IGMA Fellow (Food category), and since 2006 a Guild school instructor.
Betsy is a valued member of CDHM and Sr. Moderator in the CDHM Forum, Food Board and she has a CDHM Gallery can be visited, just by clicking here.
Betsy Niederer has been making miniatures for five years, after discovering that she could make miniature food for her children's Barbie© kitchen. She is an IGMA member since 2003, an IGMA Fellow (Food category), and since 2006 a Guild school instructor.
Betsy is a valued member of CDHM and Sr. Moderator in the CDHM Forum, Food Board and she has a CDHM Gallery can be visited, just by clicking here.
©
2008-2012 Betsy Niederer IGMA Fellow
Reproduced with permission from Betsy Niederer. All photographs and text appearing in this tutorial are the exclusive property of Betsy Niederer. Permission is explicitly denied for any republication of text or photographs in this article without the prior express written consent of the author.
BACK