
Learn To Make A
Desk Set with Pen & Ink Blotter
in 1:12 Scale
with
Sarah-Jane Waller
Materials Needed
- One Piece Of Thin Flat Card Stock
- Electrical Tape, one each
- Red
- Green
- Blue - One Piece Of Marbled Paper, (or Green, Red or Blue)
- One Piece Of Artist Painting Paper (Thin) Or Lightly Embossed
- Small Feather
- Green Bottle Like Bead ½cm
- Gold Bead 4mm
- Brass Button 1½ cm
- Double Sided Tape
- Tacky Glue
- Scissors
- Ruler
- Pencil
- Optional :
- Cocktail Stick
- Leaf Sequin 2½cm
- Felt Tip Pens Or Paint
- India Ink
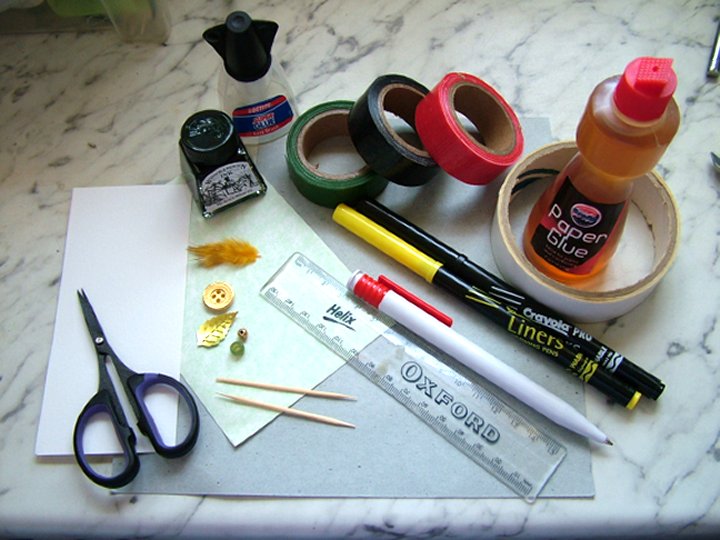
 Close-up images of materials needed
Enlarge picture of basic supply requirements
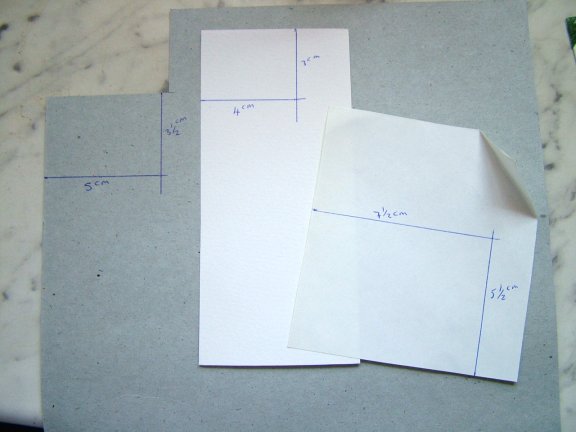
 1. Take your piece of thin card marbled paper and watercolour paper measure out rectangles at:
- Card 5cm x 3½cm
- Marbled paper 5½cm x 7½ cm
- White water colour paper 4cm x 3cm
Now you should have 3 rectangles in front of you in varying sizes.
Enlarge picture showing sizes of card to cut
TIP
Use a cutter, steel rule or knife, if you can, you will get a straighter edge. Plus the measurements are quite important so take your time and get it right! Dont throw away the scraps you can use them for other areas as we progress.
Use a cutter, steel rule or knife, if you can, you will get a straighter edge. Plus the measurements are quite important so take your time and get it right! Dont throw away the scraps you can use them for other areas as we progress.
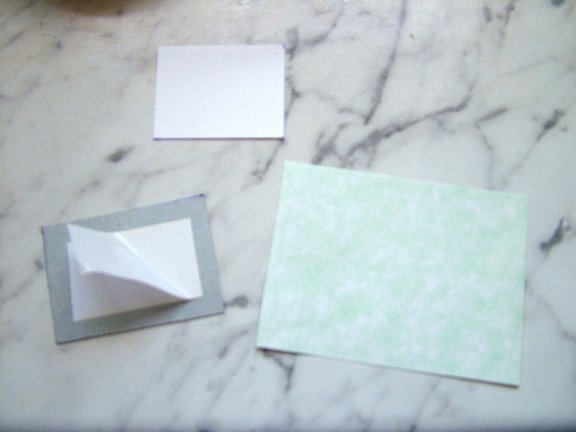
 2. Next cut a piece of double sided tape or glue (I prefer double-sided tape as it's stronger) and stick it to the back of the card. Do not remove the tape cover on the exposed side.
Enlarge picture showing where to place the tape
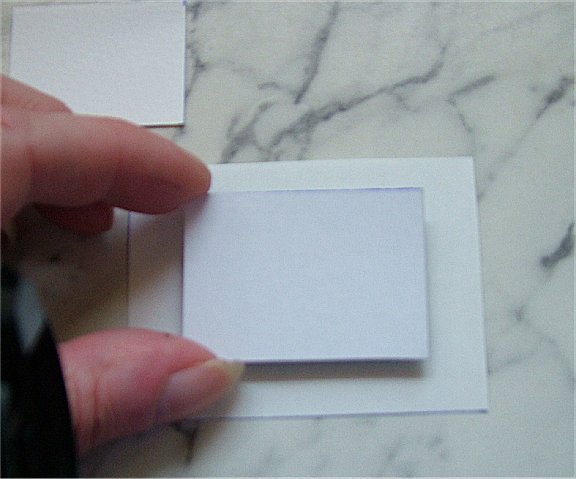
 3. Take your coloured/marbled piece of paper and turn it upside down so the pattern is on the table. Now peel back the double sided tape from the card stock and carefully place in the centre of the paper (see image). Press down firmly. If you are using glue, allow to dry completely before continuing.
Enlarge picture showing where to apply the card stock to the marbled paper
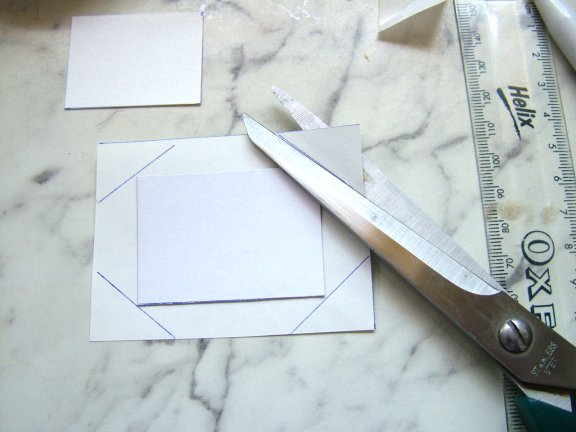
 4. Next take your pen and ruler and draw a line across the corner angles of the paper. Cut off the drawn corner triangles as shown.
Enlarge picture showing where to cut the marbled paper
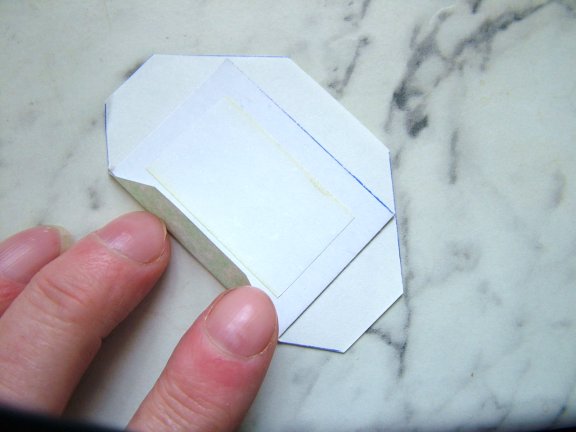
 5. Cut a piece of double-sided tape and place it in the centre of the card stock. Peel of the tape on the opposite side. Fold in the sides of the marbled paper gently creasing as you go - then the top and bottom until it is all folded over (if gluing, allow to dry).
Enlarge picture showing where to fold the marbled paper
Questions and Answers
Q. Are the cut corners all meant to be the same size?
A. As best you can, although you will be covering it in the next few steps.
Q. Are the cut corners all meant to be the same size?
A. As best you can, although you will be covering it in the next few steps.
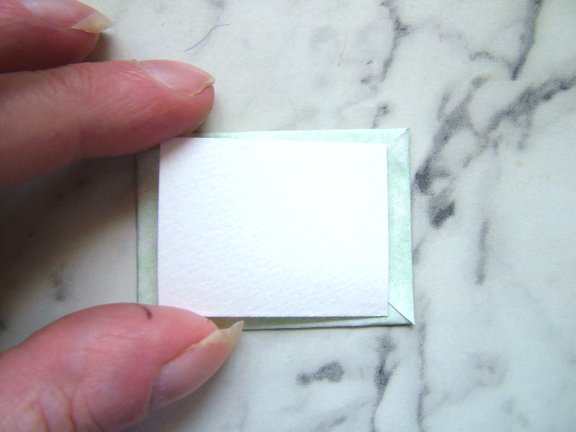
 6. Next you will be making the top of the desk pad! Take your cut-out piece of watercolour paper, apply a piece of the double-sided tape and apply it to the centre of the paper. Place the paper dead centre on the board, as shown in the image.
 The cut-out paper will need to have equal sides, equal top and equal bottom. The top and bottom will be narrower than the sides, so be careful how you do this; once placed it will be impossible to remove! When ready, carefully press firmly down.
Enlarge picture showing how to place the watercolour paper
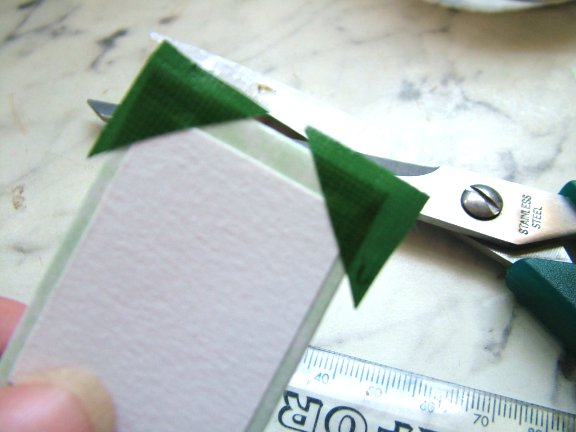
 7. Now the fun begins... Take your chosen coloured roll of tape and cut off 2½ cm square. Cut across the diagonal and place on the corners as shown in the image. Repeat for each corner. Hold the board up to a window or light source, then carefully trim off the excess tape so that it fits the corners. At this stage, if you want to, you can repeat the process for the board back then trim it, then press down all edges. You now have a desk pad!
Enlarge picture showing how to make the corner placements
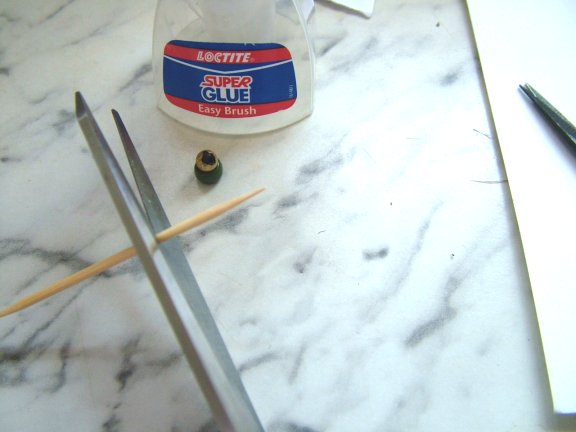
 8. Now we will make the pencil and ink well.
Take your gold bead and glue it at a slight angle to the top of the green larger bead. This will form the ink well. You need the bead to be angled so that the quill will be slightly tilted when inserted. Once dry, paint the inside of the beads with black acrylic paint to resemble ink; dribble a bit down the top bead.
Next we'll make the pencil. First take the cocktail stick and measure 2cm and cut off with scissors. Paint the cut off stick with either the felt pen or paint to just near the end. Leaving the end unpainted. After all the pieces are dry, dip the unpainted end of the stick into the India ink to create the illusion of lead.
Enlarge picture showing how to make the ink well and pencil
TIP
You can cut down cocktail sticks then paint or stain them different colours to create miniature pencils for a playroom or school room.
You can cut down cocktail sticks then paint or stain them different colours to create miniature pencils for a playroom or school room.
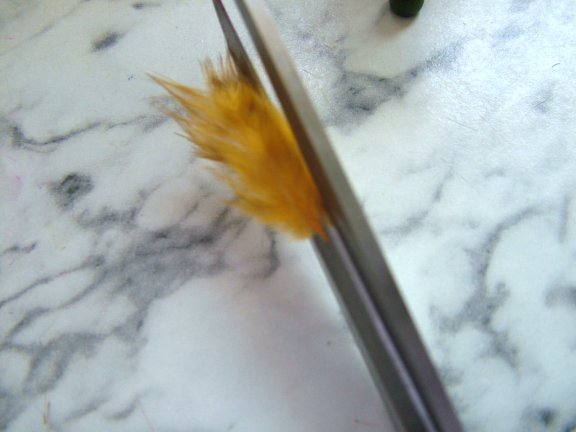
 9. Next we'll make the feather quill. Using small scissors, take a feather and begin trimming from the bottom up, not taking off too much feather. Cut the feather at an angle at the very tip and broaden the cut as you move up. Trim off all of the feather at the base which will create the nib. Try cutting with different feathers. Dip the Quill in black acrylic or the Indian ink to give an authentic feel to it. Leave to dry.
Enlarge picture showing how to make the quill
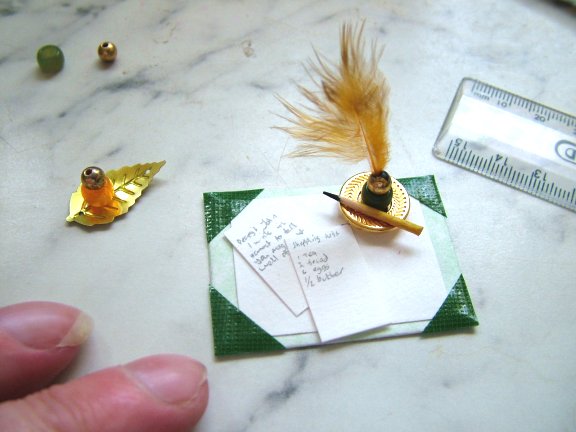
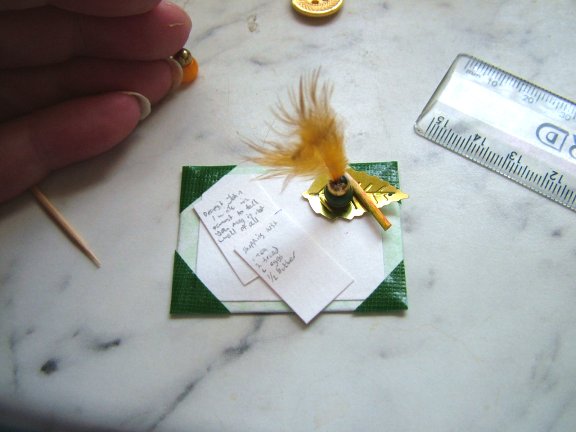
 10. Take either your button or leaf and glue the ink well onto it. Dry completely. Place your newly cut quill pen in the ink well and the pen on the base and place or glue onto your ink blotter.
Enlarge picture showing how to secure the pieces to a base
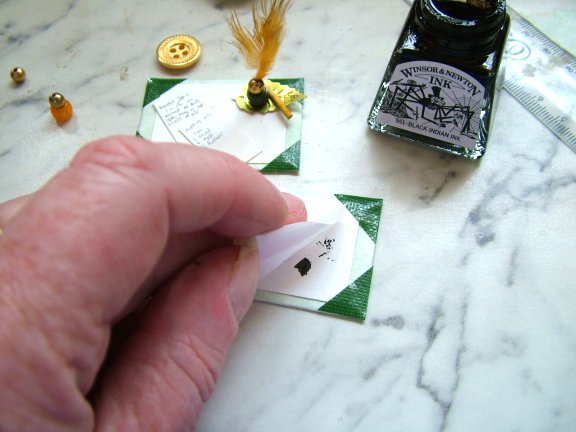
 11. For authenticity, I always take the end of the left over cocktail stick and dip it in the India ink, then drop or drag it over my blotter. Then take the left over watercolour paper, trim back to size and with a tiny '00' pen or cocktail stick dip into the India ink and write out a menu or letter to Mom on the paper. You can add extra touches like envelopes or notepads.
Enlarge picture showing final touches
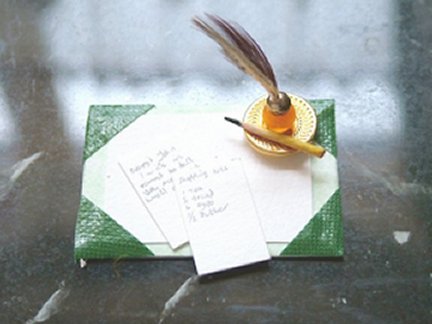
 12. I hope you enjoyed making this and you had fun.
Enlarge picture showing completed desk set
TIP
You can cover the blotter base with very thin leather, then trim around the edges with a gold paint pen for a richer style. You could also make the set larger. Fixing them to a study (desk) and making a layout by carefully taking out a bit of the wood and gluing the blotter to the board. Change the colours of the tape also changes the appearance.
You can cover the blotter base with very thin leather, then trim around the edges with a gold paint pen for a richer style. You could also make the set larger. Fixing them to a study (desk) and making a layout by carefully taking out a bit of the wood and gluing the blotter to the board. Change the colours of the tape also changes the appearance.
MEET THE ARTIST
 Sarah-Jane Waller sculpts the classic 1:12 scale to the traditional 1:9 scale Animals & Dogs. She is a published Illustrator/artist by trade. Sarah-Jane says that for her she gains incredible enjoyment from creating miniature pieces for others. She adores nature, so many of her pieces are nature inspired. She is the creator of the American Miniaturist mascot dog, "Henry". Sarah-Jane's miniature dogs have been enjoyed by 1:12 scale collectors, along with dog collectors of any scale the world over.
Sarah-Jane is a published writer, having created a childrens book entitled "Tinsley Visits Earth" for ages 5-9. You can purchase this book by emailing her directly at sarahjaneartist at btinternet dot com.
Sarah-Jane is a valued member and Global Administrator of the CDHM Forums; Visit the Galleries today.
© 2007-2012 Sarah-Jane Waller
Reproduced with permission from Sarah-Jane Waller. All photographs and text appearing in this tutorial are the exclusive property of Sarah-Jane Waller. Permission is explicitly denied for any republication of text or photographs in this article without the prior express written consent of the author.